


BajaHobby L39
 09-05-2021, 06:50 AM
#126


I have the same servos and it seems to fly great. No problems. Sometimes I think we get carried away thinking that we need massive amounts of torque. I prefer a servo that has very precise centering (repeatable) so that a guy isn't constantly trimming. So far no issue. I have about 25 flights on mine.
It was [strongly] recommended to me to use Hysol adhesive and glue solid the joint between the front of the fuselage and the rear. I was made aware of one case where the connection that is made by the four or five threaded bolts failed in flight during a high G vertical pull up from level. I glued it solid with Hysol and I can sleep at night. There is a lot of weight in the forward part of the fuselage so I can see where a failure such as that might occur.
This model flies GREAT! I love it but it continues to challenge me on landing. I find that I must land with some power on. It seems to be VERY draggy in landing configuration. I have some other jets where I can just chop the throttle and coast in to a nice landing. With this plane I have to maintain a couple of clicks of throttle stick all the way to the final flare otherwise I have had it drop out of the sky and tear out the landing gear from the mounting plates. I generally fly from a field that is about 3300 ft above sea level so that could be part of it.
Last edited by Randy Smith; 09-05-2021 at 07:03 AM.
 09-05-2021, 04:40 PM
#127
I have the same servos and it seems to fly great. No problems. Sometimes I think we get carried away thinking that we need massive amounts of torque. I prefer a servo that has very precise centering (repeatable) so that a guy isn't constantly trimming. So far no issue. I have about 25 flights on mine.
It was [strongly] recommended to me to use Hysol adhesive and glue solid the joint between the front of the fuselage and the rear. I was made aware of one case where the connection that is made by the four or five threaded bolts failed in flight during a high G vertical pull up from level. I glued it solid with Hysol and I can sleep at night. There is a lot of weight in the forward part of the fuselage so I can see where a failure such as that might occur.
This model flies GREAT! I love it but it continues to challenge me on landing. I find that I must land with some power on. It seems to be VERY draggy in landing configuration. I have some other jets where I can just chop the throttle and coast in to a nice landing. With this plane I have to maintain a couple of clicks of throttle stick all the way to the final flare otherwise I have had it drop out of the sky and tear out the landing gear from the mounting plates. I generally fly from a field that is about 3300 ft above sea level so that could be part of it.
It was [strongly] recommended to me to use Hysol adhesive and glue solid the joint between the front of the fuselage and the rear. I was made aware of one case where the connection that is made by the four or five threaded bolts failed in flight during a high G vertical pull up from level. I glued it solid with Hysol and I can sleep at night. There is a lot of weight in the forward part of the fuselage so I can see where a failure such as that might occur.
This model flies GREAT! I love it but it continues to challenge me on landing. I find that I must land with some power on. It seems to be VERY draggy in landing configuration. I have some other jets where I can just chop the throttle and coast in to a nice landing. With this plane I have to maintain a couple of clicks of throttle stick all the way to the final flare otherwise I have had it drop out of the sky and tear out the landing gear from the mounting plates. I generally fly from a field that is about 3300 ft above sea level so that could be part of it.
Tone
Last edited by Agrav8ed; 09-05-2021 at 07:55 PM.
09-05-2021, 05:07 PM
#128
Member
I have the same servos and it seems to fly great. No problems. Sometimes I think we get carried away thinking that we need massive amounts of torque. I prefer a servo that has very precise centering (repeatable) so that a guy isn't constantly trimming. So far no issue. I have about 25 flights on mine.
It was [strongly] recommended to me to use Hysol adhesive and glue solid the joint between the front of the fuselage and the rear. I was made aware of one case where the connection that is made by the four or five threaded bolts failed in flight during a high G vertical pull up from level. I glued it solid with Hysol and I can sleep at night. There is a lot of weight in the forward part of the fuselage so I can see where a failure such as that might occur.
This model flies GREAT! I love it but it continues to challenge me on landing. I find that I must land with some power on. It seems to be VERY draggy in landing configuration. I have some other jets where I can just chop the throttle and coast in to a nice landing. With this plane I have to maintain a couple of clicks of throttle stick all the way to the final flare otherwise I have had it drop out of the sky and tear out the landing gear from the mounting plates. I generally fly from a field that is about 3300 ft above sea level so that could be part of it.
It was [strongly] recommended to me to use Hysol adhesive and glue solid the joint between the front of the fuselage and the rear. I was made aware of one case where the connection that is made by the four or five threaded bolts failed in flight during a high G vertical pull up from level. I glued it solid with Hysol and I can sleep at night. There is a lot of weight in the forward part of the fuselage so I can see where a failure such as that might occur.
This model flies GREAT! I love it but it continues to challenge me on landing. I find that I must land with some power on. It seems to be VERY draggy in landing configuration. I have some other jets where I can just chop the throttle and coast in to a nice landing. With this plane I have to maintain a couple of clicks of throttle stick all the way to the final flare otherwise I have had it drop out of the sky and tear out the landing gear from the mounting plates. I generally fly from a field that is about 3300 ft above sea level so that could be part of it.
Thanks Randy it sounds like the stock 18kg servos will be fine, ill have another look at the nose section. i do know what you mean one more bolt in the middle at the bottom would probably be a good addition
09-05-2021, 05:30 PM
#129
Member
Out of interest Agrav8ed what servos did you decide to go with?
Seems like it will take a wide range of turbines, I'm thinking a jets munt 166 or swiwin 170
Seems like it will take a wide range of turbines, I'm thinking a jets munt 166 or swiwin 170
When I ordered my jet some time ago and I prefer to use my own so I cannot speak towards the dualskies. However, I have not experienced this issues with the landing. My jet come in pretty consistent and slowing without throttling to the ground. I kill my throttle about halfway through my final turn. I think maybe you are right and your sea level may be a factor.
Tone
Tone
09-05-2021, 07:35 PM
#130
Tone


Last edited by Agrav8ed; 09-06-2021 at 07:50 AM.
09-27-2021, 11:37 AM
#132

 09-27-2021, 06:09 PM
#135
I disagree slightly. The bell mouth does exist. However, you set your distance of 3/4 to 1" from the straight part of the bell mouth, before it starts to curve (or bell). The distance is always from the end of the turbine to straight part of the pipe. Regardless if the straight part of the pipe is part of the bell mount (which is is in this case).
Tone
Tone
09-27-2021, 09:59 PM
#136
Interesting responses.
I've always thought (based on everything I've read/heard since '98 on pipes) that it depends on the shape of the bell, and the size of the pipe. I have been led to believe the Grumania type bells are the ones where the distance is measured from the pipe, whereas the other kind (like Tam used) is measured from the start of the bell. This one seems kind of a cross, thus the question. One thing is for sure, the 'standard' 3/4" gap advice didn't hold up under bench testing. When the pipe size/length changed, so did the gap. I have one setup where the optimum distance was almost 3." Now, if only the puppy hadn't chewed my test stand into toothpicks.... :/
I've always thought (based on everything I've read/heard since '98 on pipes) that it depends on the shape of the bell, and the size of the pipe. I have been led to believe the Grumania type bells are the ones where the distance is measured from the pipe, whereas the other kind (like Tam used) is measured from the start of the bell. This one seems kind of a cross, thus the question. One thing is for sure, the 'standard' 3/4" gap advice didn't hold up under bench testing. When the pipe size/length changed, so did the gap. I have one setup where the optimum distance was almost 3." Now, if only the puppy hadn't chewed my test stand into toothpicks.... :/
09-29-2021, 01:59 PM
#138
Hi,
Those of you who've built this bird: Did you have this much slop in your control-surface hinges? I'm building one for a guy, and on this one, the elevators can move up and down about 1/16" at the hinge-line, which amplifies out to almost 1/4" of slop at the elevator TE. The ailerons are nearly as sloppy--as though the wire that serves as the hinge-pin is too small for the hole in the G-10 hinges.
Thoughts?
09-29-2021, 04:30 PM
#140
Hi,
Those of you who've built this bird: Did you have this much slop in your control-surface hinges? I'm building one for a guy, and on this one, the elevators can move up and down about 1/16" at the hinge-line, which amplifies out to almost 1/4" of slop at the elevator TE. The ailerons are nearly as sloppy--as though the wire that serves as the hinge-pin is too small for the hole in the G-10 hinges.
Thoughts?
https://youtu.be/bak87k46BXE
Tone
09-29-2021, 05:06 PM
#141
I had some slop on one of my ailerons. It flew fine, but I did eventually pull the metal hinge and got in there with some hysol to tighten things. It ended up that the was not enough glue on the fiberglass brackets in the wings. I have not had a problem with the elevator.
Tone
Tone
Hi,
Interesting. Could you elaborate on pulling the hinge and tightening things with hysol, please? I'd like to get this squared away for my customer. Also, your nose-to-fuse fit looks great. This one isn't quite as nicely fitted. Did you have to fiddle with yours much? PM or text me if you'd prefer do discuss offline.
Thanks,
Shaun
619-944-7574
10-10-2021, 05:42 AM
#143
Tone
10-10-2021, 08:56 AM
#144

I have a chuck of lead that is 15 ounces in mine up by the NLG. I have a 4400 mah turbine pack and two 4000 mah lipos for the rx. I do not have a cockpit installed, but I do have one that will go in over the winter that will easily allow me to remove the lead weight.
01-01-2022, 02:11 PM
#145
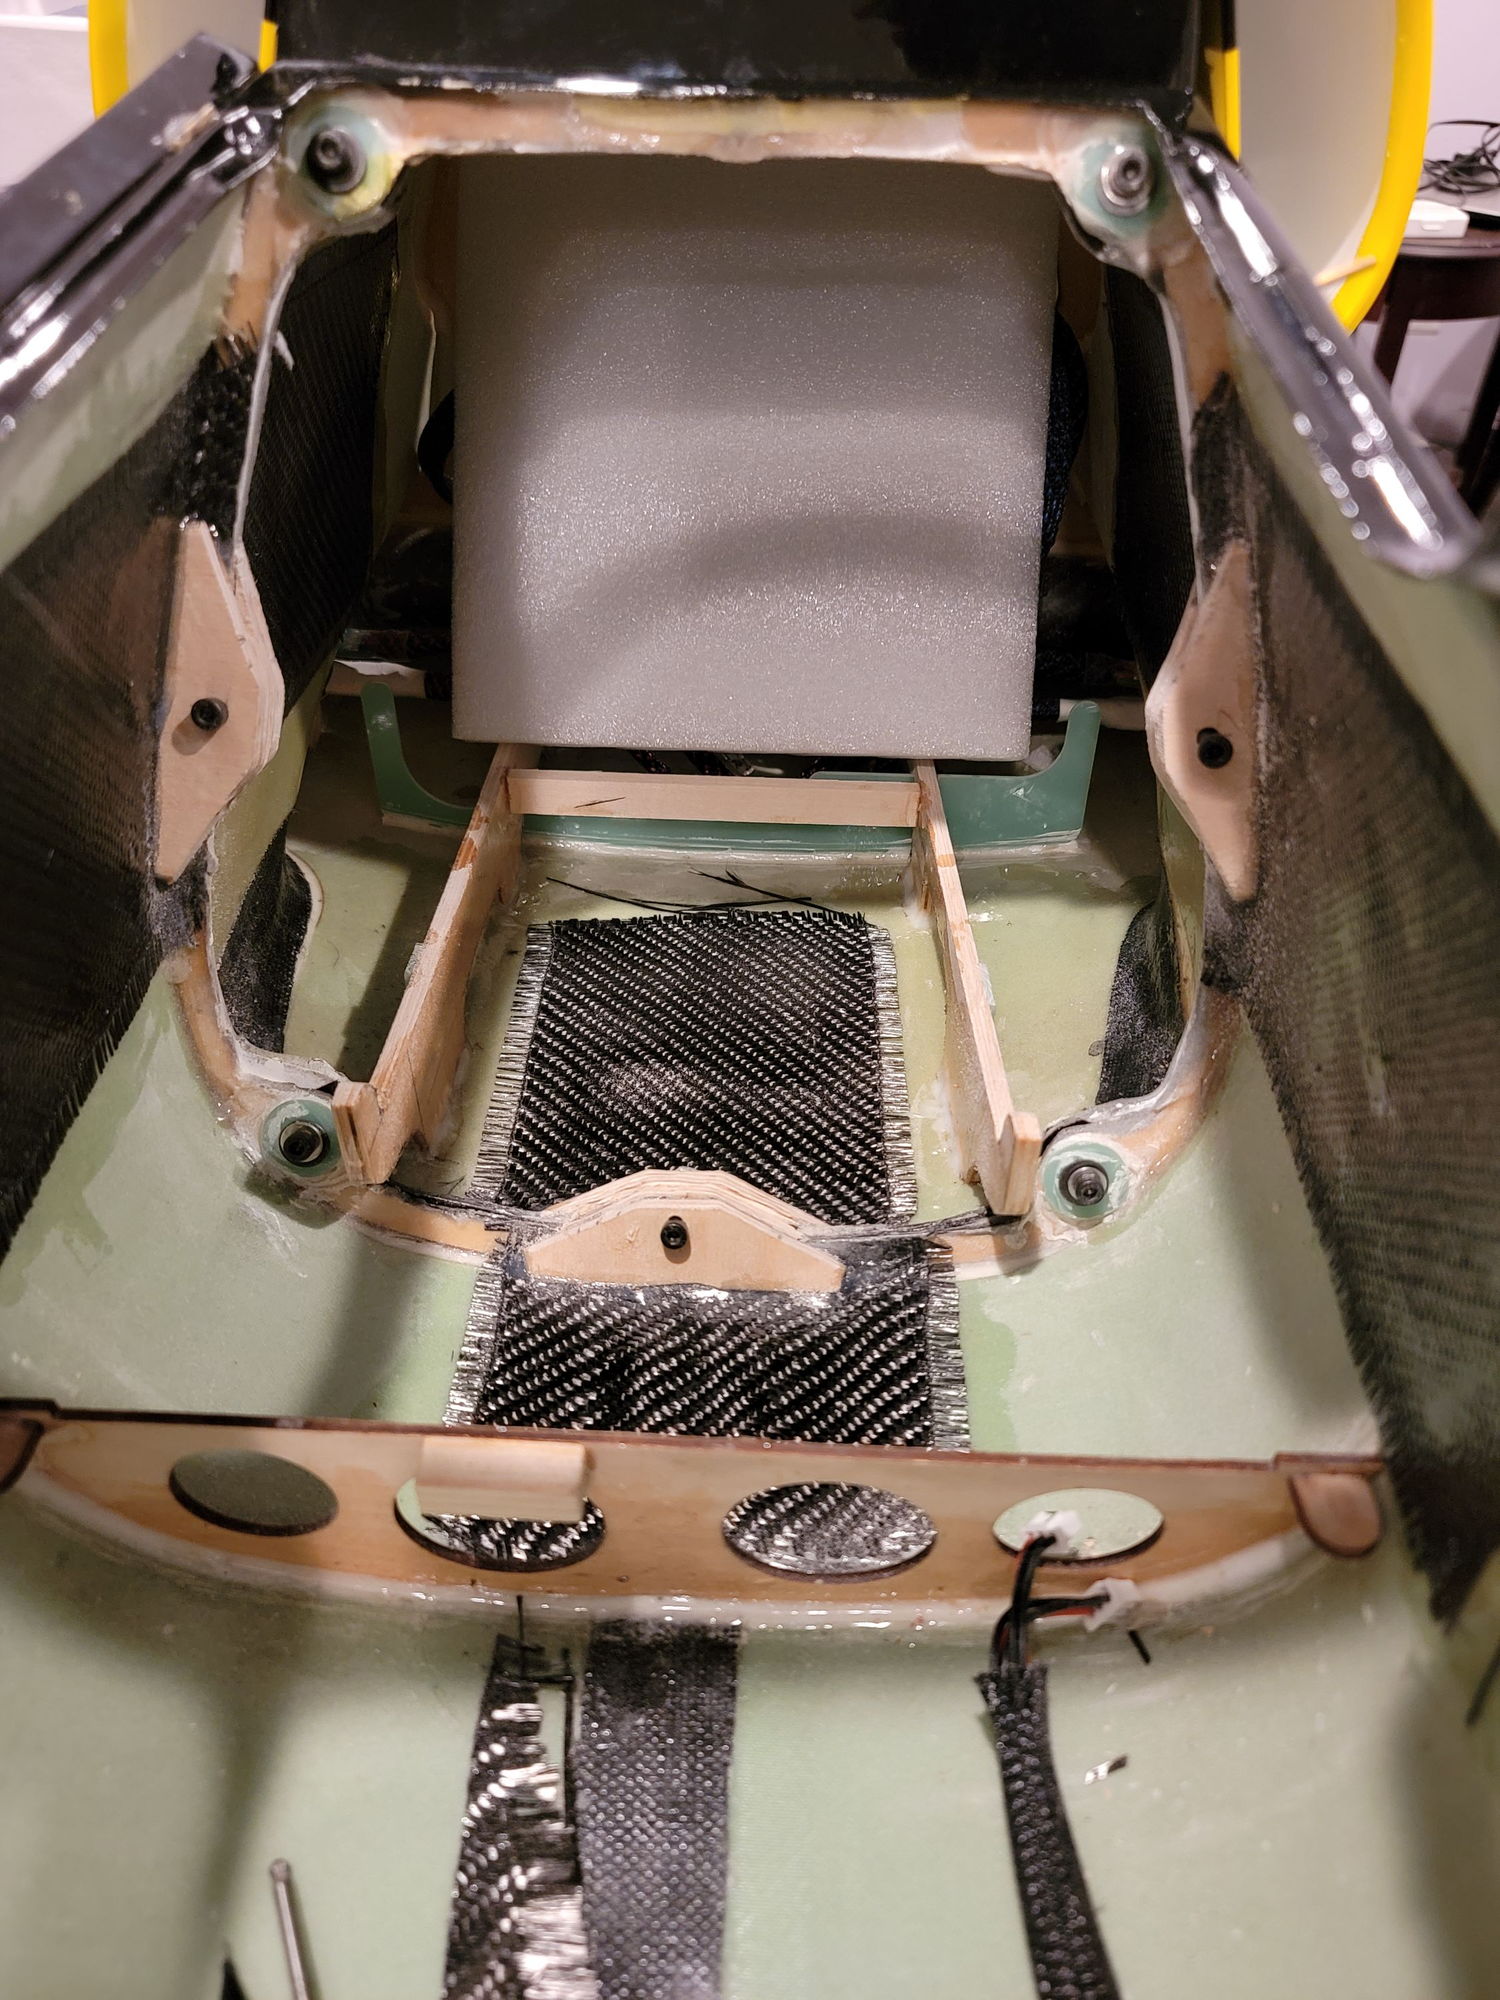
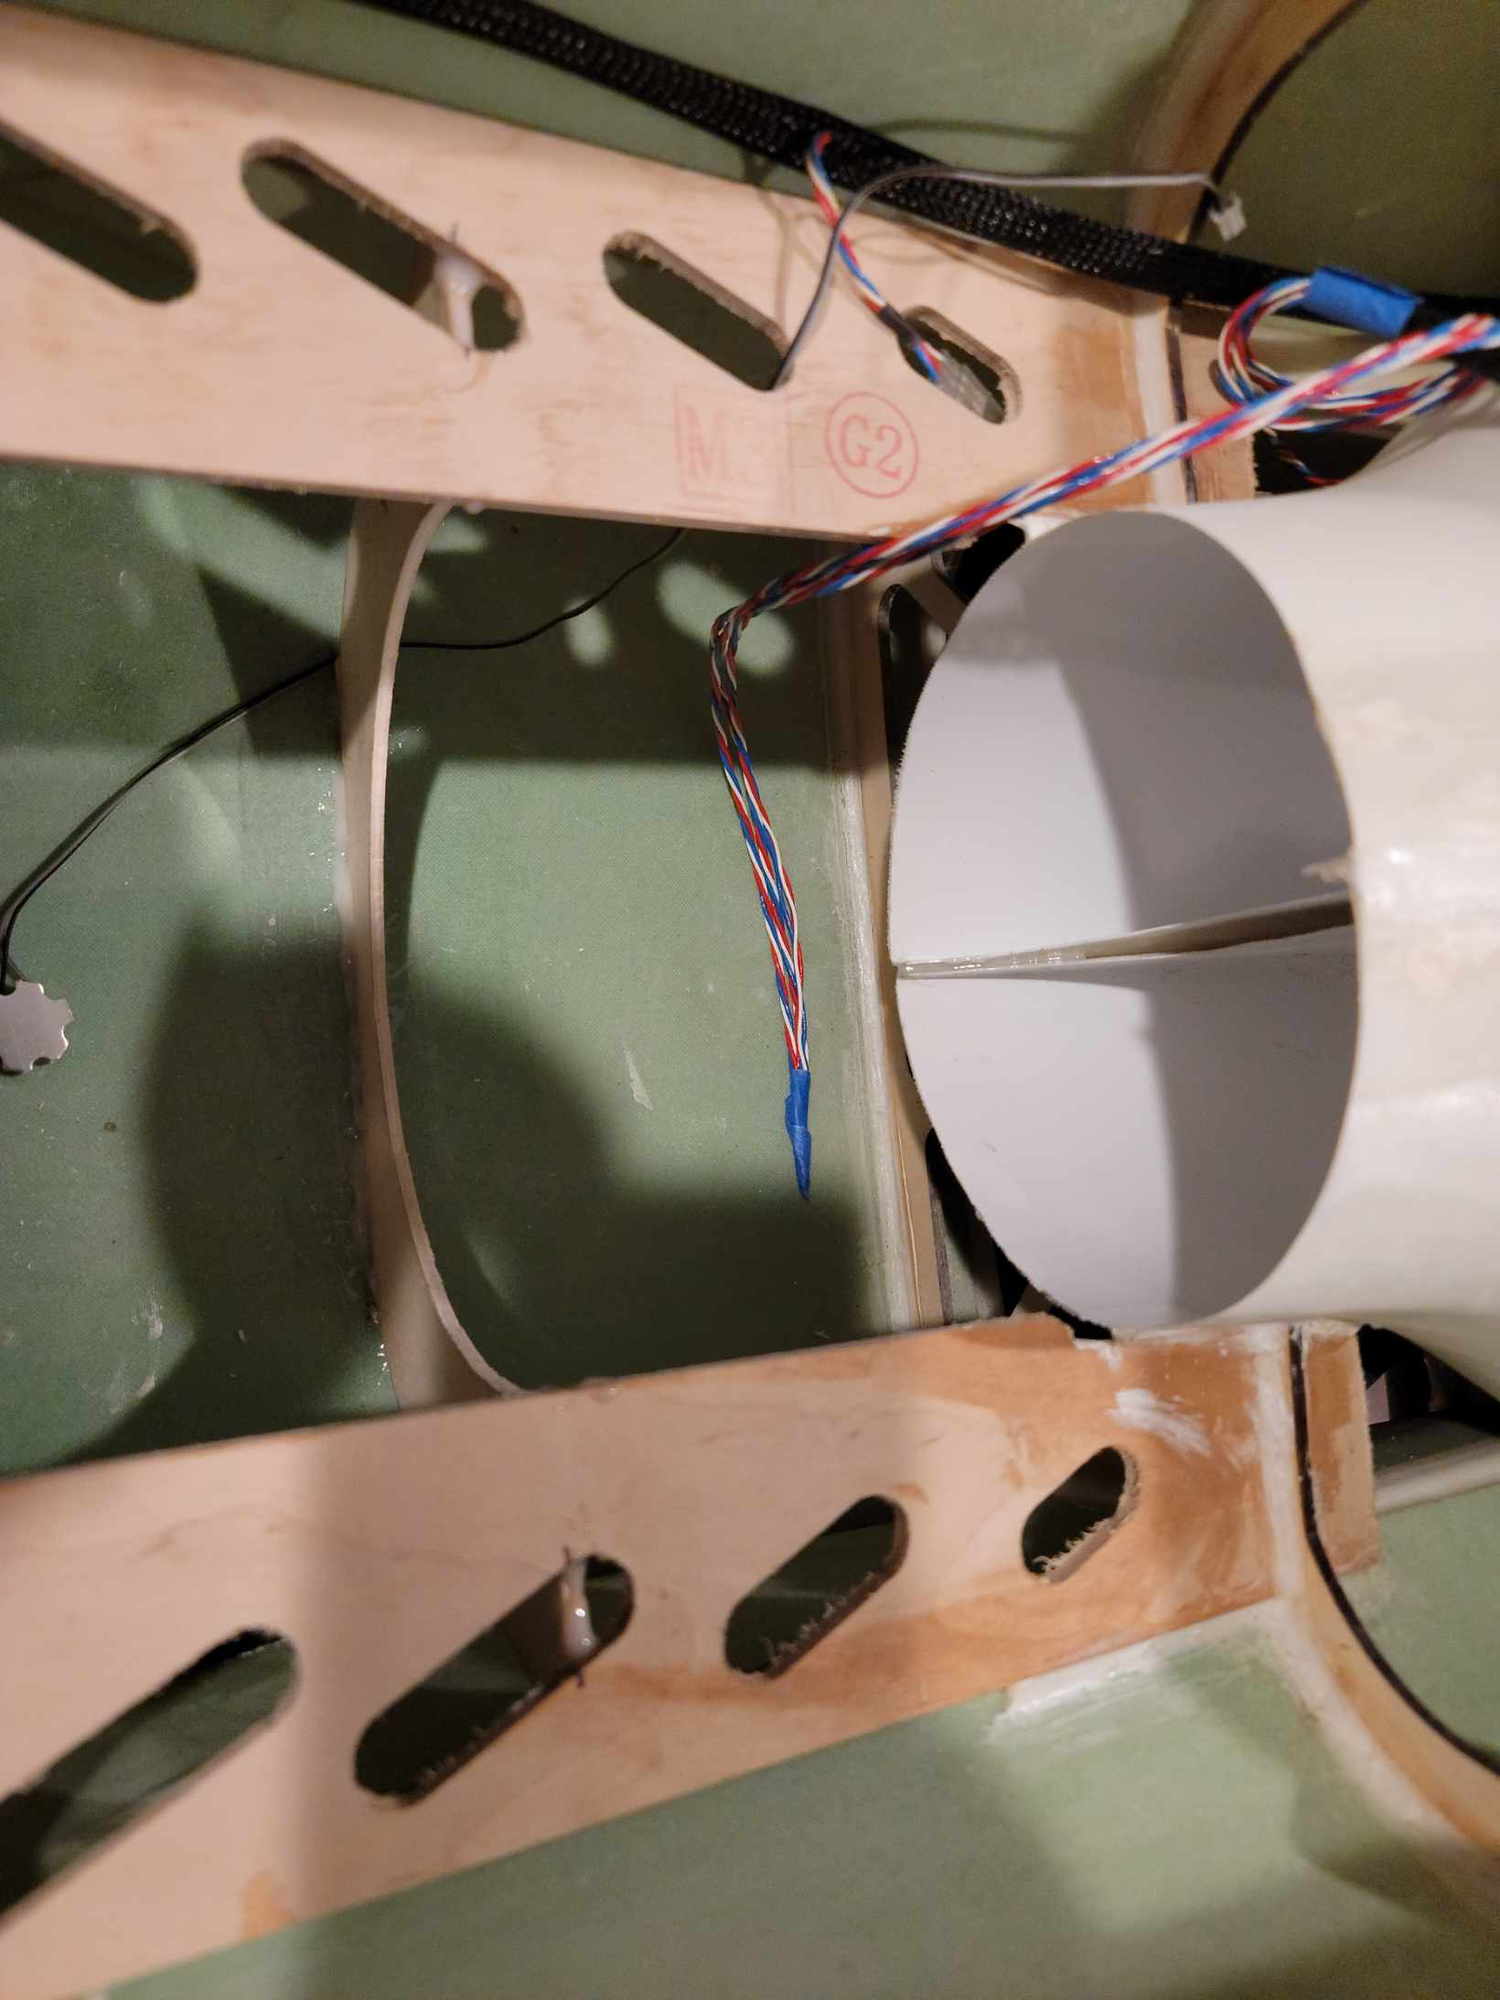
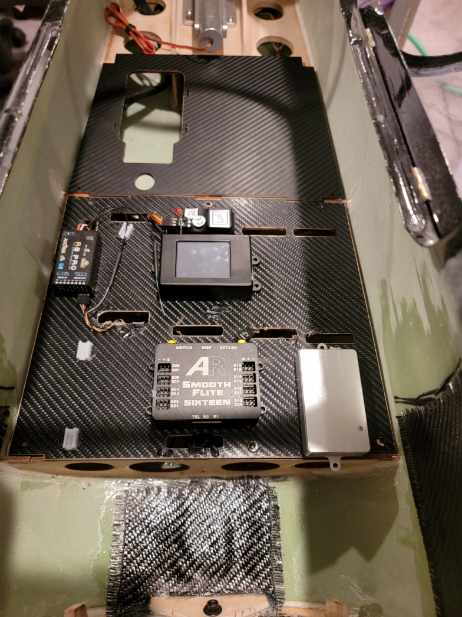
So...the end of this flying season I had a bit of a electrical snafu with a servo and ended up putting my L39 into the corn next to the runway trying to recover during a landing. The damage was pretty decent largely caused by the corn so I decided to do a re-kit in a different color scheme. The first one flew so well I decided to build the replacement the same way with smoke, larger tank, carbon reinforcement to joining area and a couple of extra mounting blocks. I have been told the stock kit fly great but as this kit needs a little nose weight anyway and the front section is holds so many components, I decided to reinforce it anyway. I also added the additional longer lenses for the tip tanks that was advertised on this thread and replaced the tip tank light with super bright versions from booma rc. I will add some pics later. Apparently the ones I took at too large to upload here.
thanks,
Tone
thanks,
Tone
Last edited by Agrav8ed; 01-01-2022 at 04:07 PM.
01-13-2022, 07:16 AM
#146

Was nice to read mostly positive feedback on this jet. Looking forward to receiving mine, Im debating my self to buy a new K160 or K180, or to put a K235 that i have lying around an de-rate it to 160-180N or so. its big bird, so should handle the extra few hundred grams i guess.
ill update when i get mine


 01-13-2022, 08:01 AM
#147
Hello all. I have purchased a 2nd hand Baja L-39 from germany that should arrive in a week or two. I been asking my self the same question. Studying pics of the newer FeiBao L-39,aside from the measurements this one seems very, very similar. The one-piece stab, the way the fin is mounted, cockpit opening to the side, the access hatches in the nose and other internal layout like intake duct and turbine mounts. FeiBao is also known for sell to other companies that re-brands and sell in their own names so no surprise really.
Was nice to read mostly positive feedback on this jet. Looking forward to receiving mine, Im debating my self to buy a new K160 or K180, or to put a K235 that i have lying around an de-rate it to 160-180N or so. its big bird, so should handle the extra few hundred grams i guess.
ill update when i get mine
Tone
01-31-2022, 05:09 PM
#148
Member
So...the end of this flying season I had a bit of a electrical snafu with a servo and ended up putting my L39 into the corn next to the runway trying to recover during a landing. The damage was pretty decent largely caused by the corn so I decided to do a re-kit in a different color scheme. The first one flew so well I decided to build the replacement the same way with smoke, larger tank, carbon reinforcement to joining area and a couple of extra mounting blocks. I have been told the stock kit fly great but as this kit needs a little nose weight anyway and the front section is holds so many components, I decided to reinforce it anyway. I also added the additional longer lenses for the tip tanks that was advertised on this thread and replaced the tip tank light with super bright versions from booma rc. I will add some pics later. Apparently the ones I took at too large to upload here.
thanks,
Tone
thanks,
Tone
The reinforcement is a good idea, its always a very good sign for a jet when someone buys a replacement and doesn't move on to something else
I also like the idea of the center bottom bolt to hold the nose section, how did you find the upgraded tank over the plastic ones?
01-31-2022, 05:54 PM
#149
Hi Agrav8ed,
The reinforcement is a good idea, its always a very good sign for a jet when someone buys a replacement and doesn't move on to something else
I also like the idea of the center bottom bolt to hold the nose section, how did you find the upgraded tank over the plastic ones?
The reinforcement is a good idea, its always a very good sign for a jet when someone buys a replacement and doesn't move on to something else
I also like the idea of the center bottom bolt to hold the nose section, how did you find the upgraded tank over the plastic ones?


This is the color scheme. Its snowing here so I will have to wait to get a fully assembled pic of mine.