


T-One Models 2.7m F-22 build


 01-21-2020, 02:52 PM
#55

Thread Starter

Update! Well everything is on order or here for this build so I will probably start tomorrow afternoon or evening. The following is a break down of electronics to be used and after spending over 2k on servos I can say this is about it for me on projects for a long time, well until someone makes a large A-6 that is.
Servos: 8 BLS172 Sbus for Stabs, thrust vector, rudders and flaps
2 BLS175 Sbus for Ailerons
2 S9177SV Sbus for Leading edge flaps
1 Savox 1230SG for Nose steering
Power System: Emcotec 2018 DPSI with dual Sbus 3 channel receivers
Two Duralite 5200 7.4 Ion packs
Air System: Two Jetronic valves for gear and doors
One Xicoy valve for bay doors
One Xicoy brake valve
Two large air tanks
Xicoy fail safe/gear door sequence with air pressure telemetry
Two MAP fill valves and one analog air gauge for the brakes
Canopy open/close/lock will be linear actuators
Fuel System: Two MAP Hi-flow UATs
Three stock Tank fittings
BVM Hi-flow vent system
Three stock clunks
Light System: Stock and no idea what battery the controller uses yet?
This jet while not complicated has a lot going on closer to my tomcat than anything.
01-23-2020, 07:39 PM
#58
Thread Starter
Thanks David, Jeff T here in Huntsville is hooking me up. Super excited about this one, I have everything here to finish it.
01-23-2020, 07:52 PM
#59

Chiming in to say hi only as a fellow owner of this plane, and share/learn from your build thread.
I will be using twin M166TS for power plants. I am having a challenge mounting them right now - the gap is wider than the turbine mount plates so bridging ply plates are being considered.
Jeremy

 01-24-2020, 11:20 AM
#61
Thread Starter
Thanks for the info Jeremy, good to know since min also using two M166TS in mine.
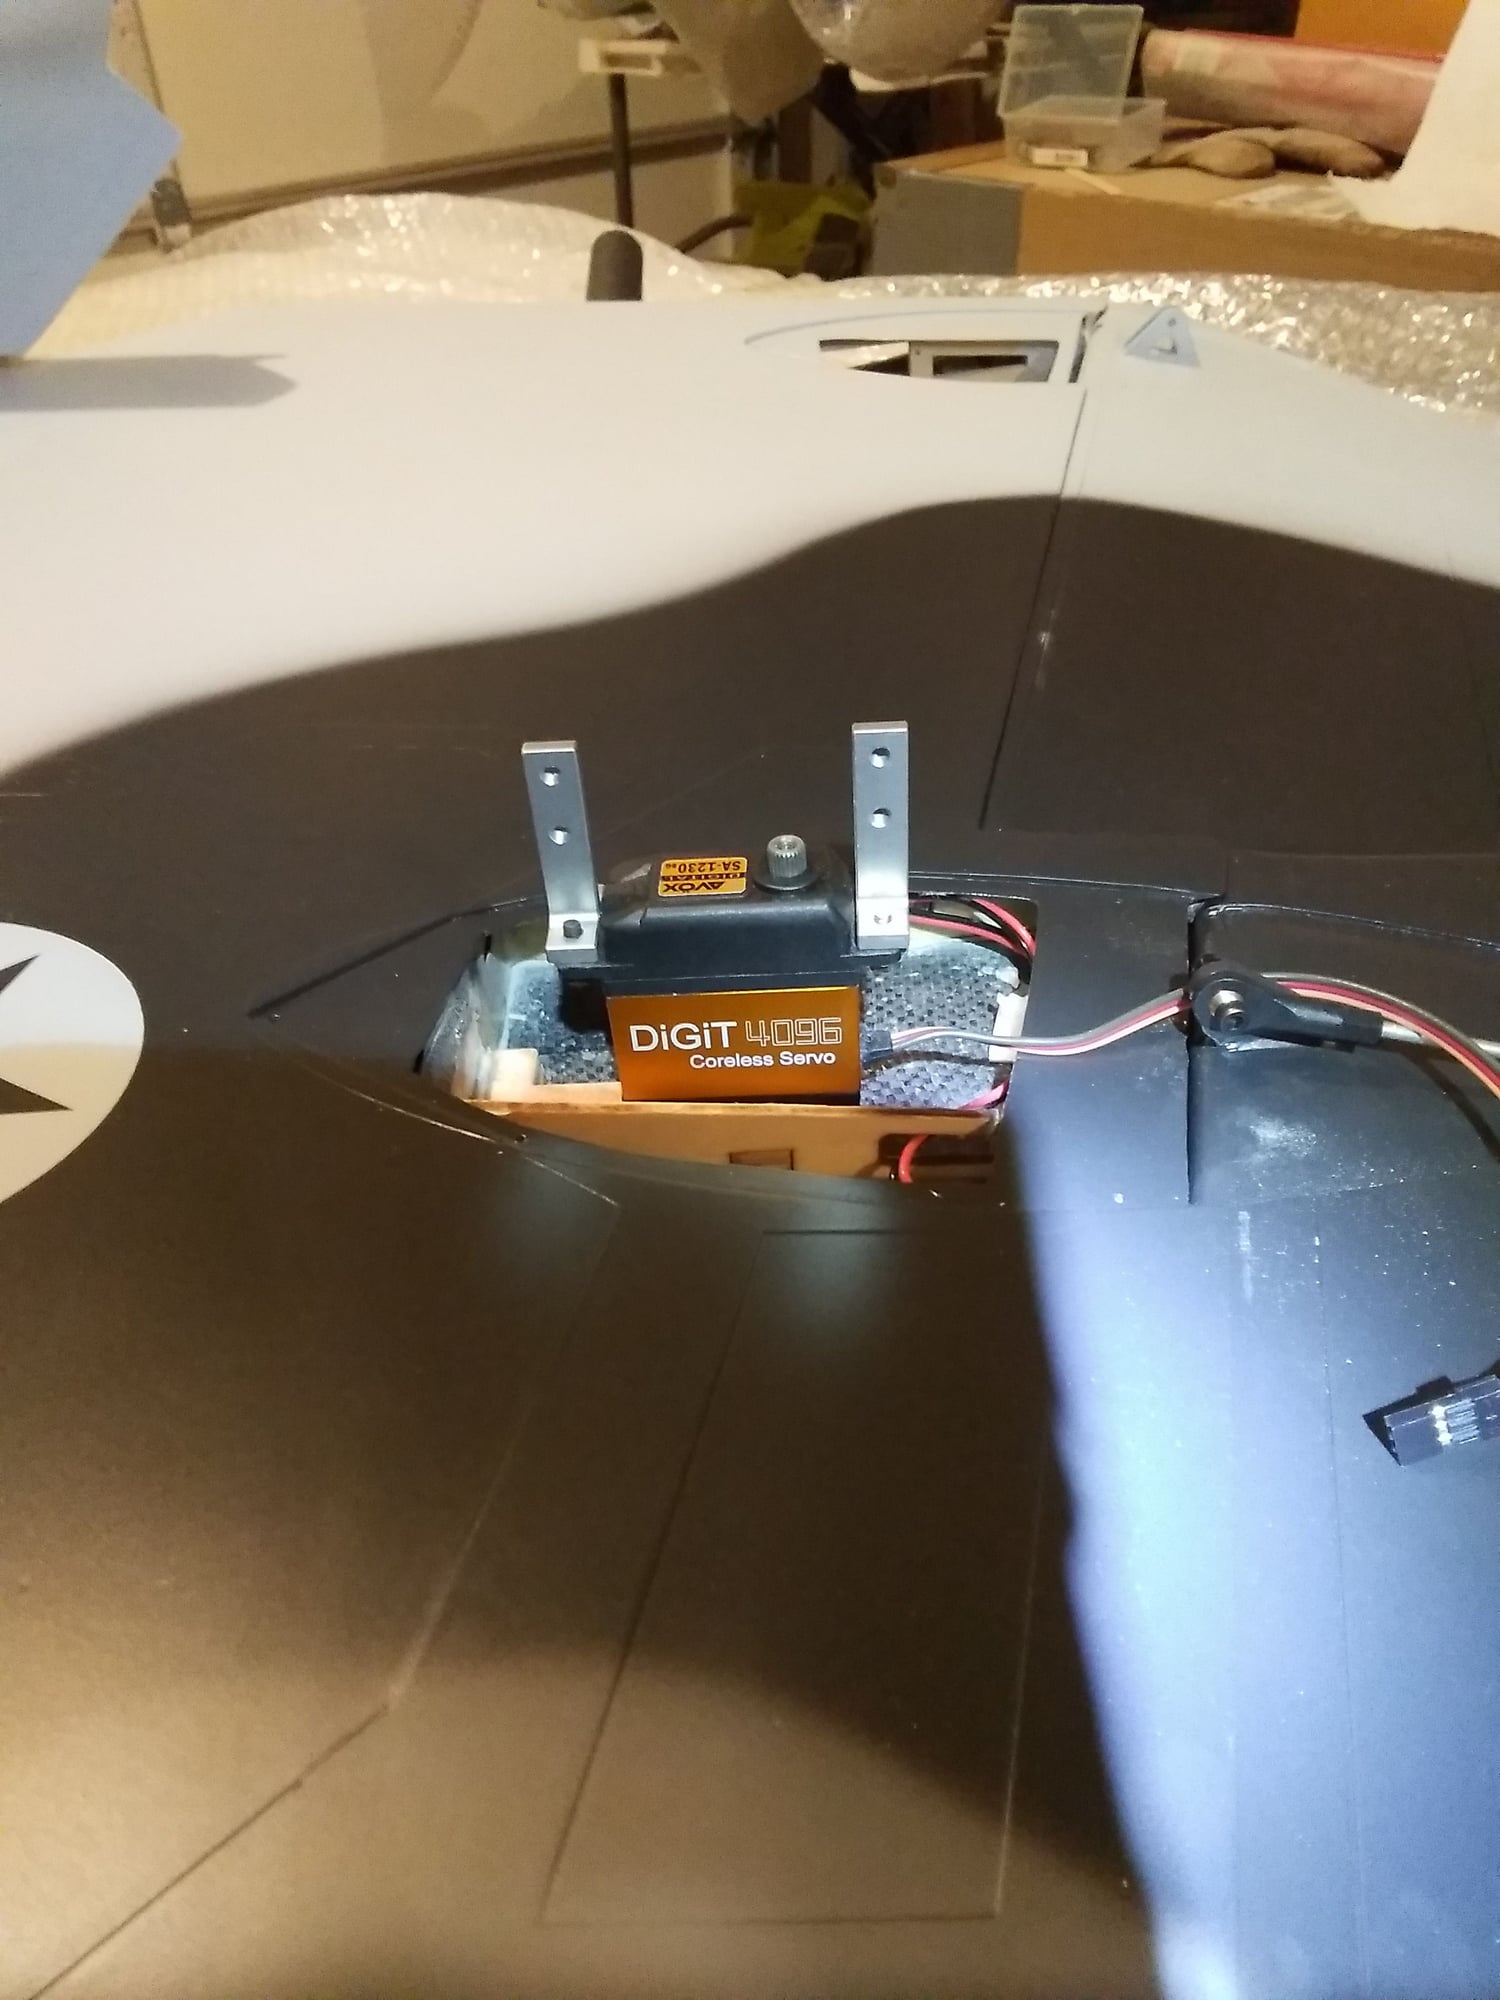
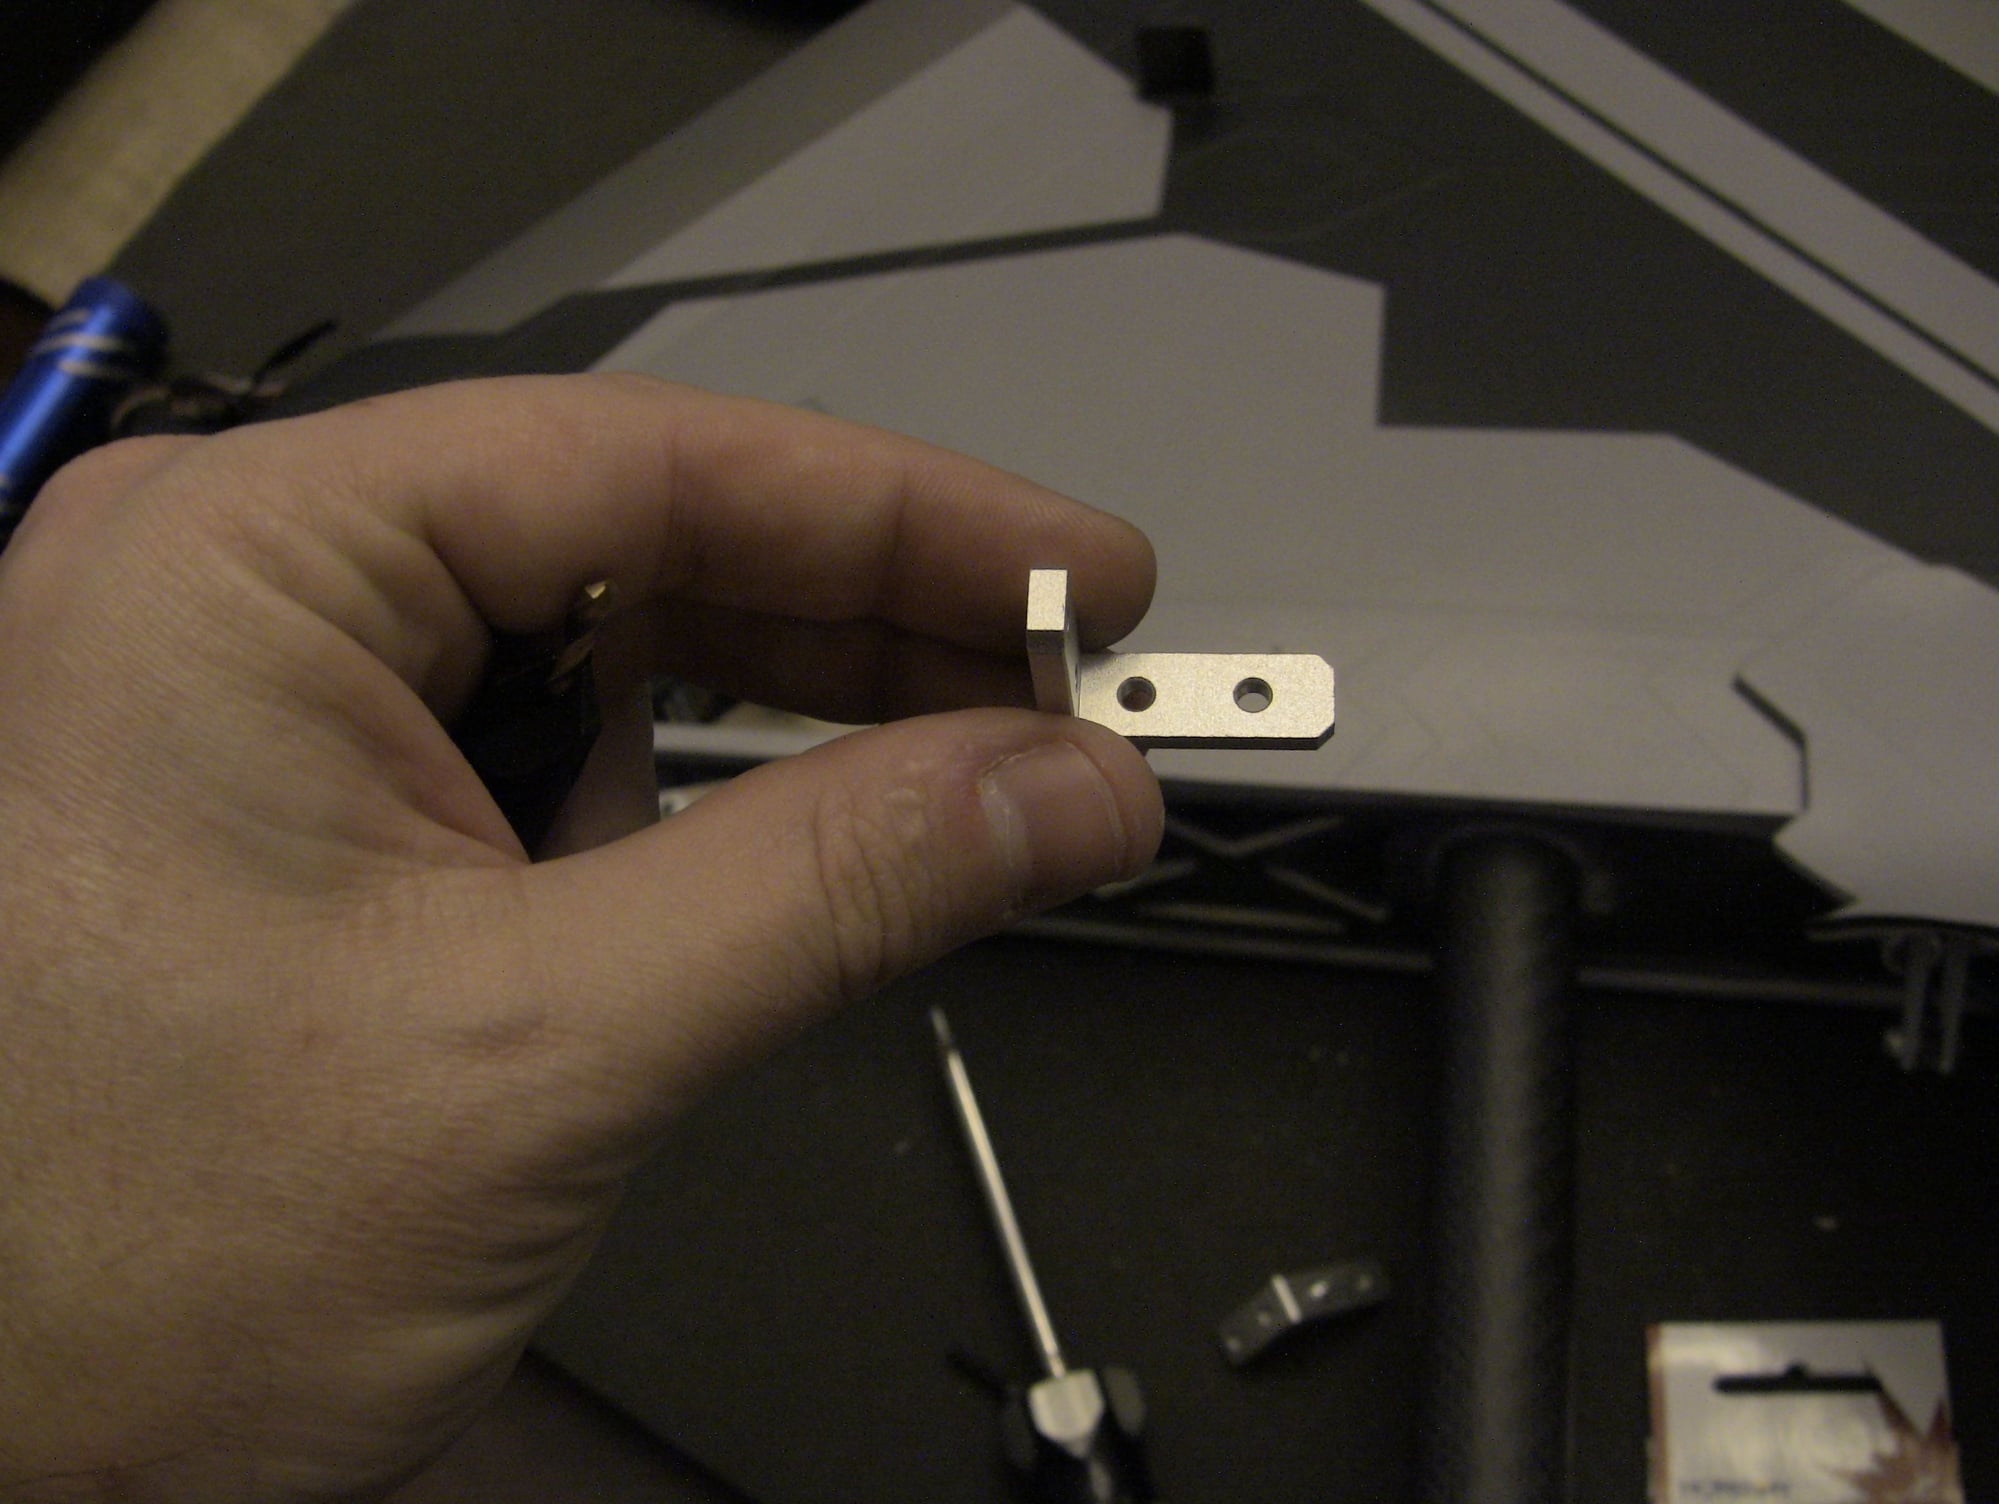
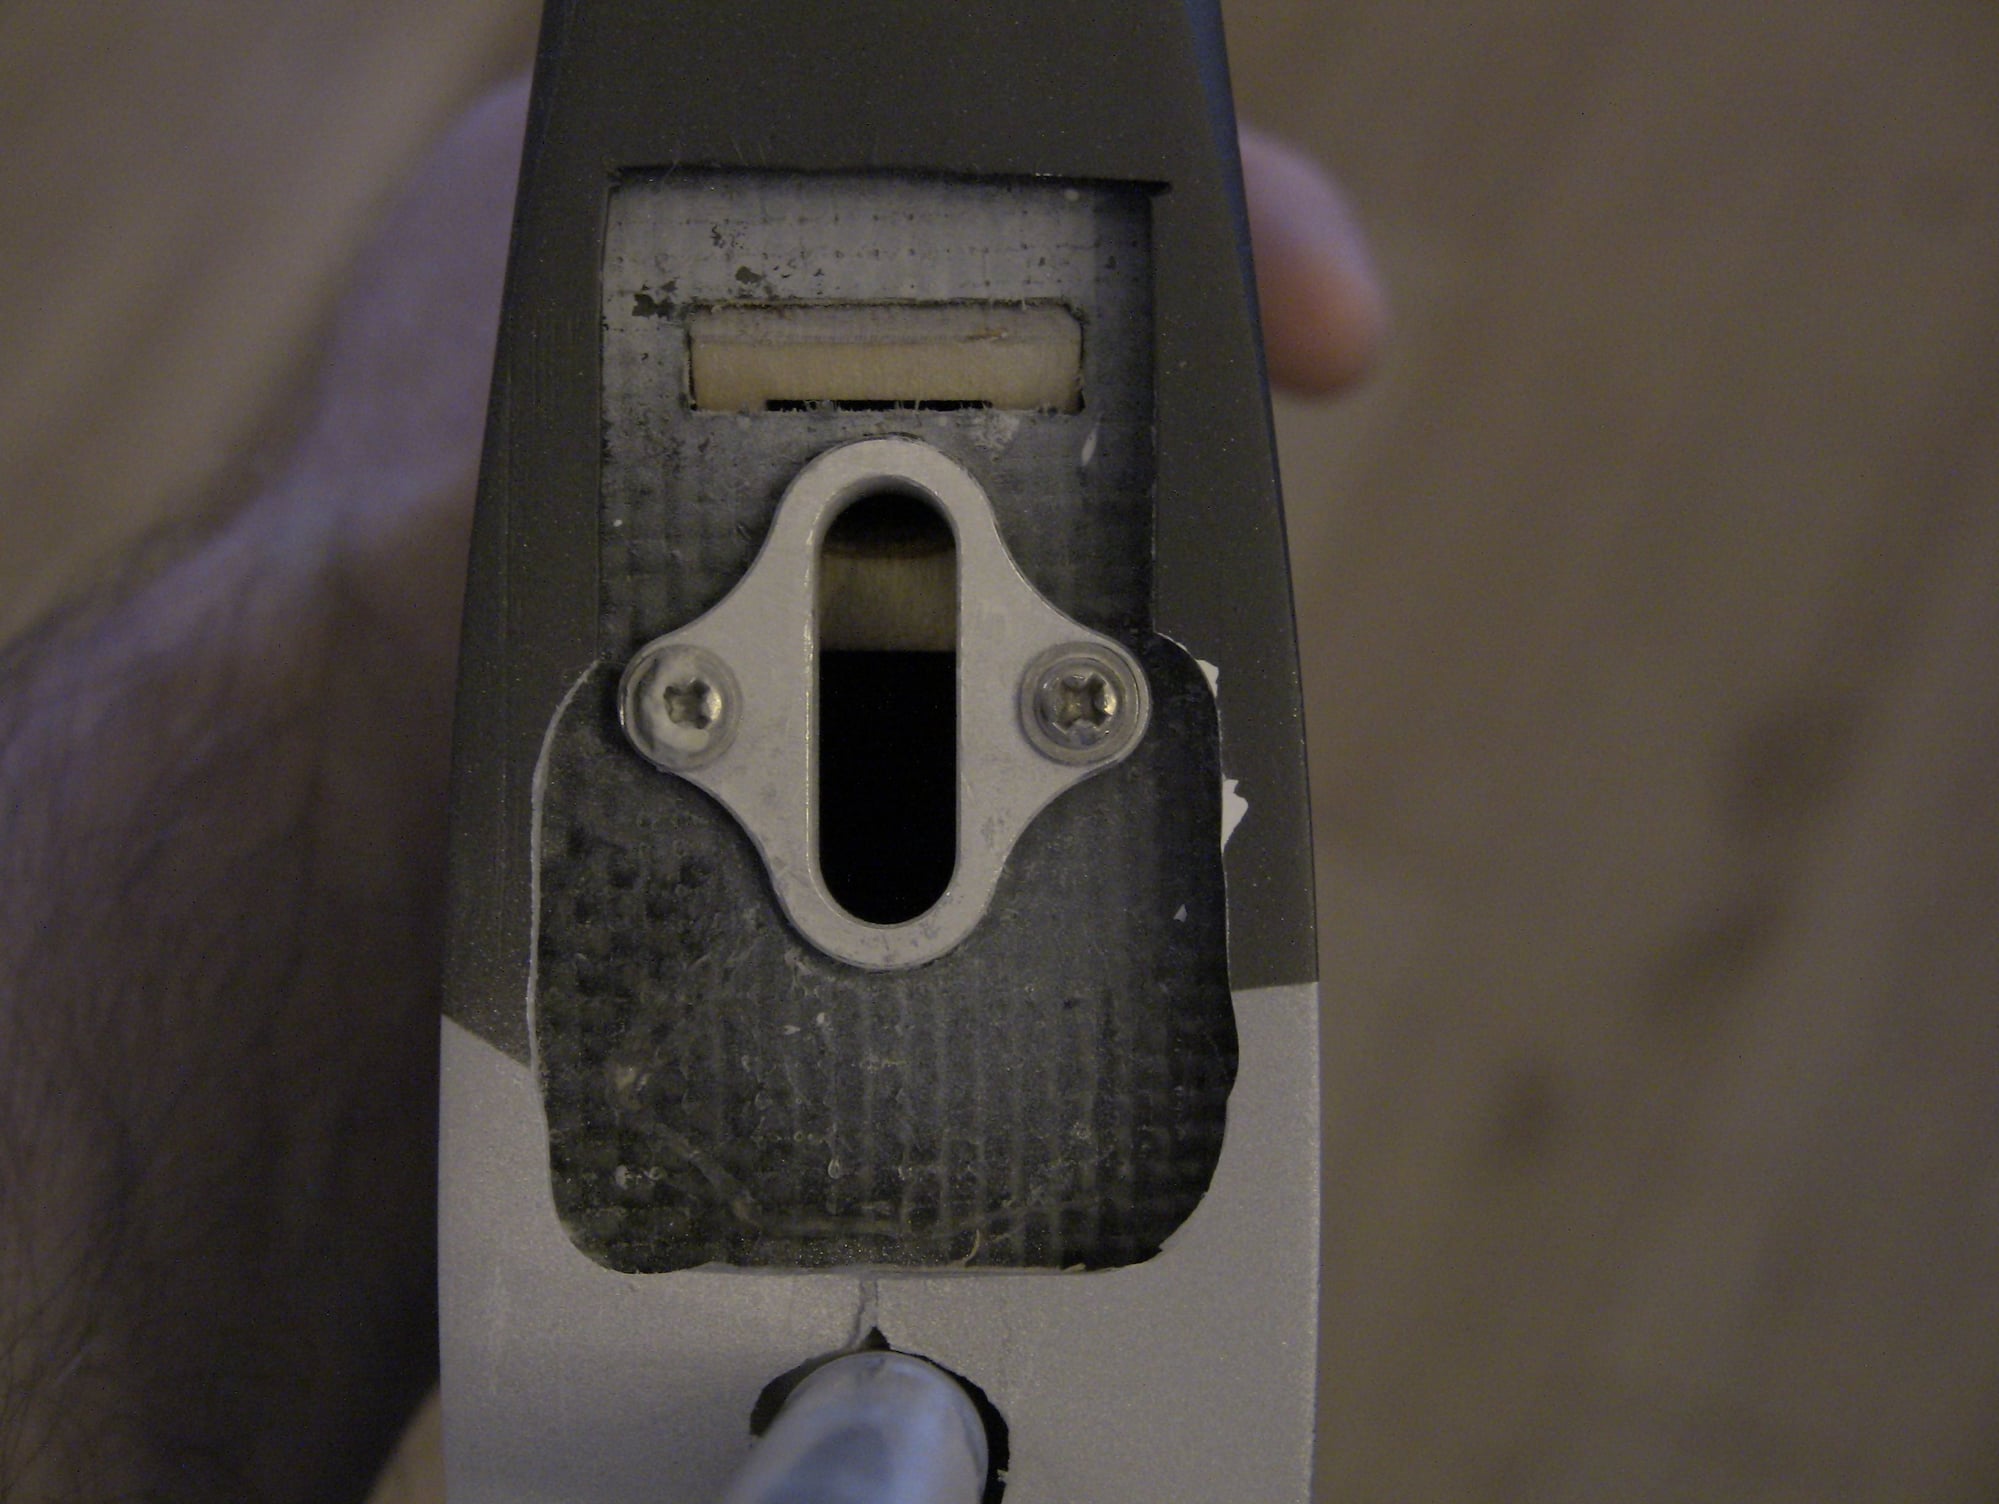
without any reference it’s impossible to know what there intent is, I thought it would be L brackets since Gun had them on his slat servos and the ply plate is raised like others for screw clearance and all the models coming out of this region use L brackets. I guess it’s a good reminder why I do these builds, it helps the owners or future owners figure things out.
I will say US support on this has been good so far.

 01-25-2020, 05:07 PM
#63
Thread Starter
01-25-2020, 05:46 PM
#64
My Feedback: (15)
Update! Well everything is on order or here for this build so I will probably start tomorrow afternoon or evening. The following is a break down of electronics to be used and after spending over 2k on servos I can say this is about it for me on projects for a long time, well until someone makes a large A-6 that is.
Servos: 8 BLS172 Sbus for Stabs, thrust vector, rudders and flaps
2 BLS175 Sbus for Ailerons
2 S9177SV Sbus for Leading edge flaps
1 Savox 1230SG for Nose steering
Power System: Emcotec 2018 DPSI with dual Sbus 3 channel receivers
Two Duralite 5200 7.4 Ion packs
Air System: Two Jetronic valves for gear and doors
One Xicoy valve for bay doors
One Xicoy brake valve
Two large air tanks
Xicoy fail safe/gear door sequence with air pressure telemetry
Two MAP fill valves and one analog air gauge for the brakes
Canopy open/close/lock will be linear actuators
Fuel System: Two MAP Hi-flow UATs
Three stock Tank fittings
BVM Hi-flow vent system
Three stock clunks
Light System: Stock and no idea what battery the controller uses yet?
This jet while not complicated has a lot going on closer to my tomcat than anything.
Servos: 8 BLS172 Sbus for Stabs, thrust vector, rudders and flaps
2 BLS175 Sbus for Ailerons
2 S9177SV Sbus for Leading edge flaps
1 Savox 1230SG for Nose steering
Power System: Emcotec 2018 DPSI with dual Sbus 3 channel receivers
Two Duralite 5200 7.4 Ion packs
Air System: Two Jetronic valves for gear and doors
One Xicoy valve for bay doors
One Xicoy brake valve
Two large air tanks
Xicoy fail safe/gear door sequence with air pressure telemetry
Two MAP fill valves and one analog air gauge for the brakes
Canopy open/close/lock will be linear actuators
Fuel System: Two MAP Hi-flow UATs
Three stock Tank fittings
BVM Hi-flow vent system
Three stock clunks
Light System: Stock and no idea what battery the controller uses yet?
This jet while not complicated has a lot going on closer to my tomcat than anything.
Which linear actuators are you using for the canopy and the canopy lock?
01-25-2020, 08:53 PM
#66
Thread Starter
Hi David I stock all the actuonix linear servos so I’m using those. I’m going to use a single L12 30mm stroke for the lock. I will use a 100mm stroke for the canopy open/close, if you saw any of the canopy setup in the F-18 I used them in that setup. Will be a bit of slow going, have to spend tomorrow studying, then renting a plane Monday/Tuesday to fly over to Savannah to take a test for the next job. Should be full throttle come Thursday/Friday
Last edited by FenderBean; 01-25-2020 at 08:55 PM.
01-25-2020, 11:21 PM
#67
Thread Starter
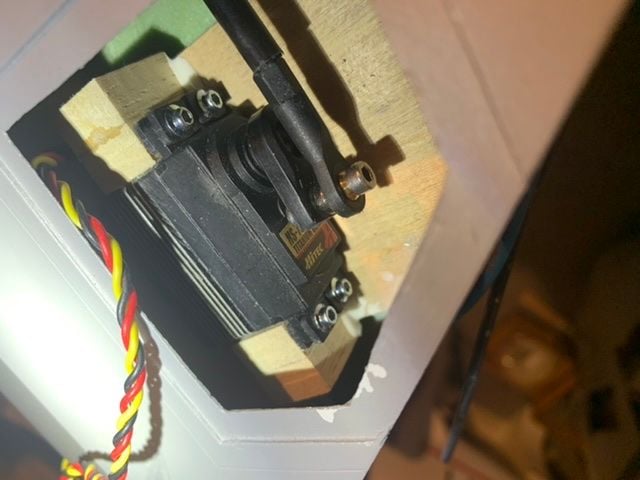
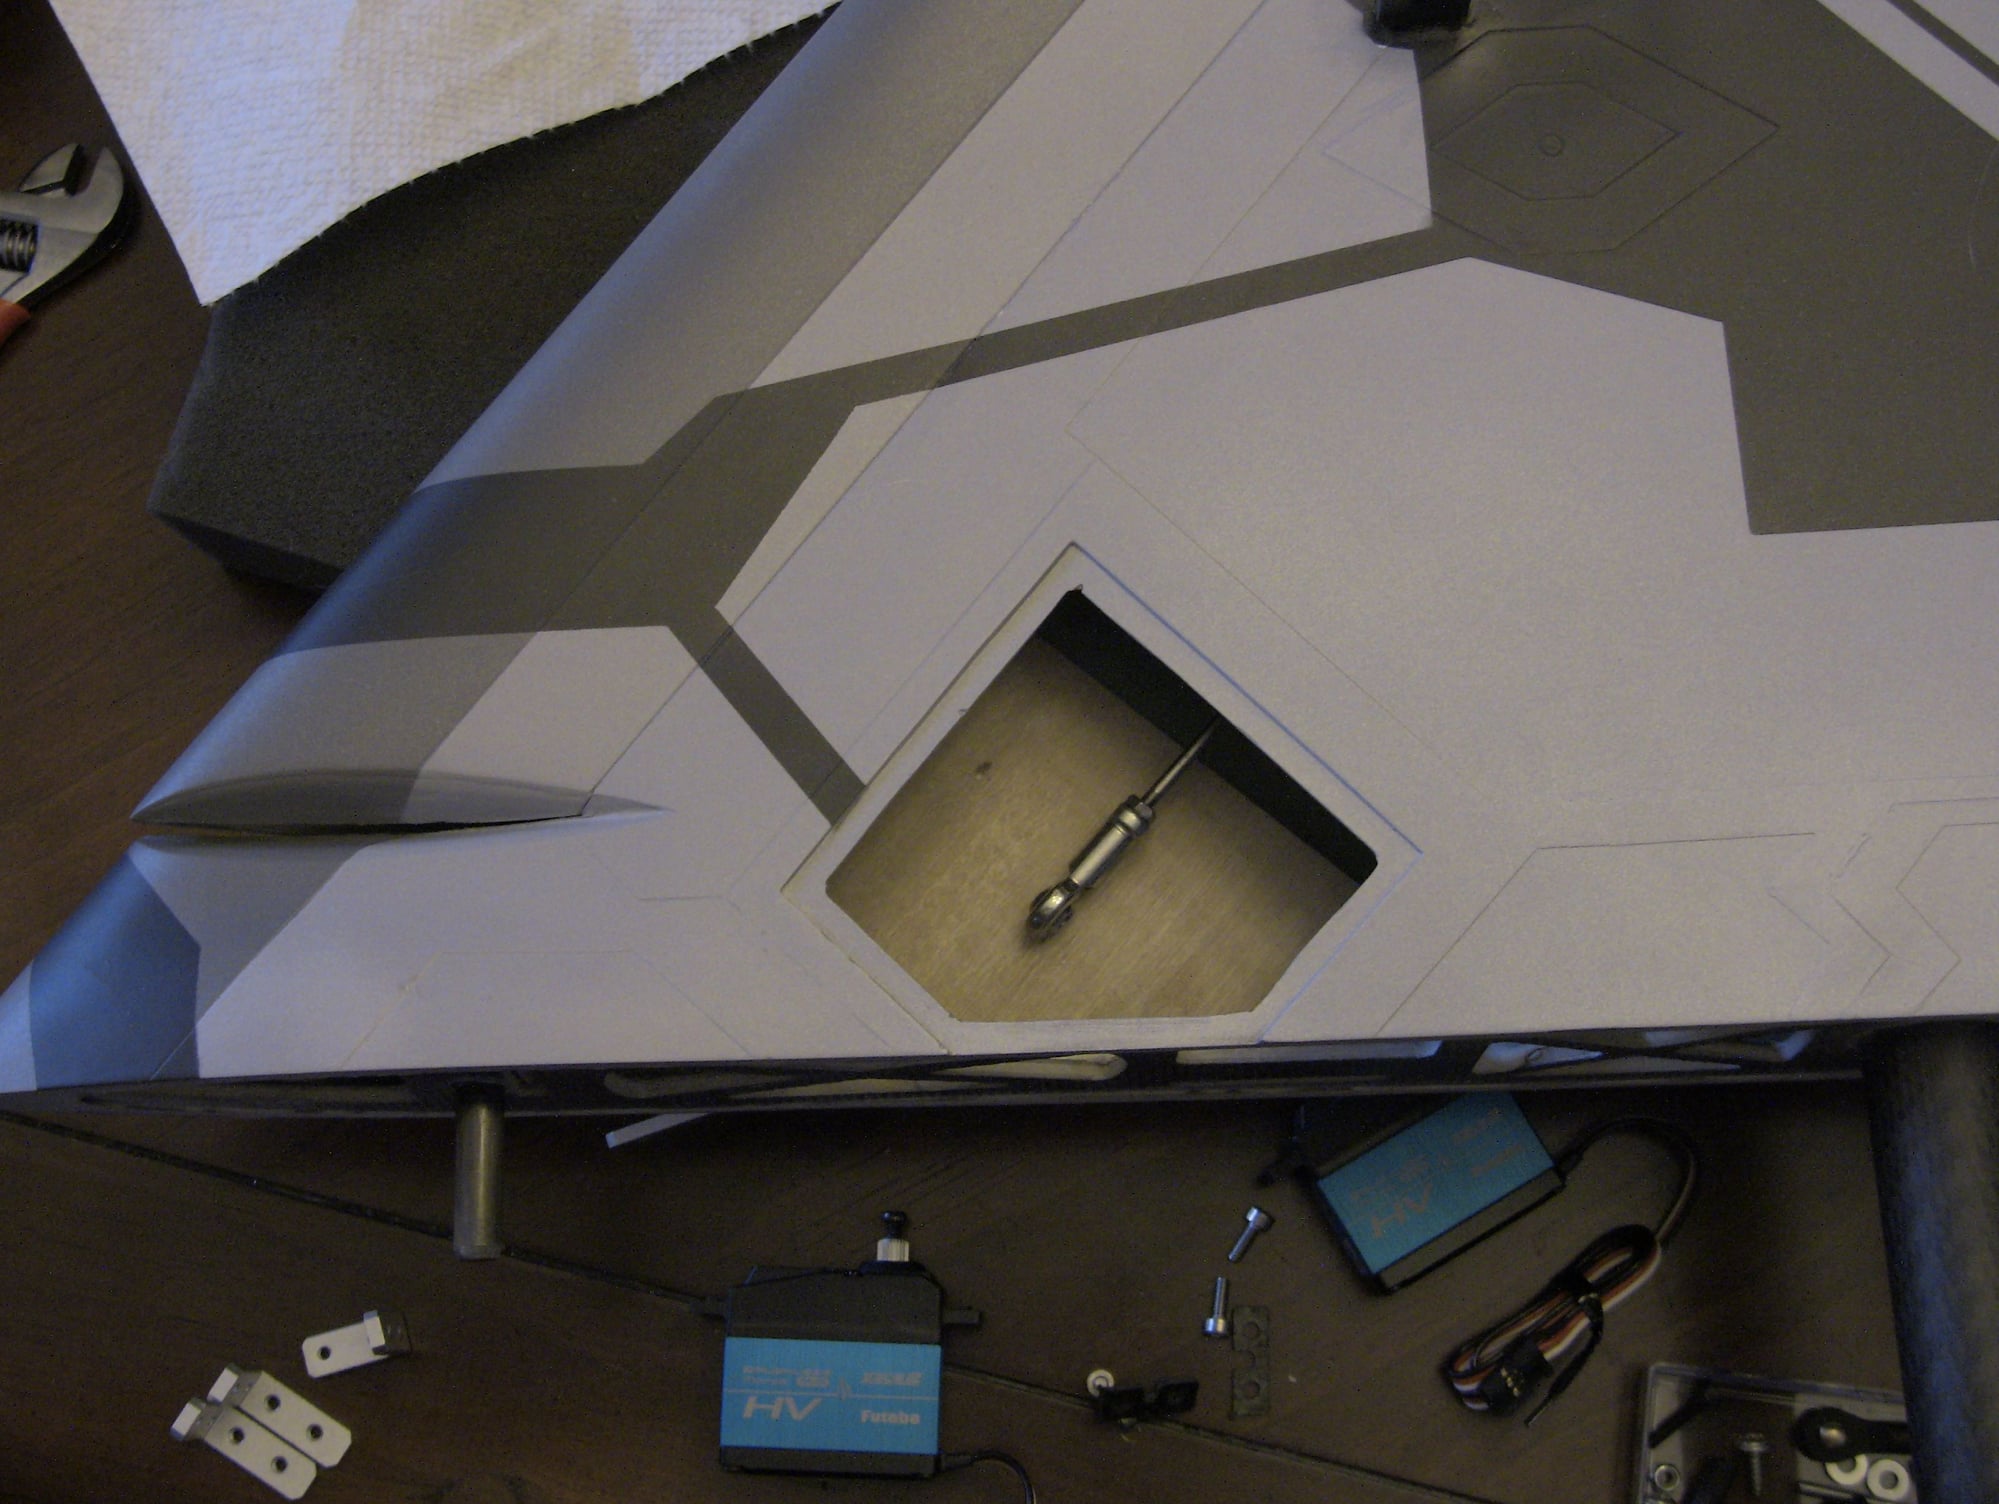
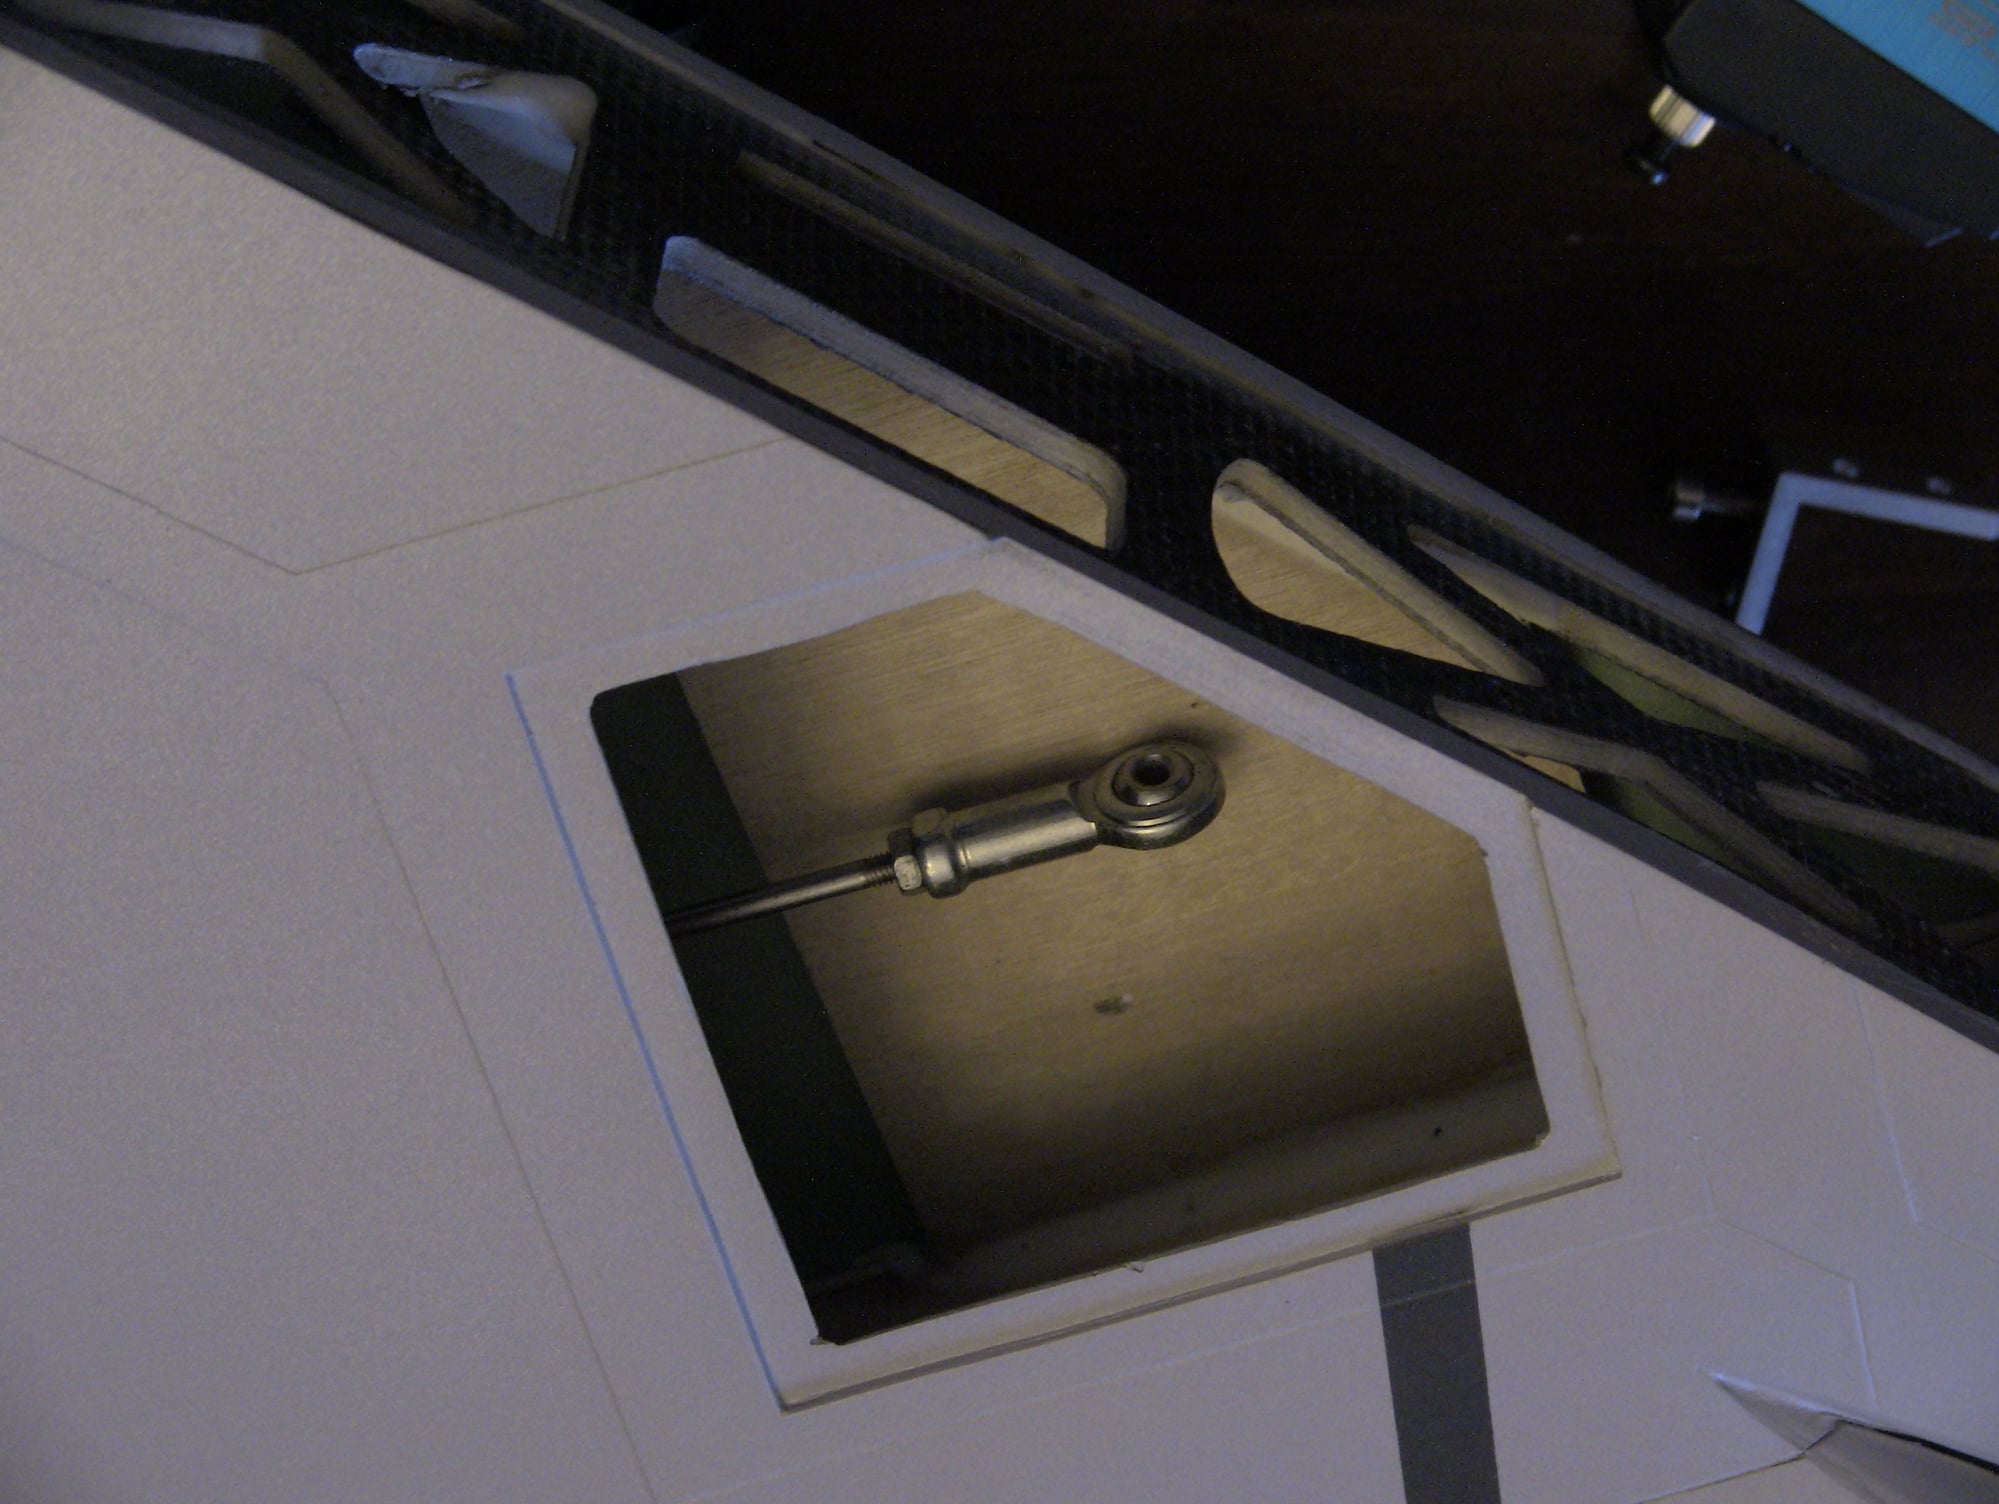
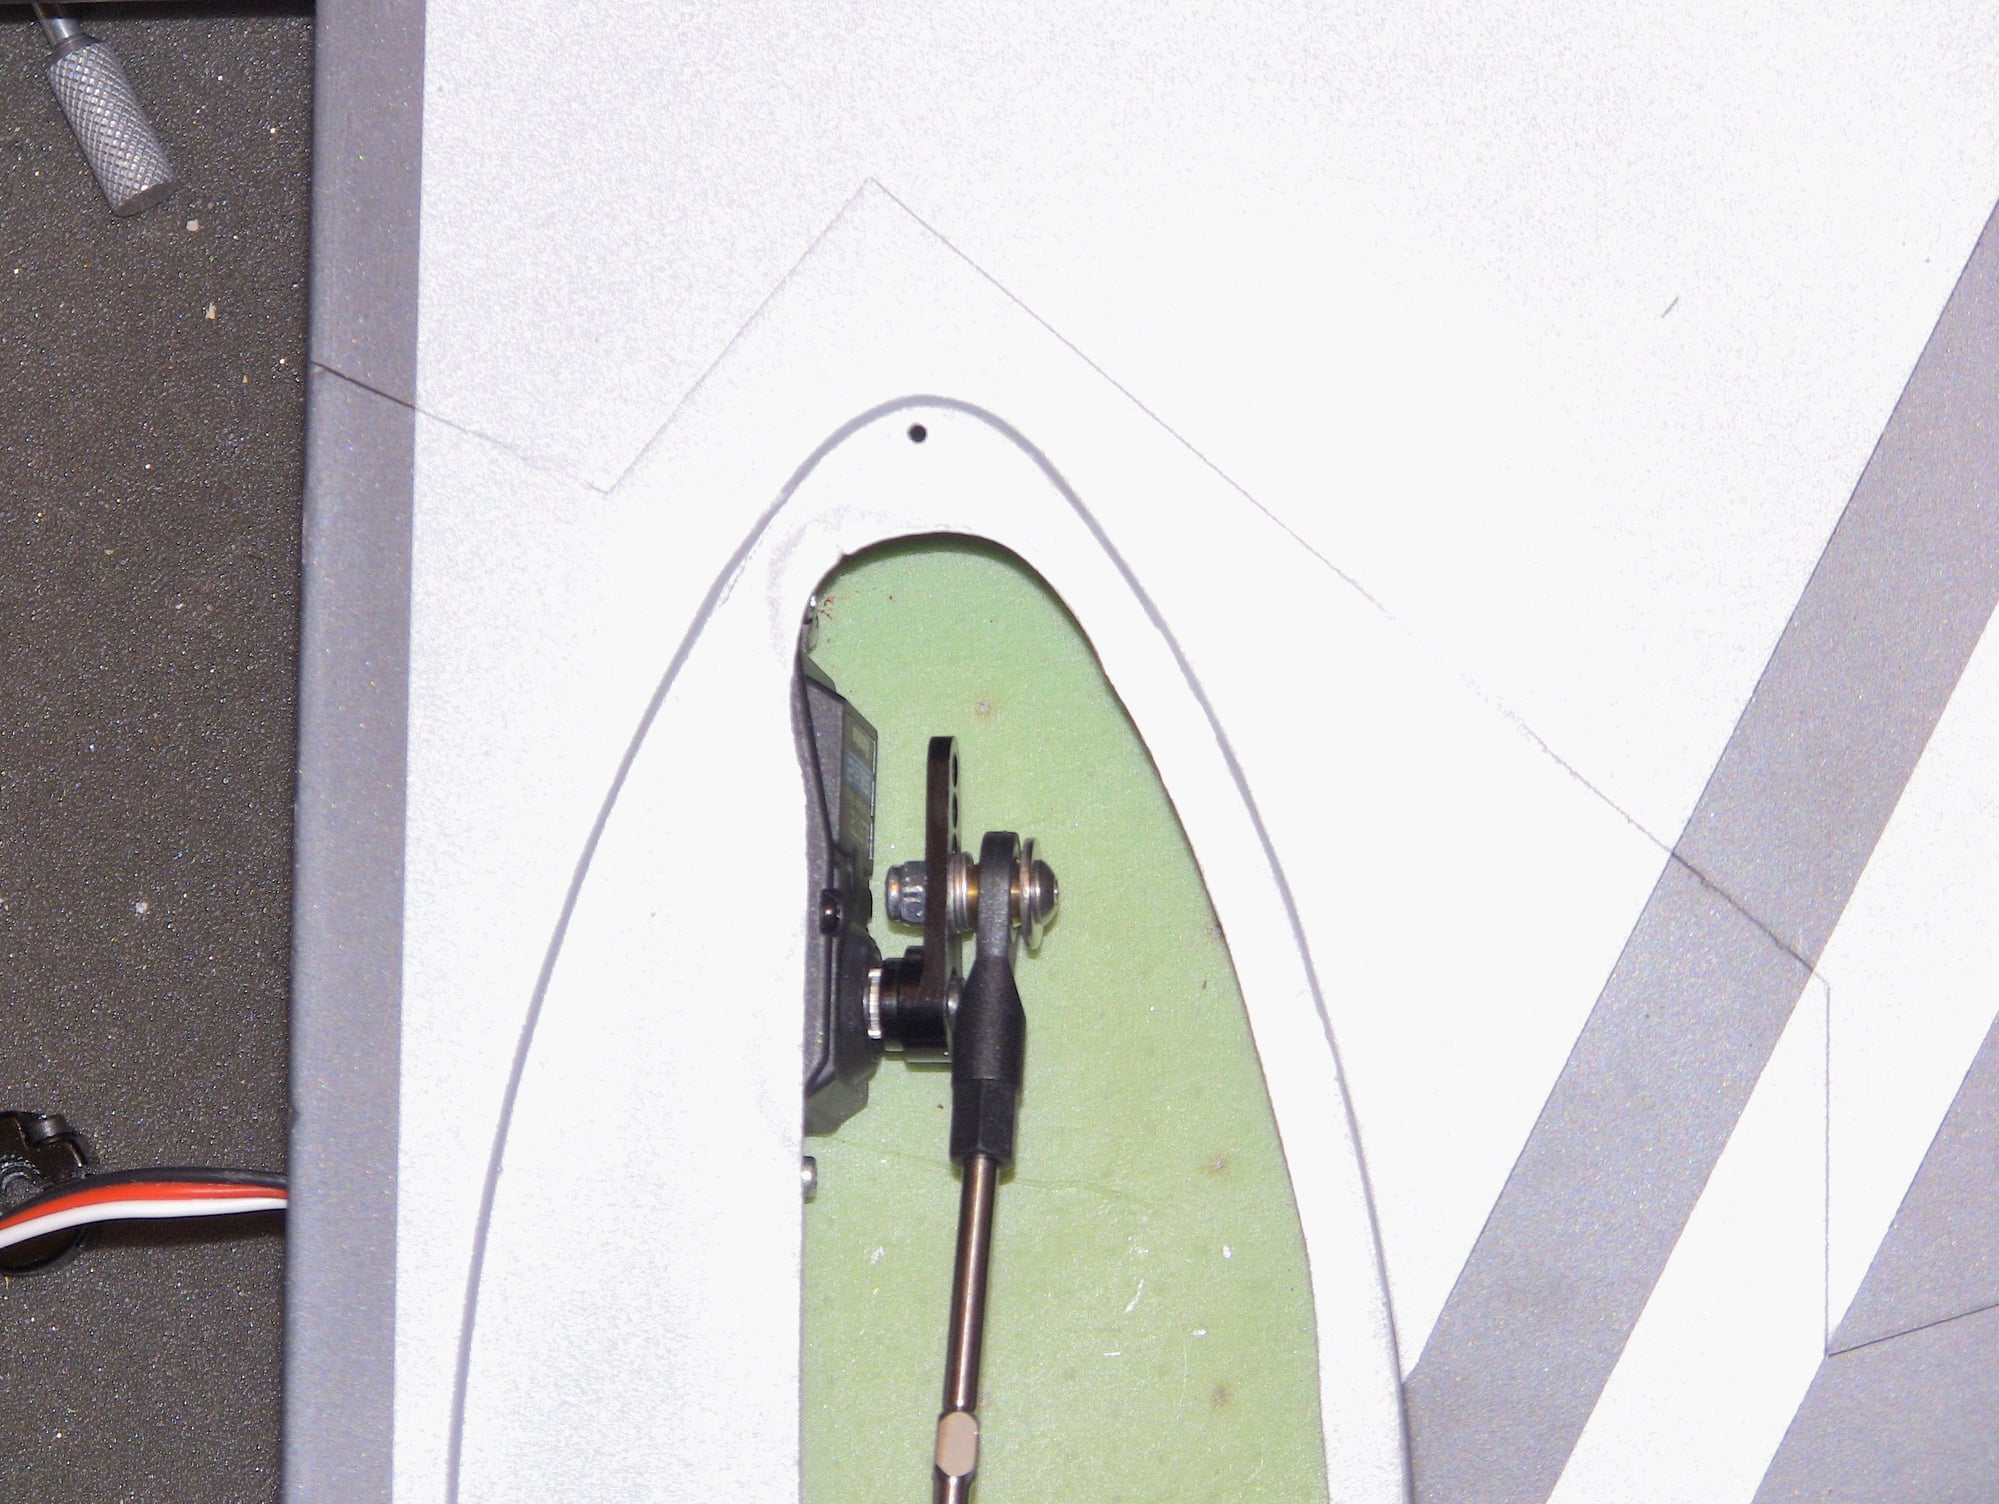
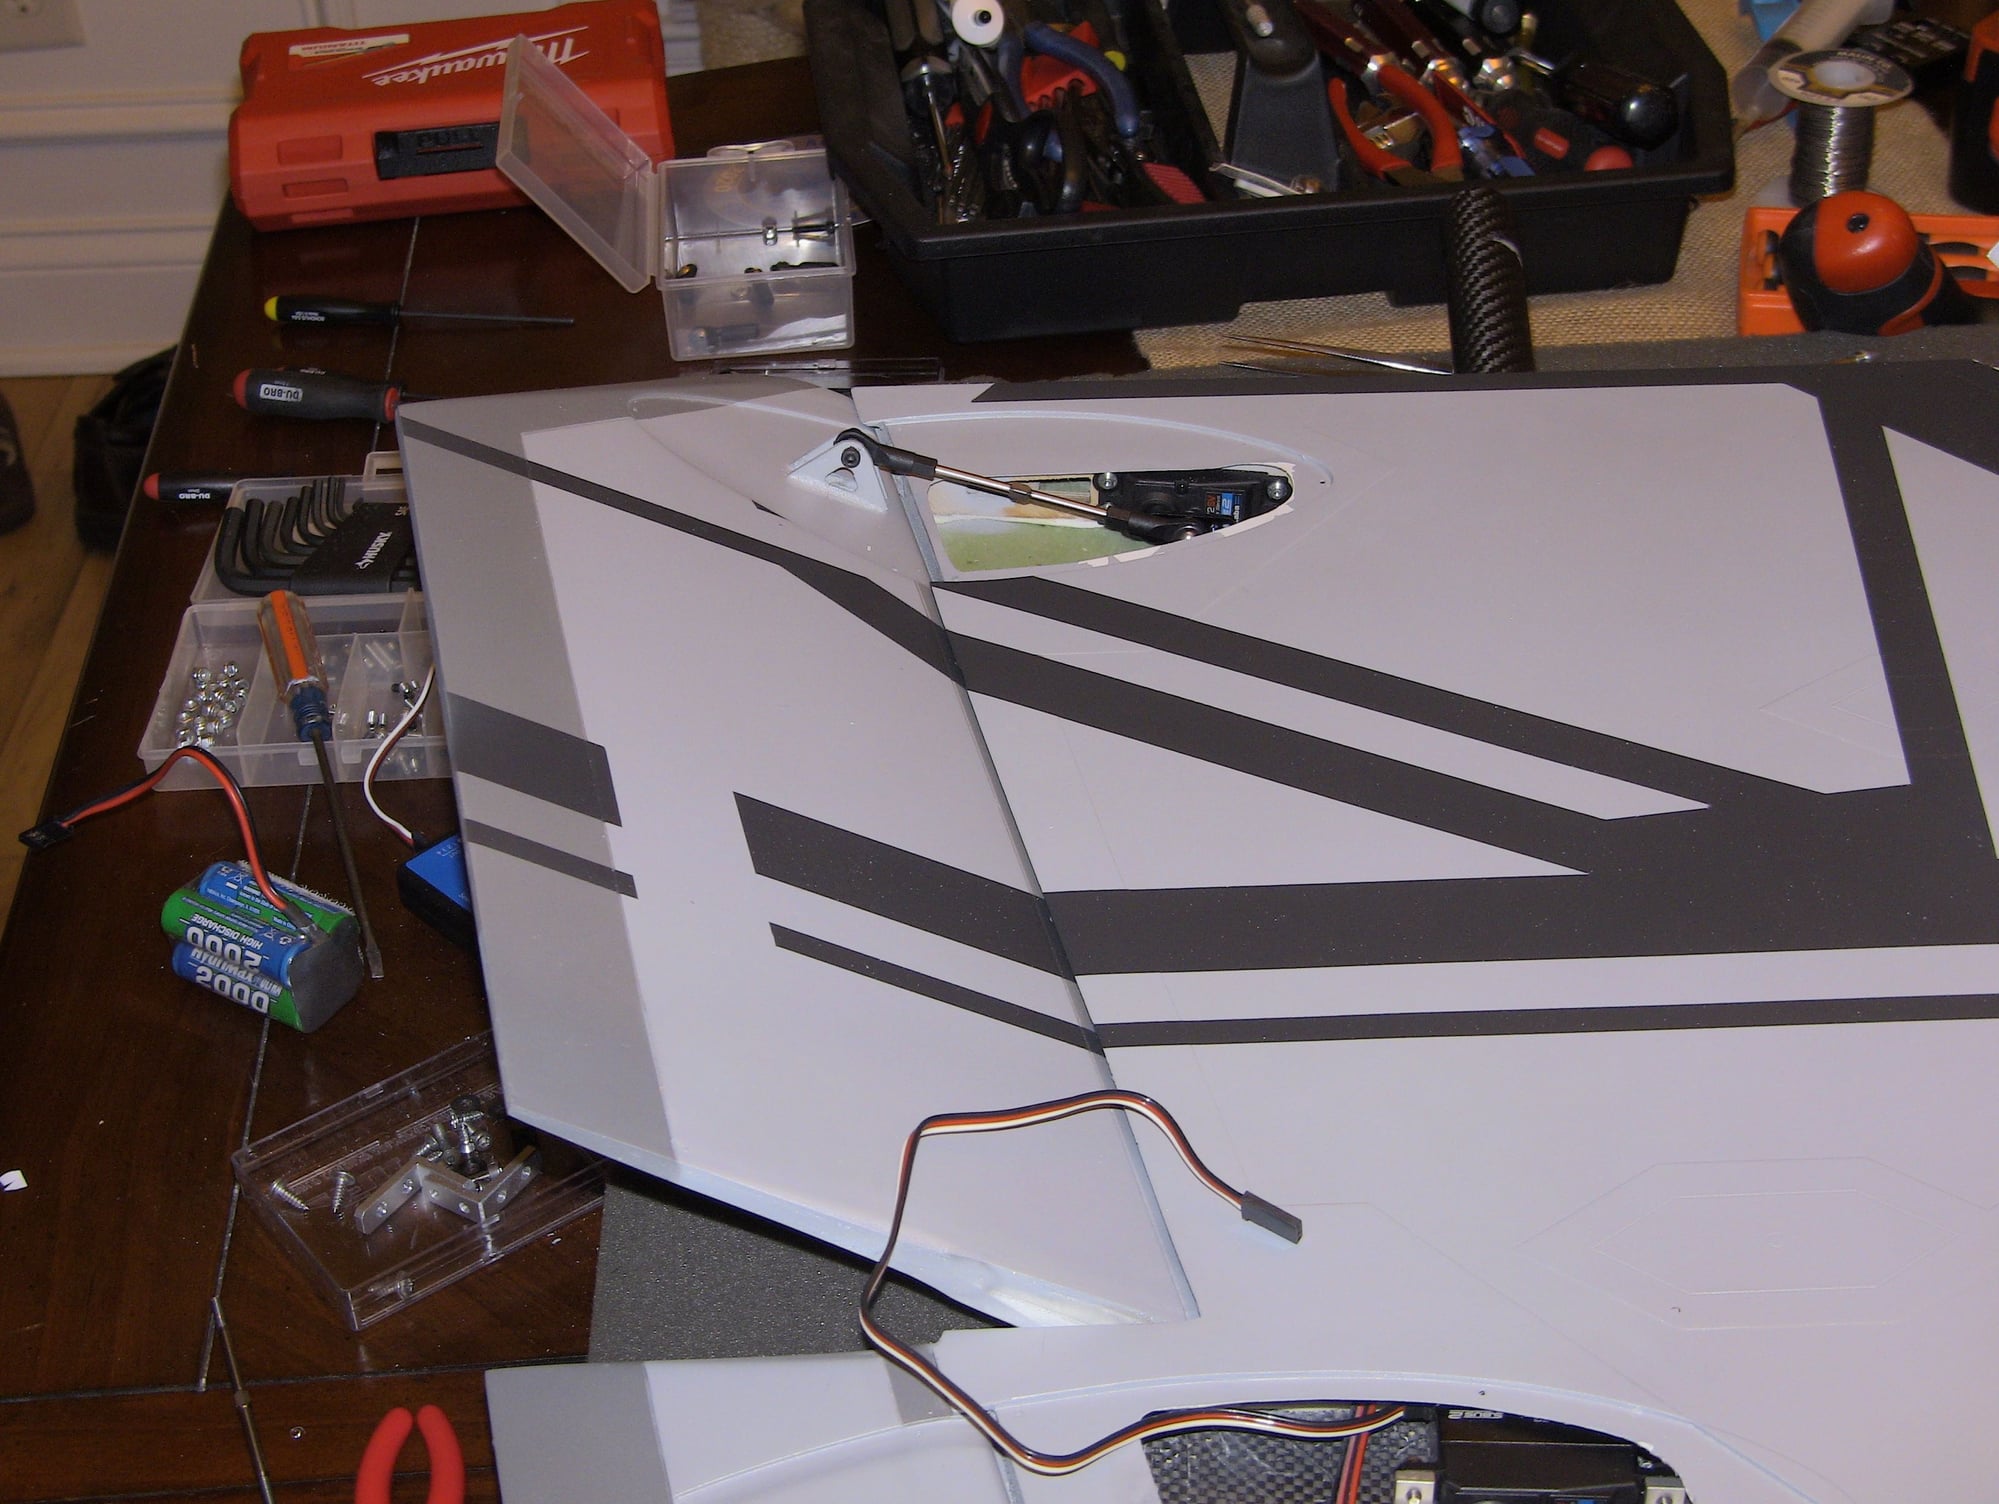
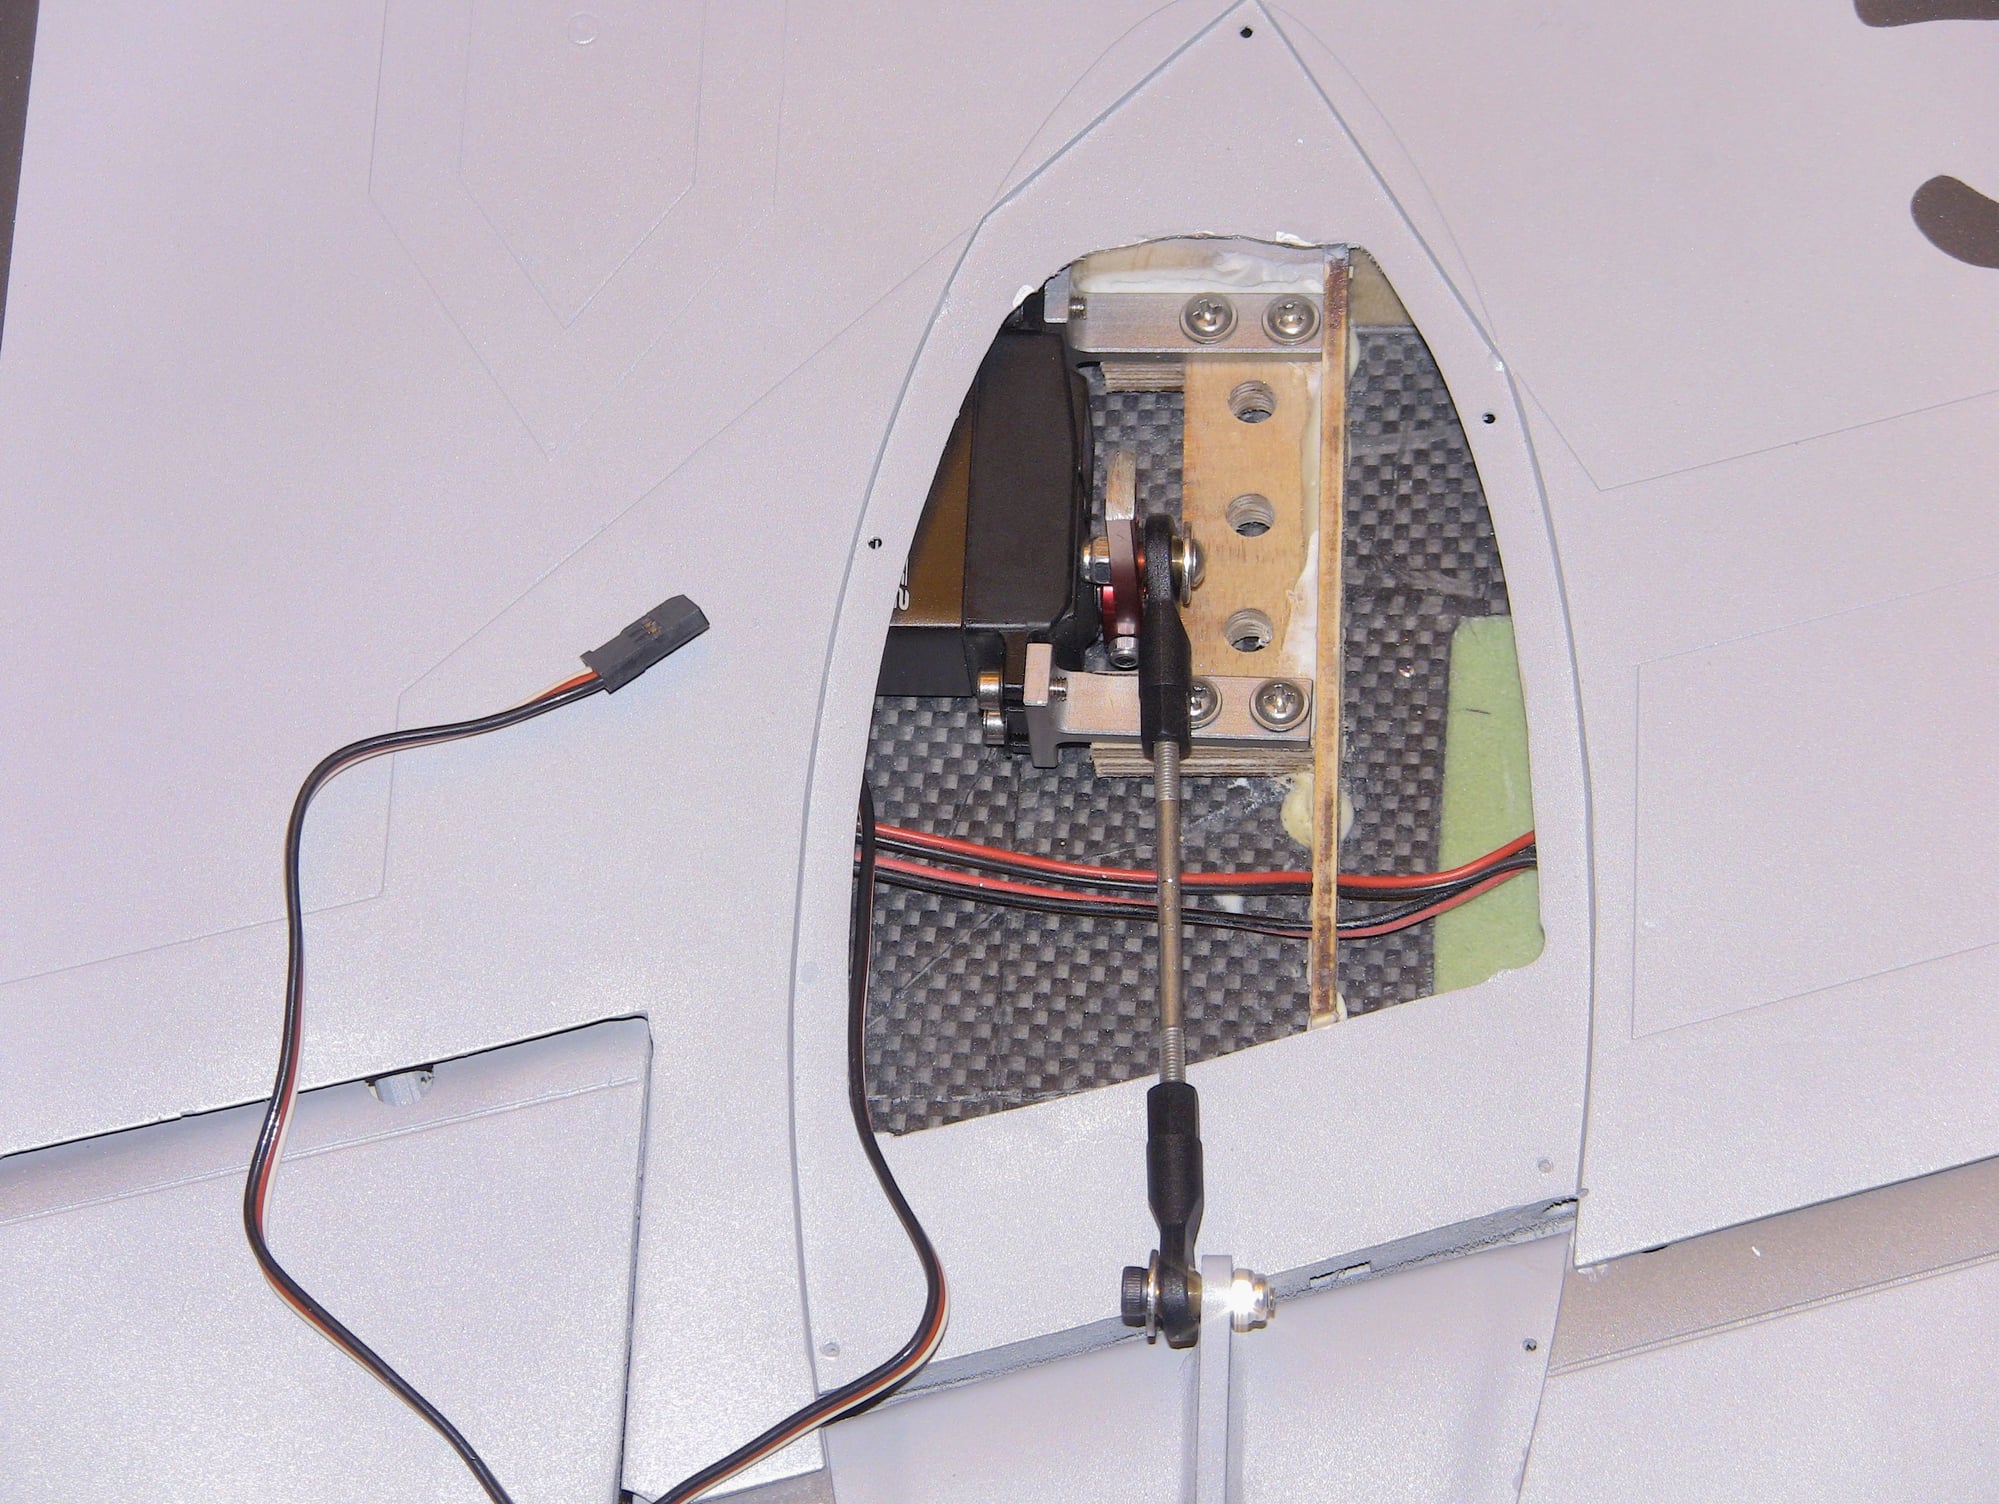
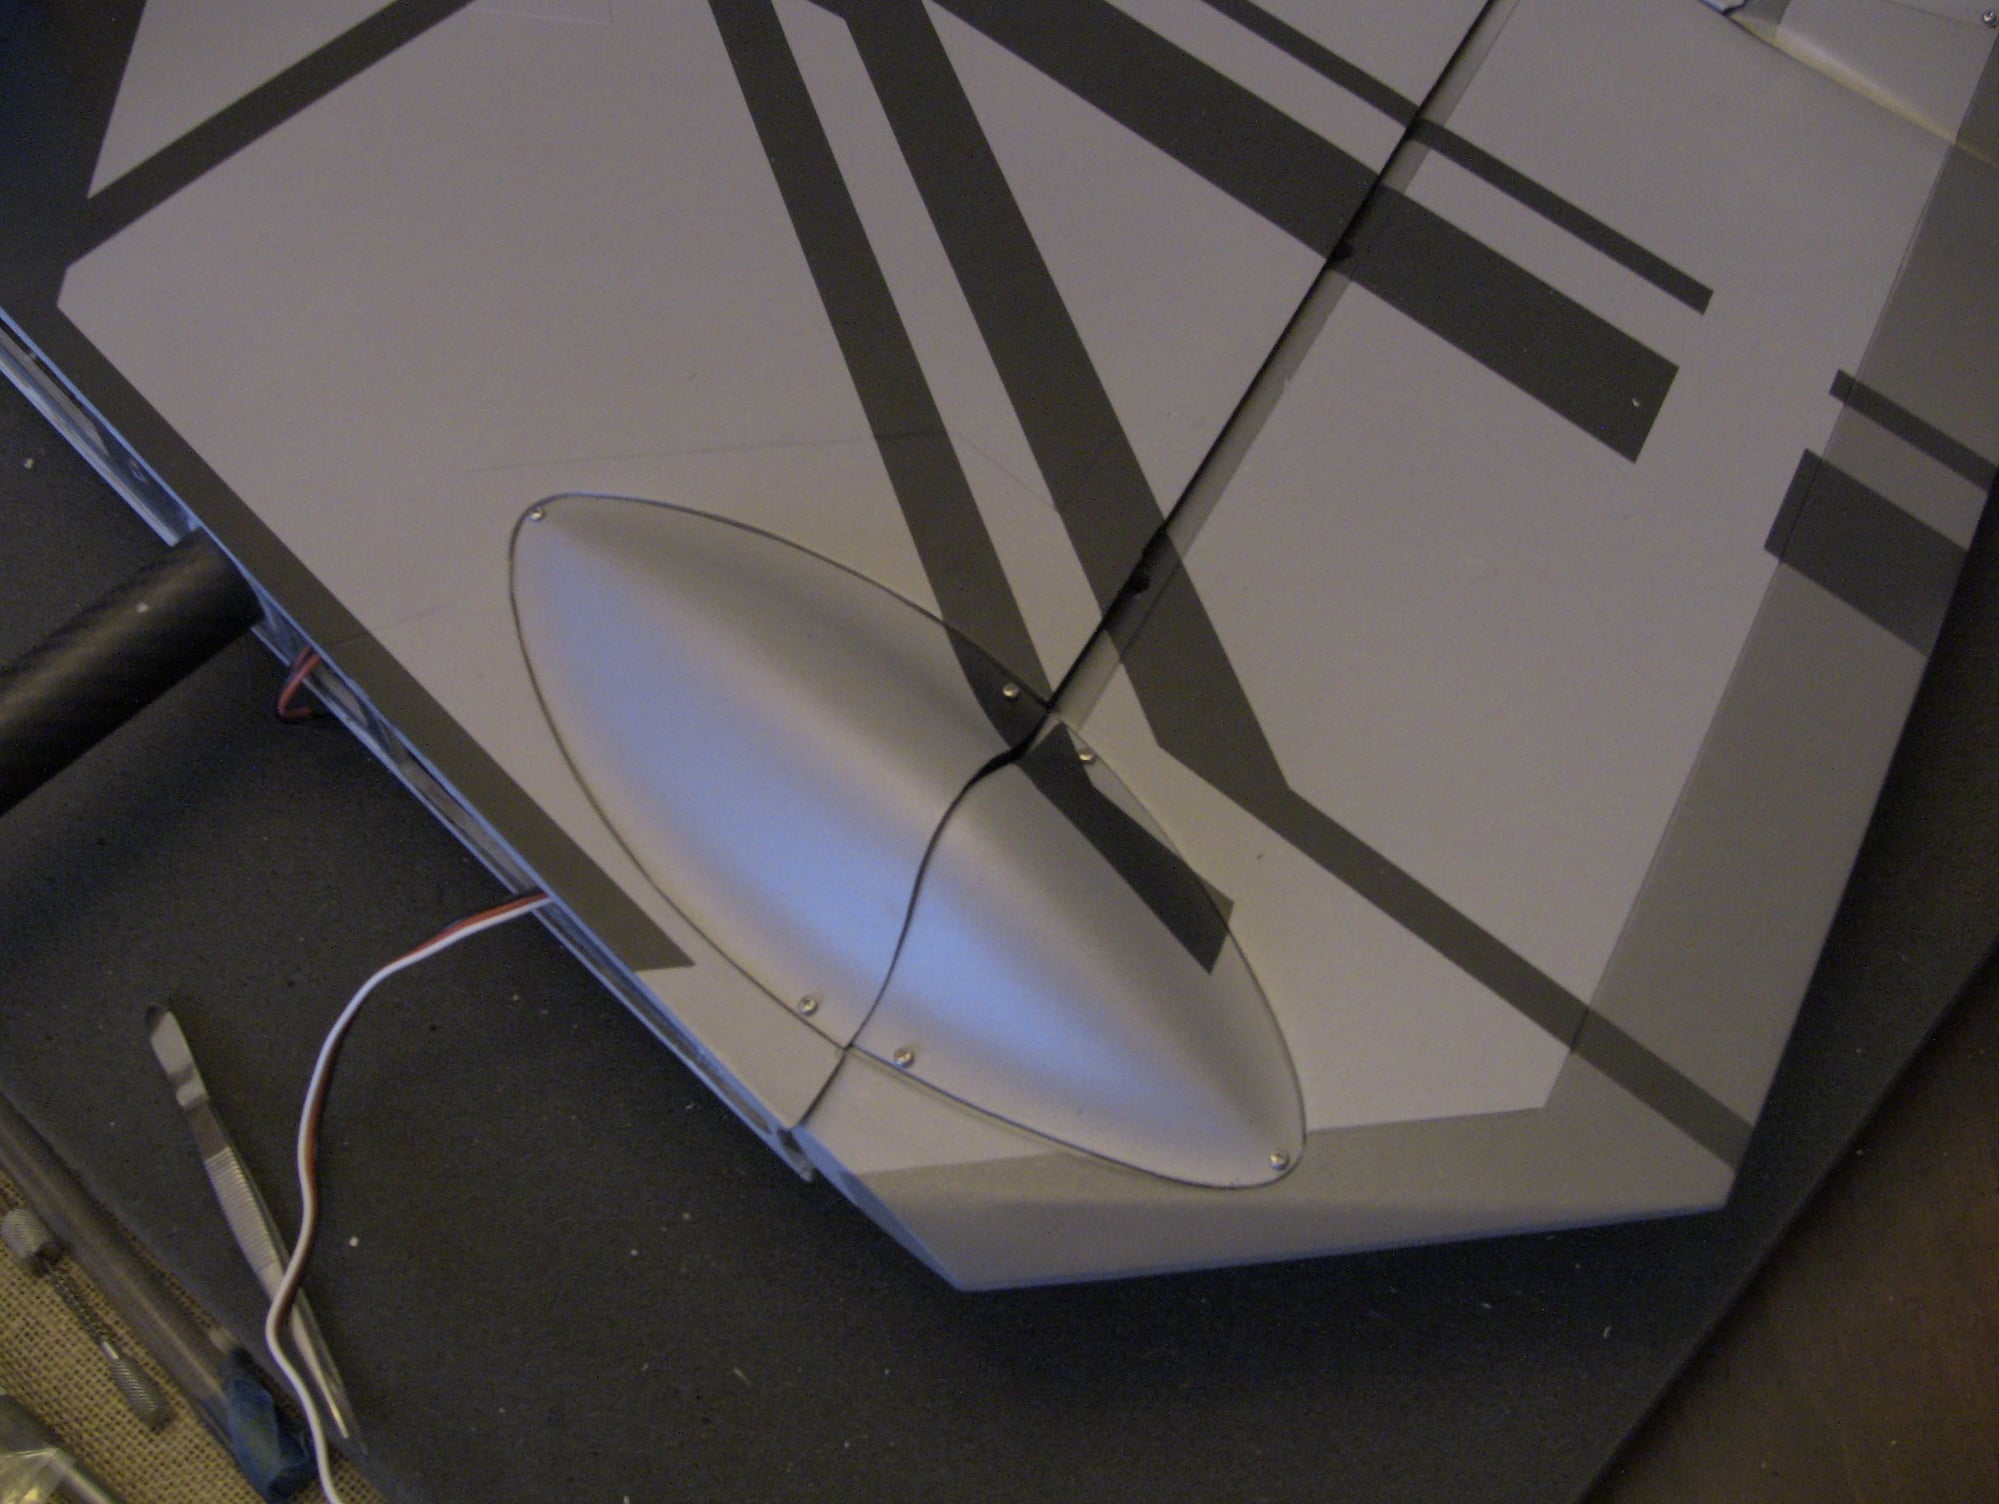
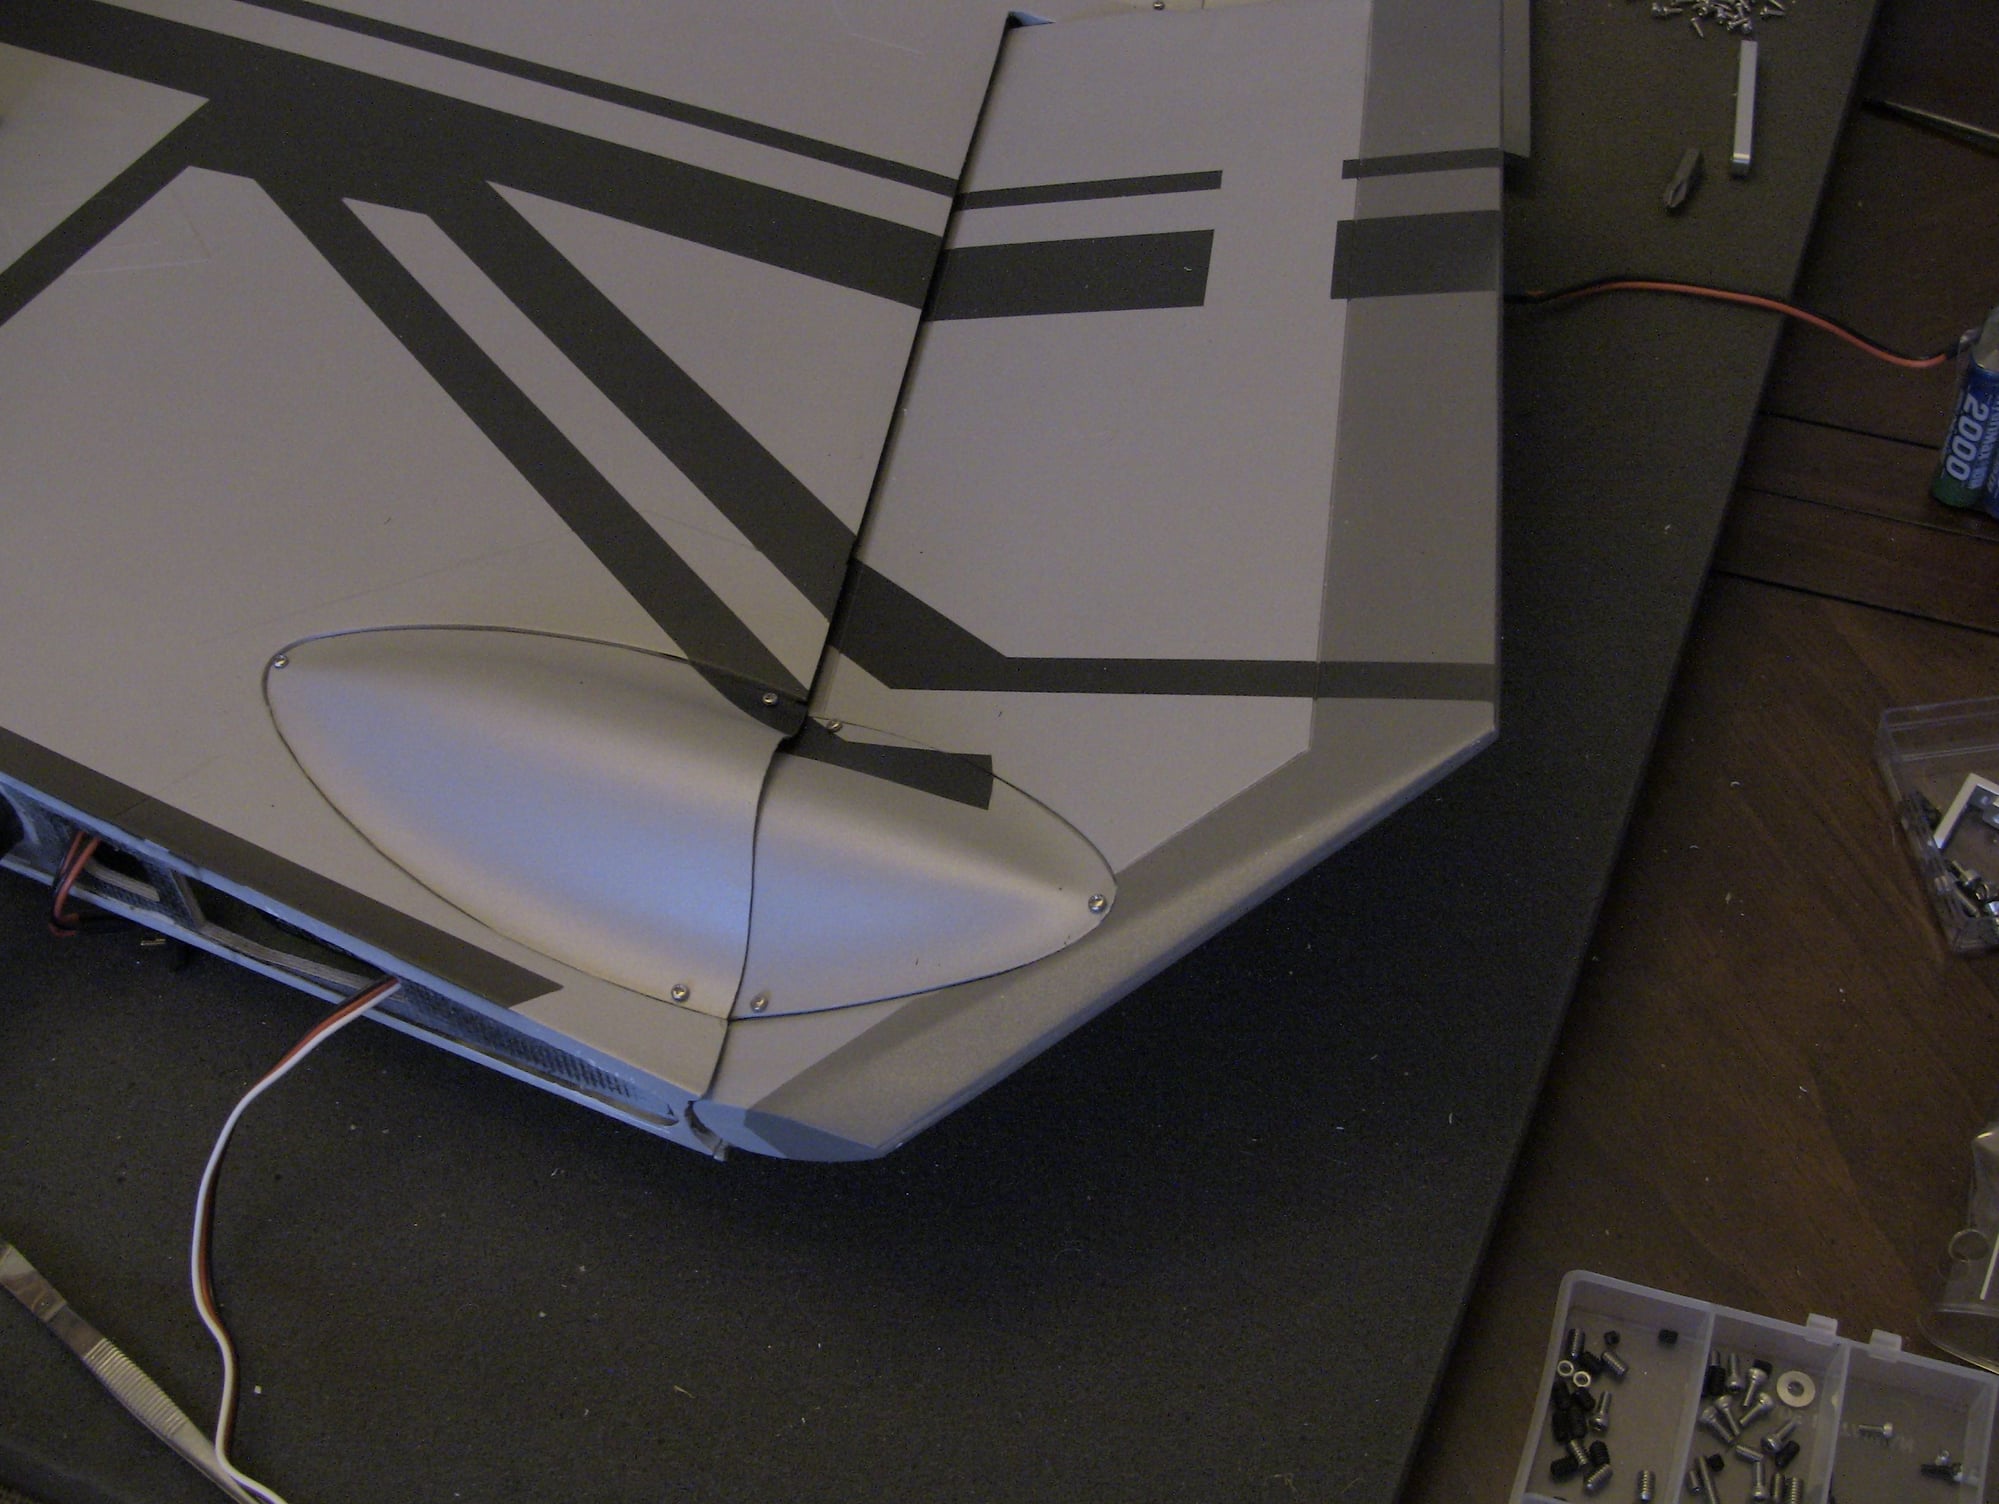
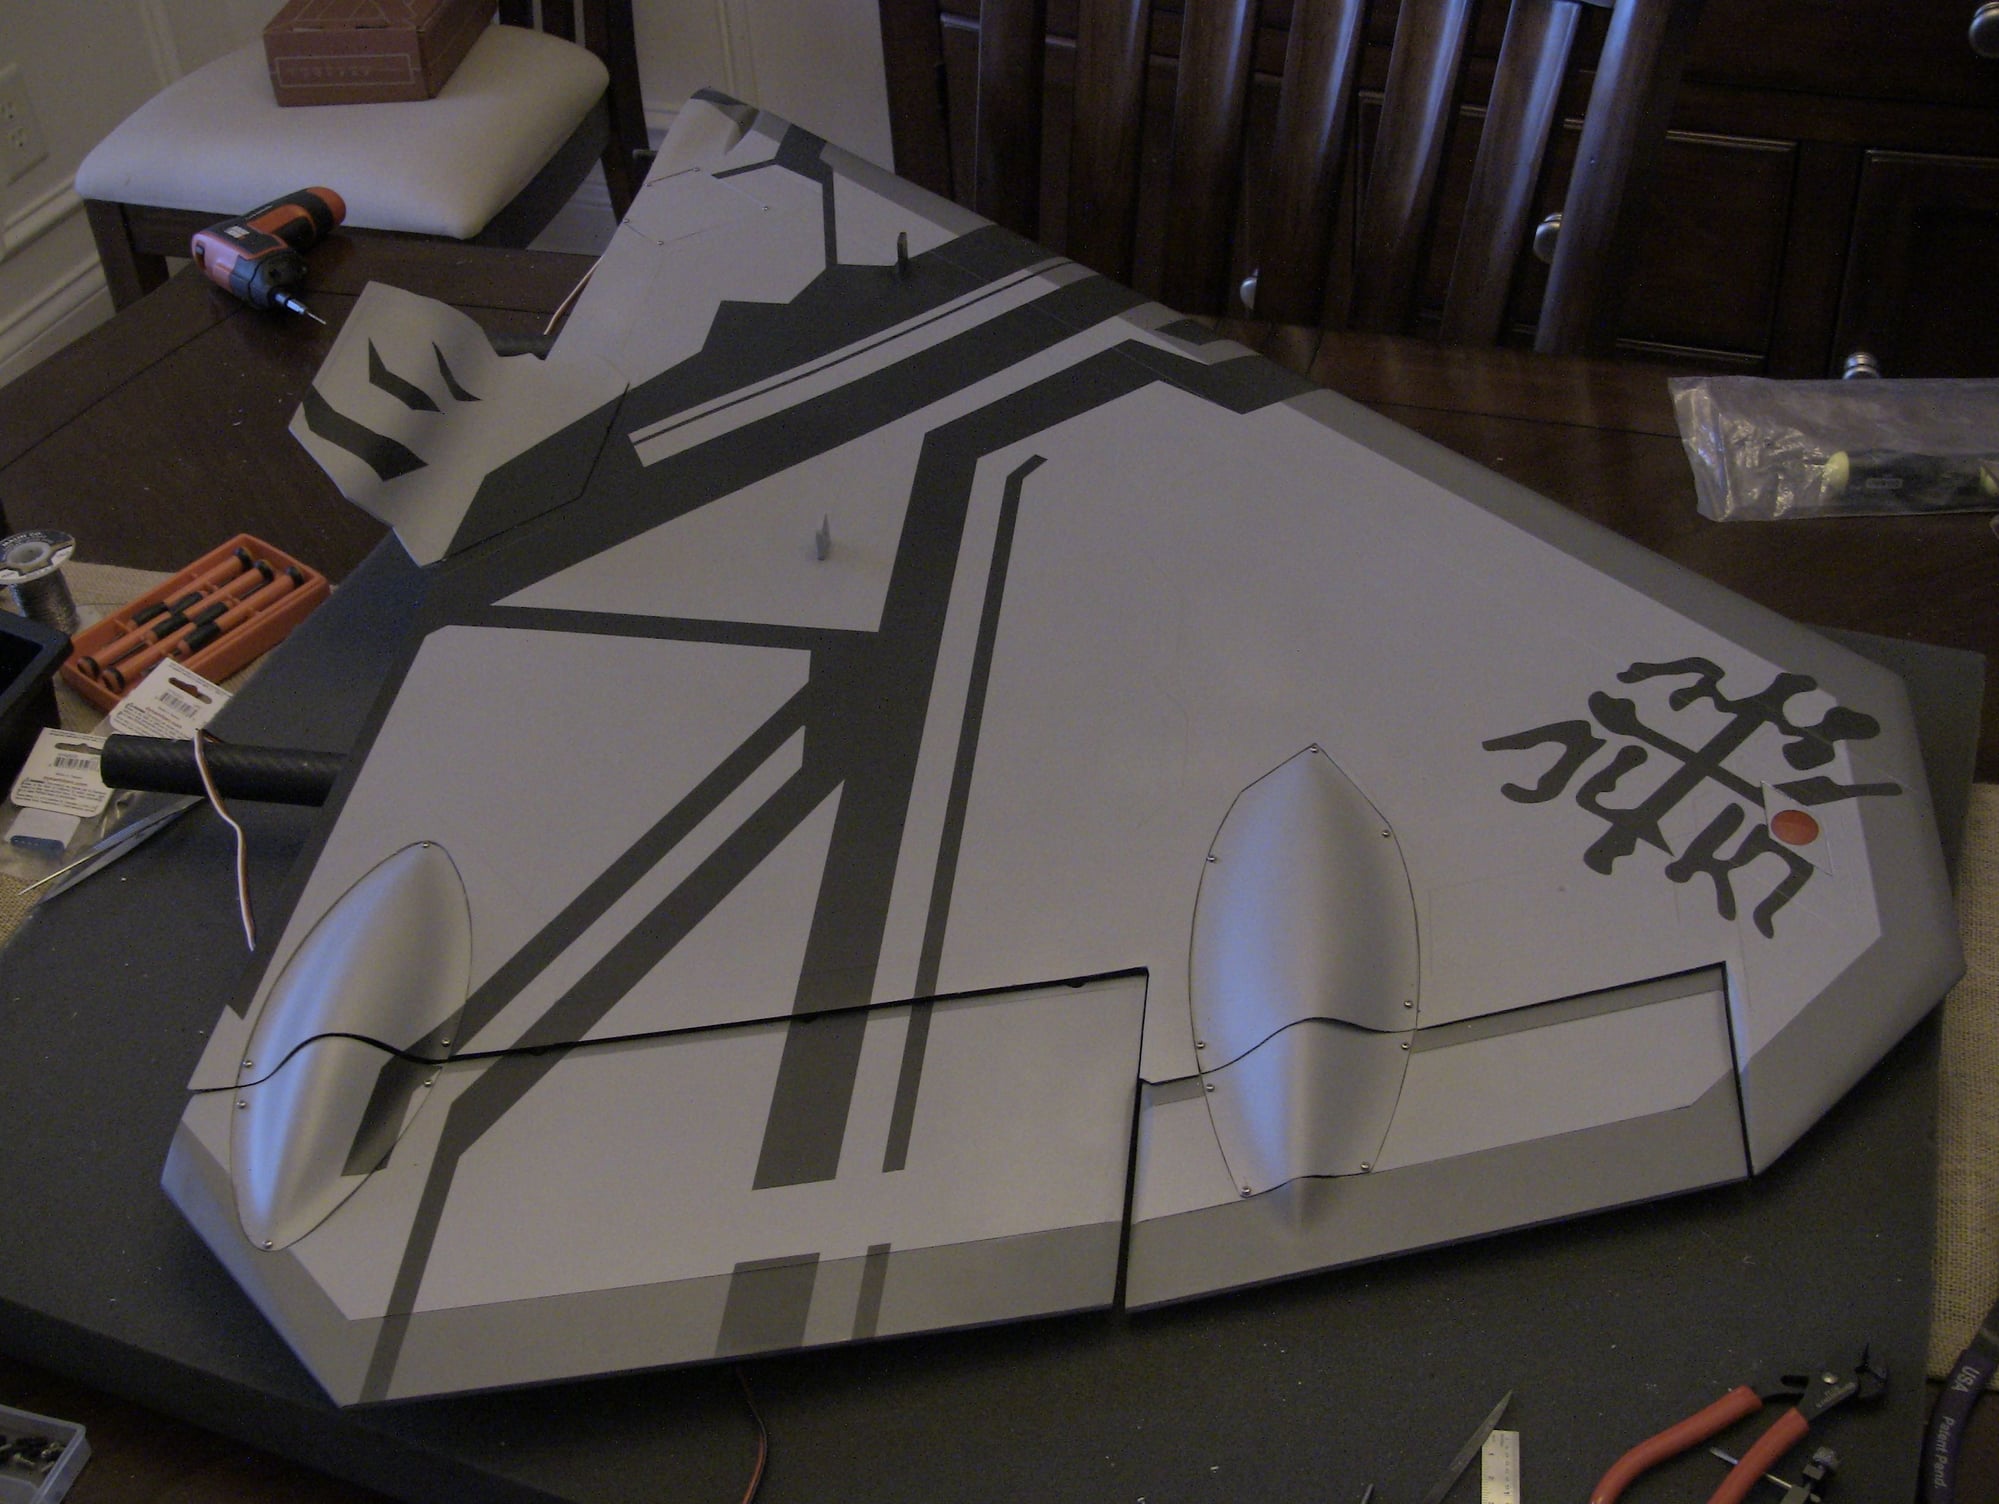
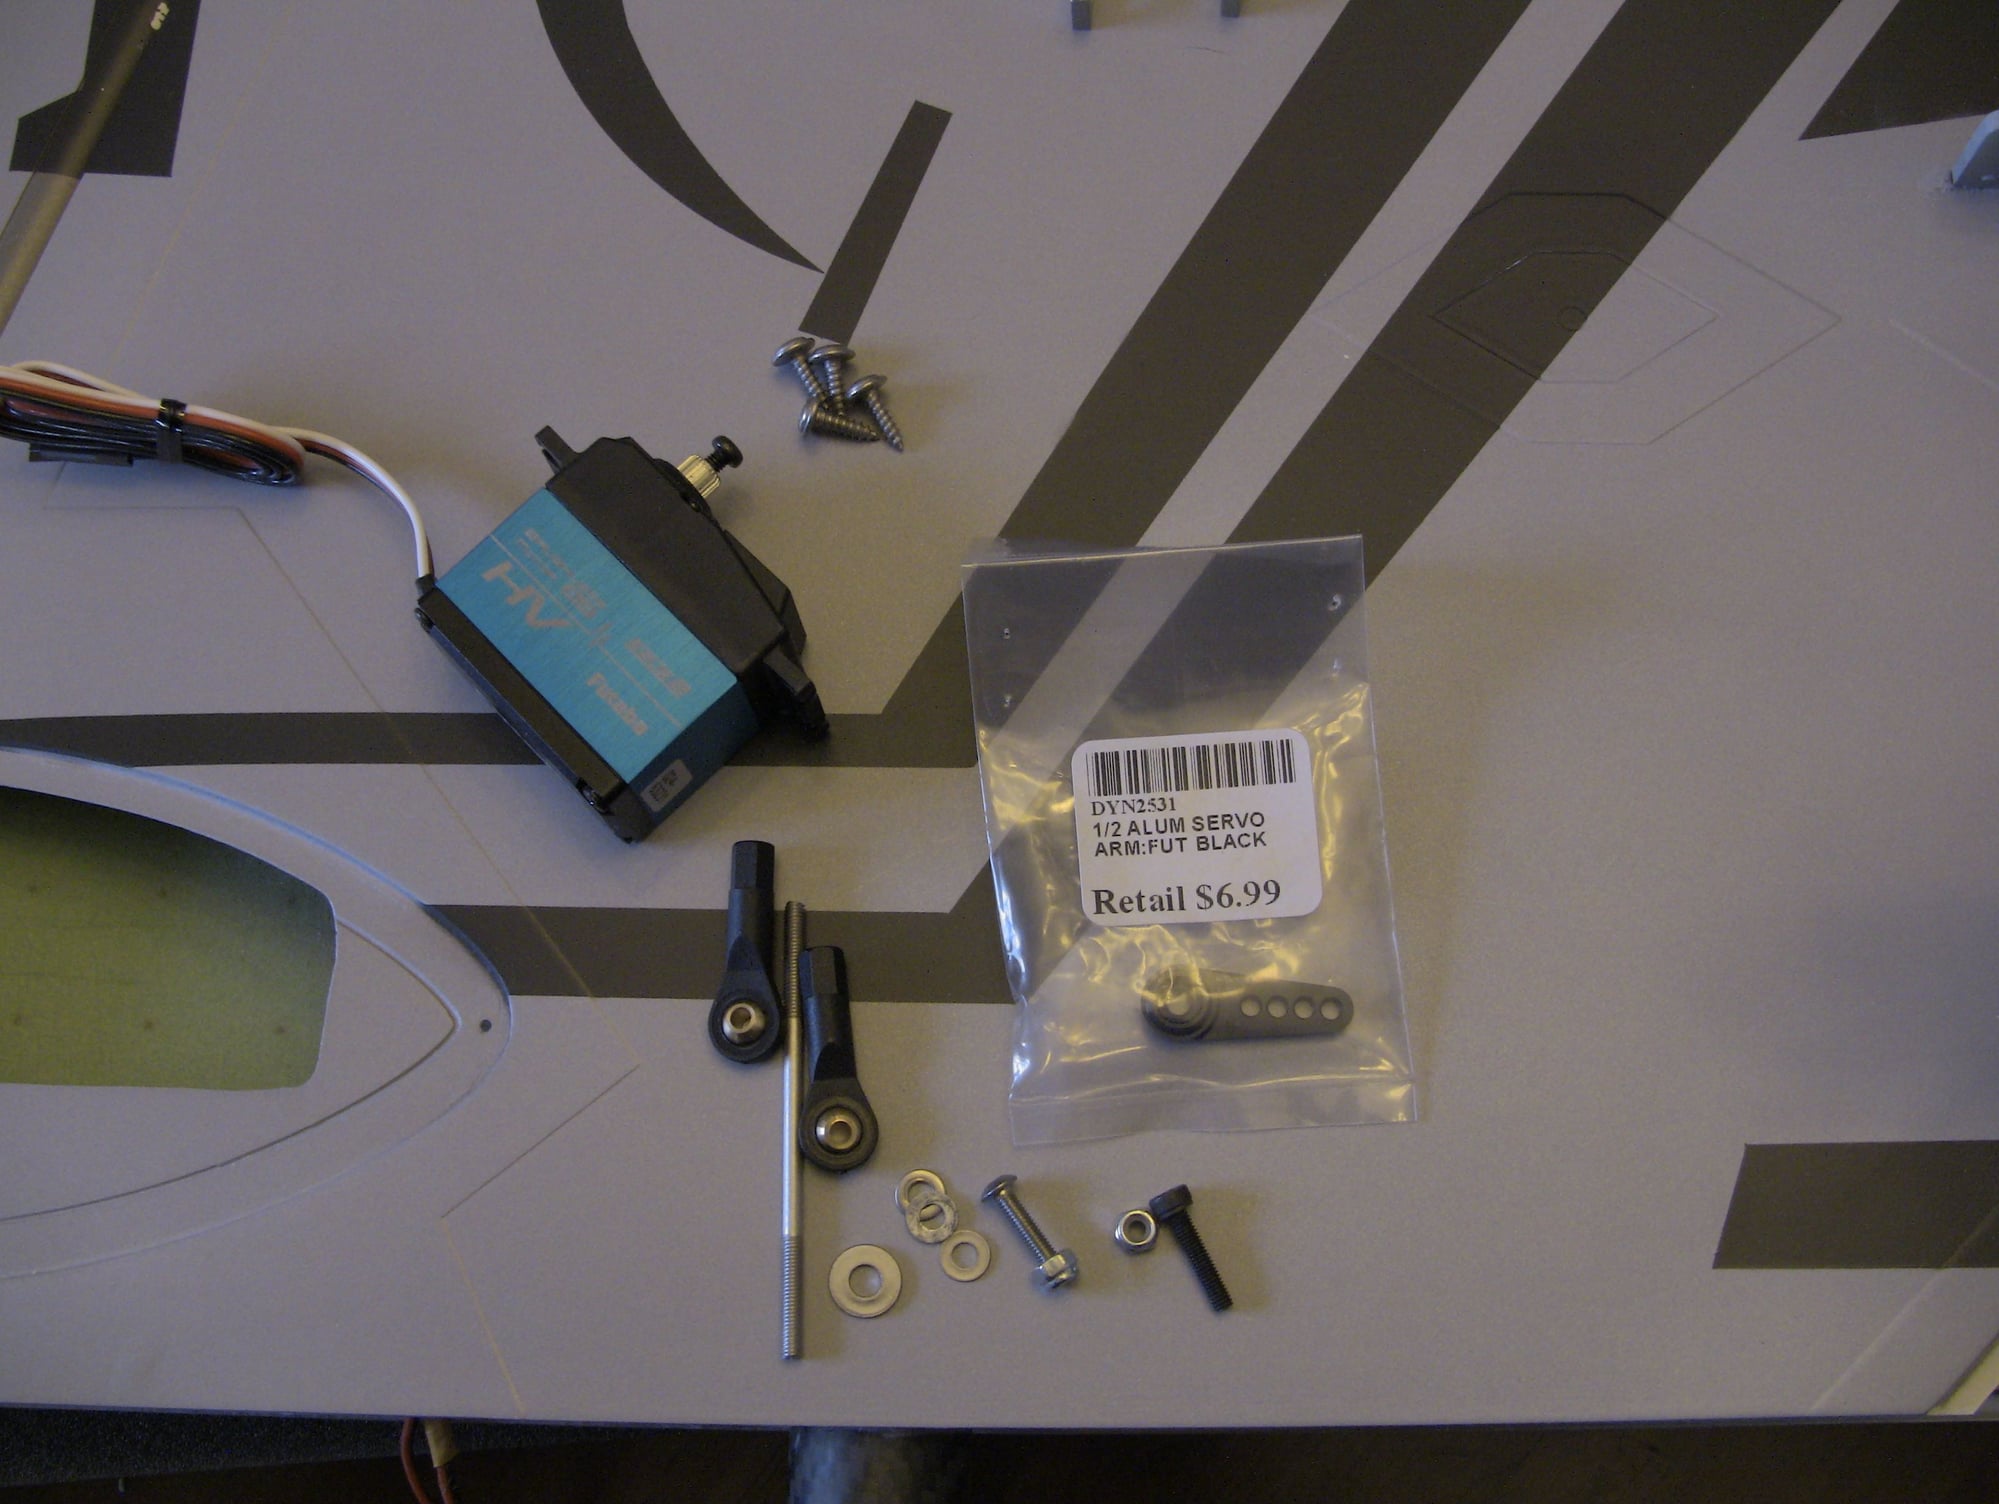
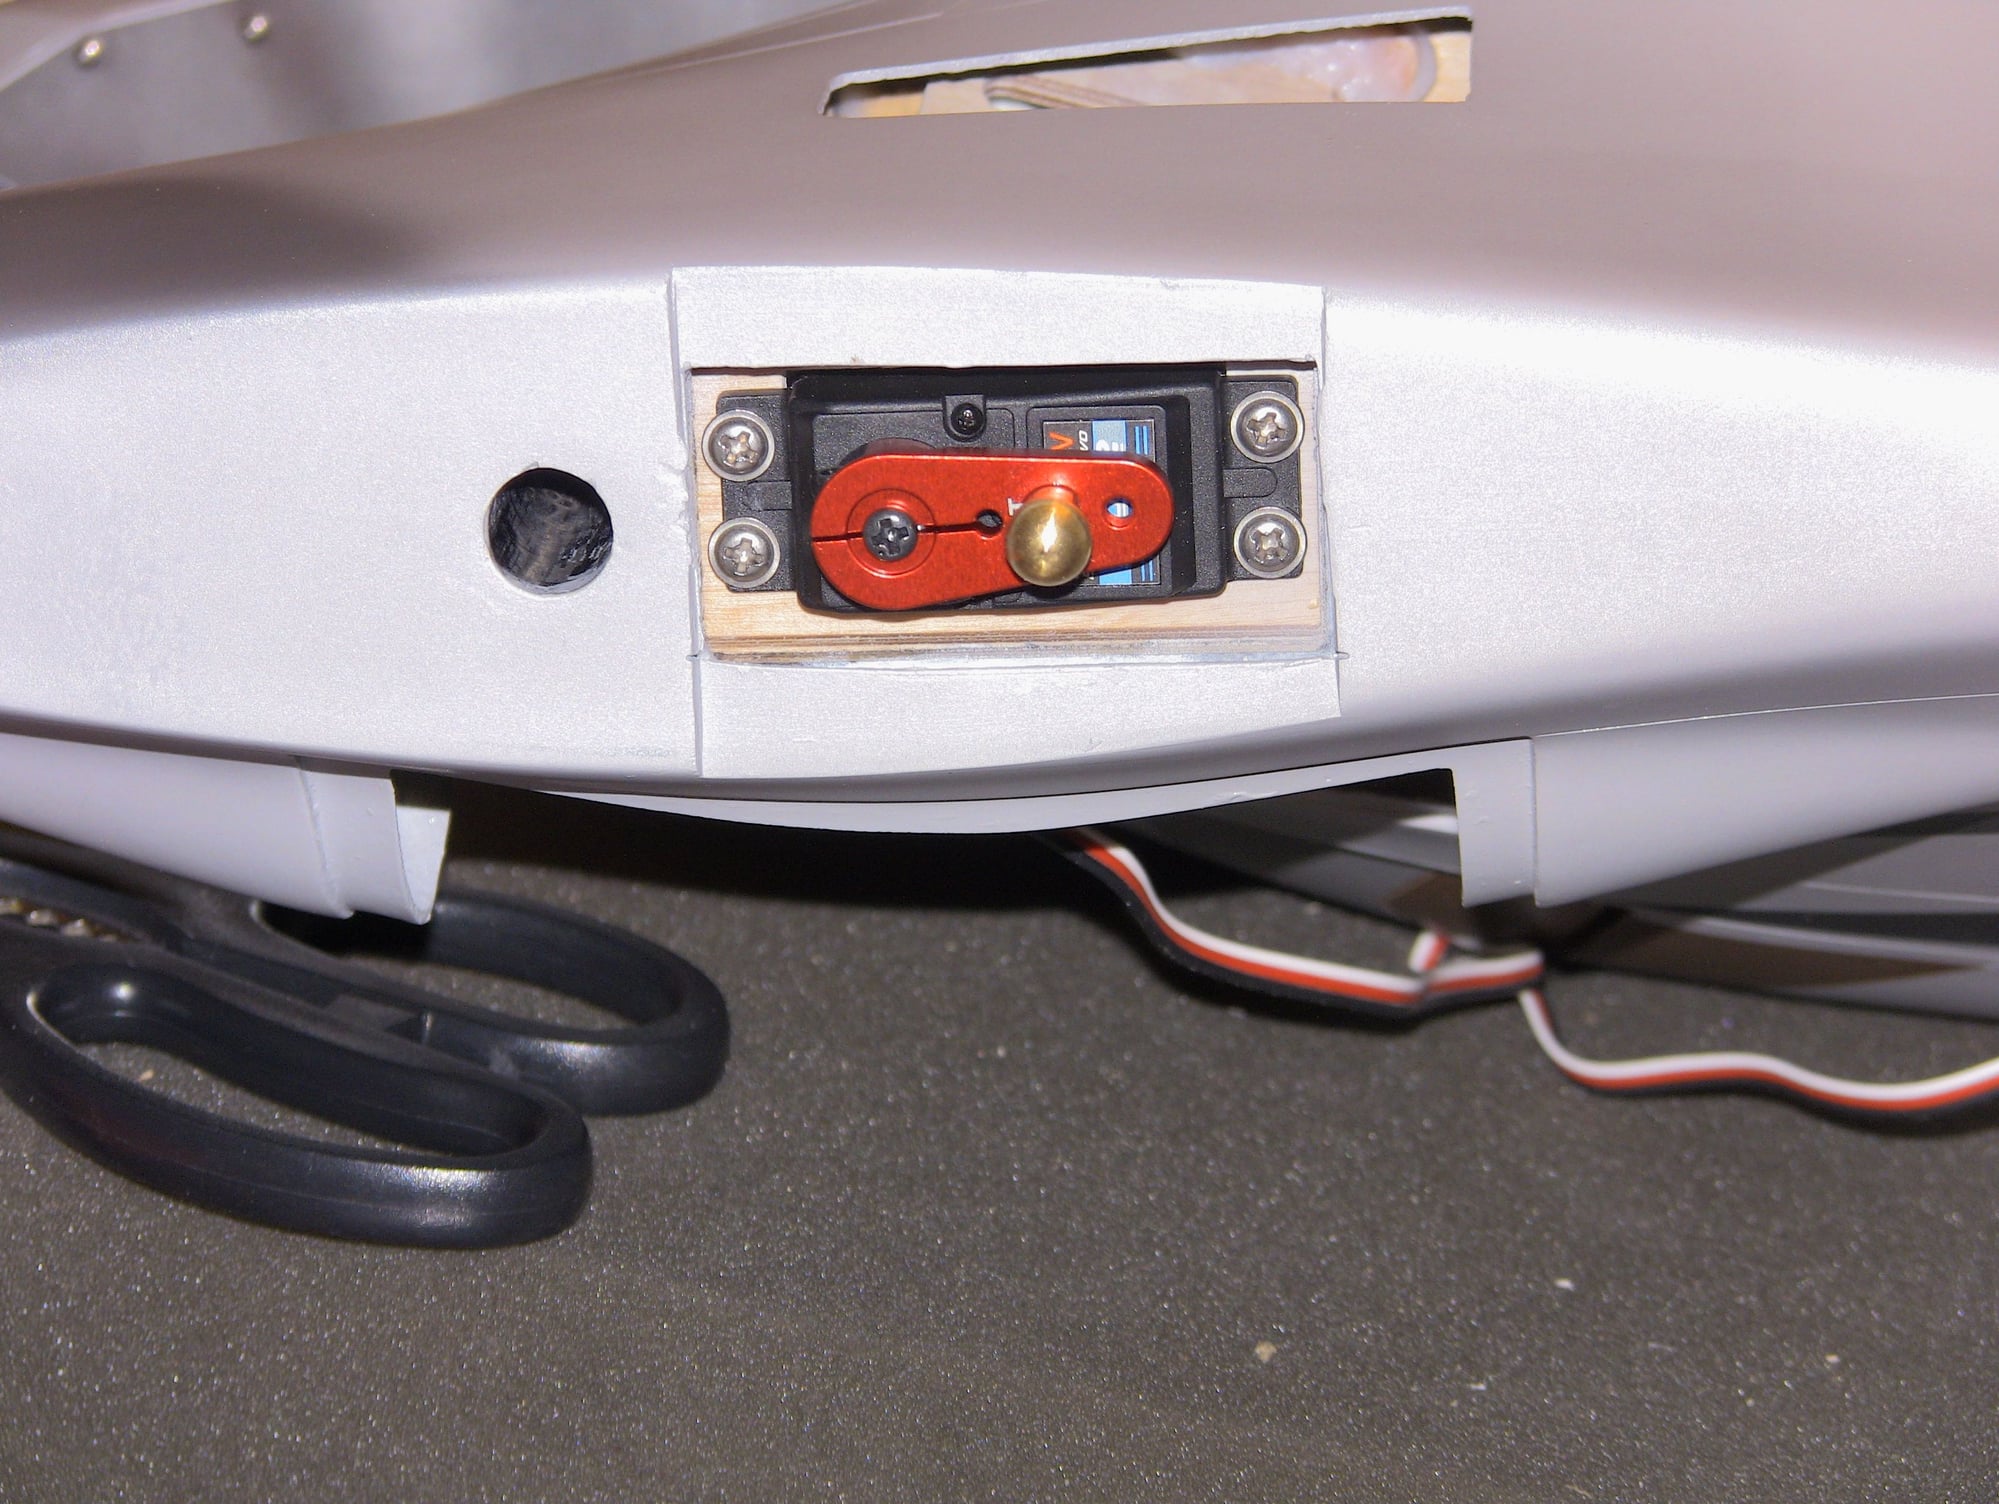
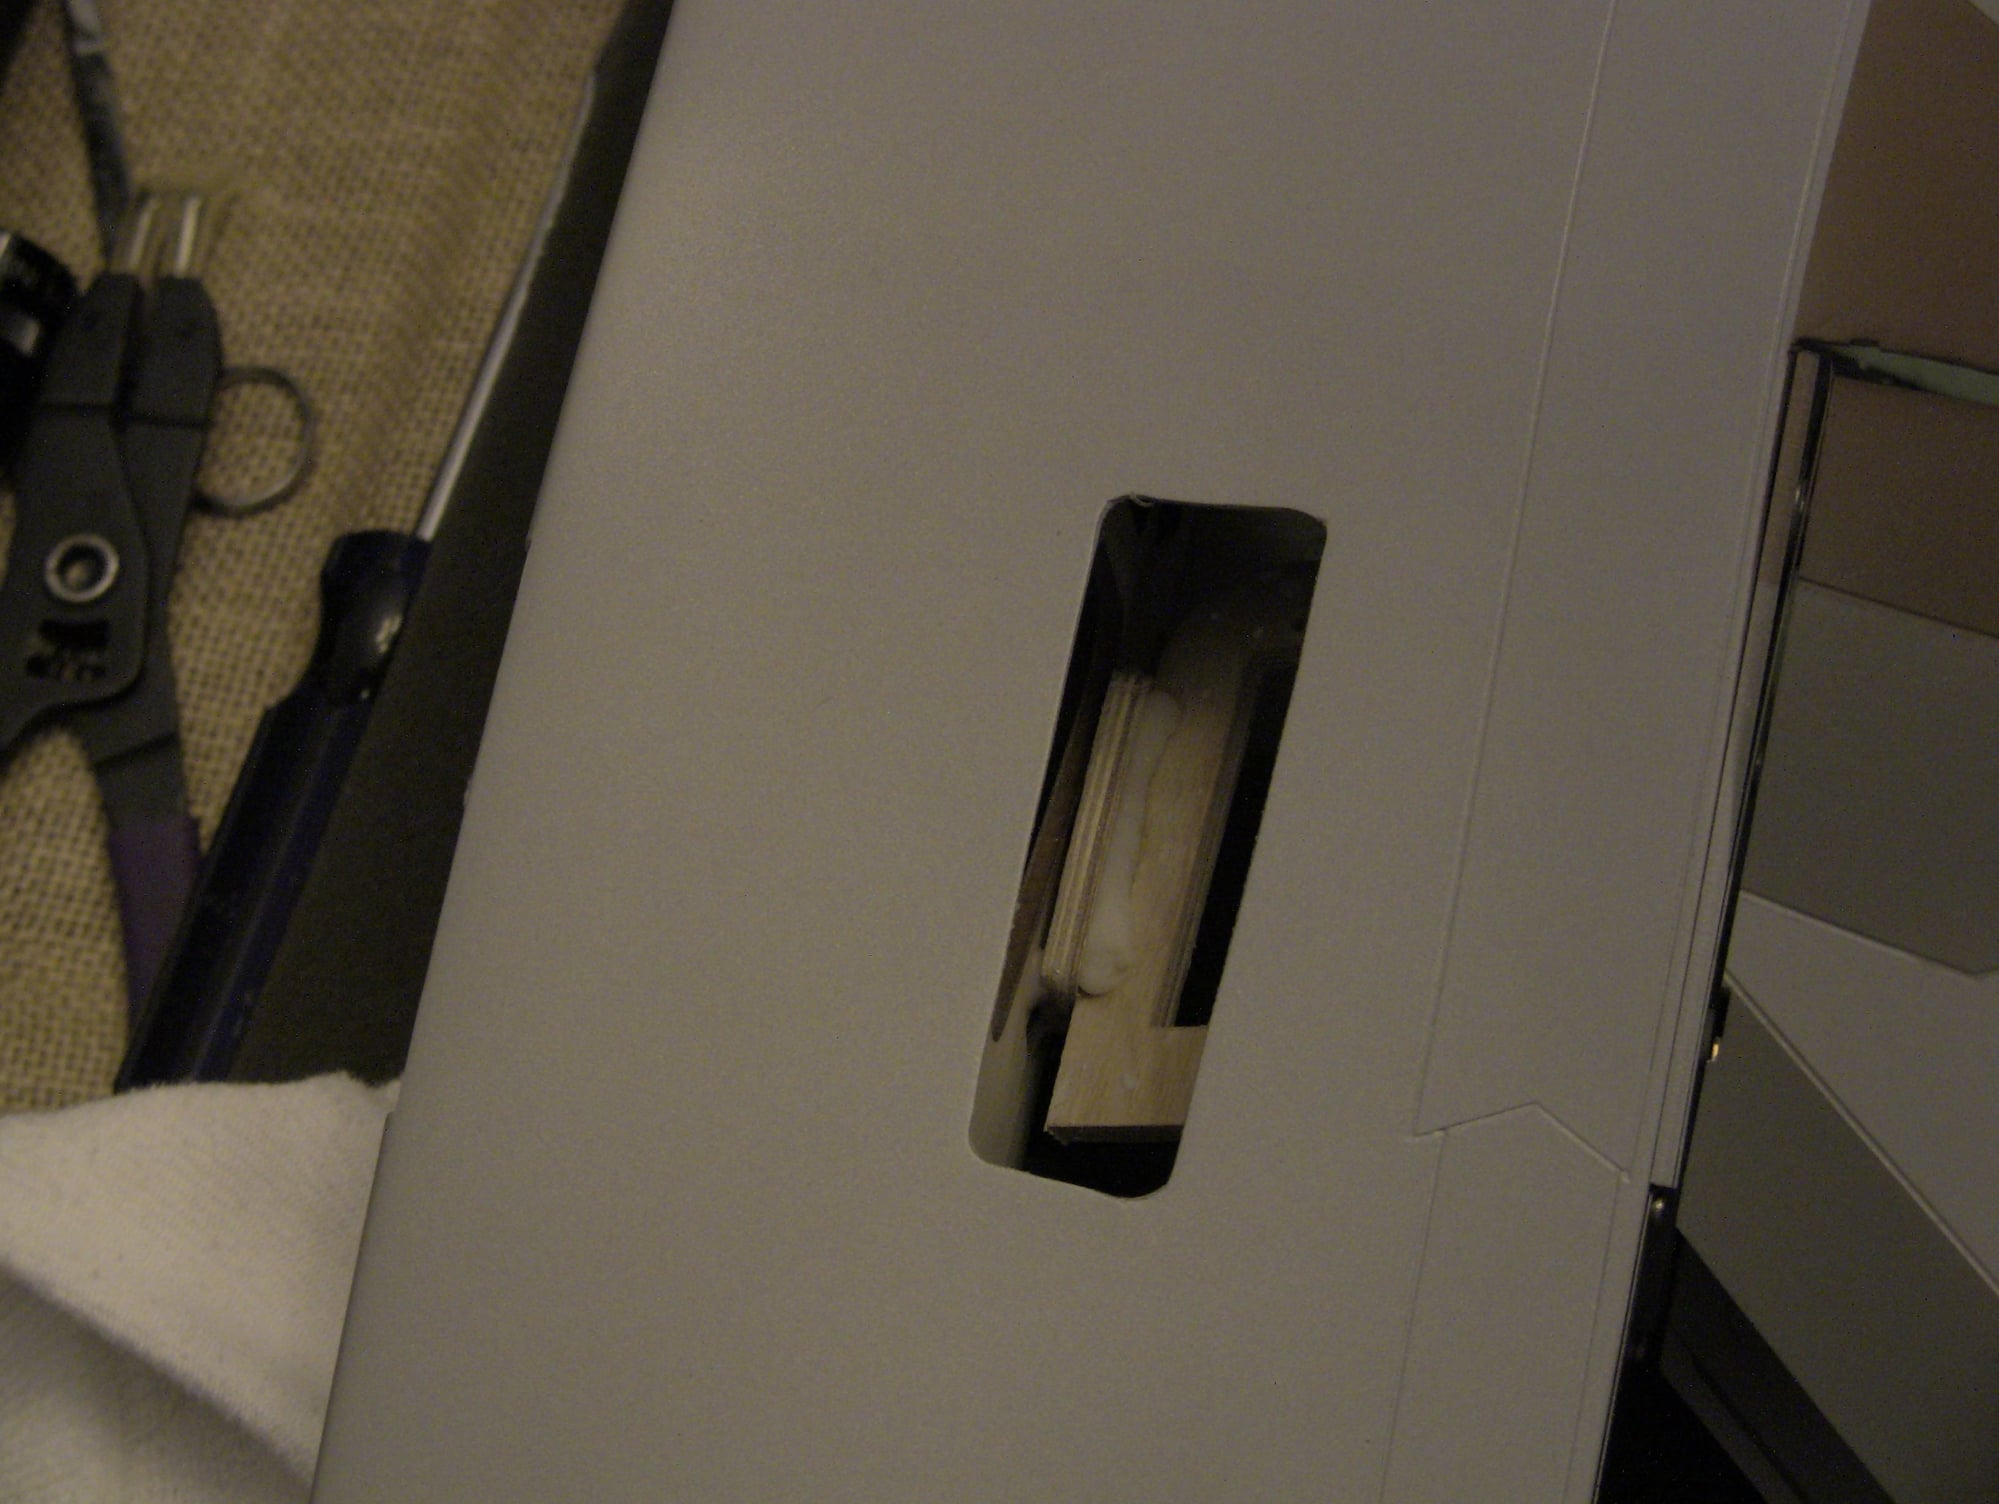
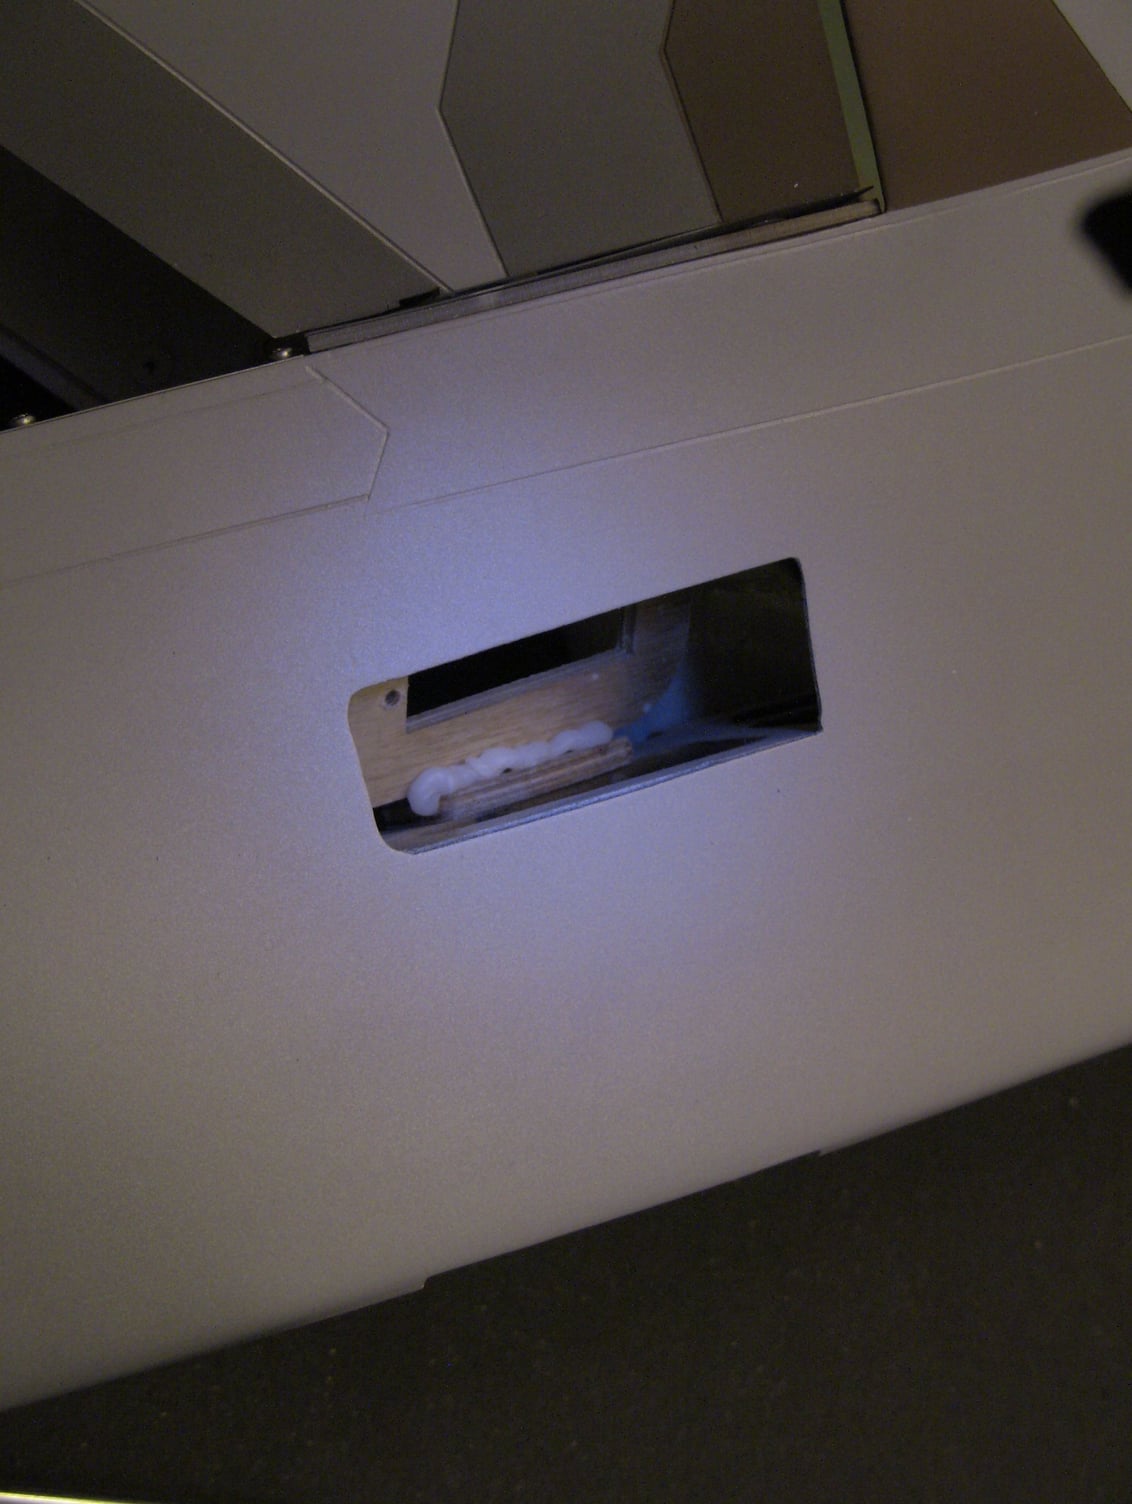
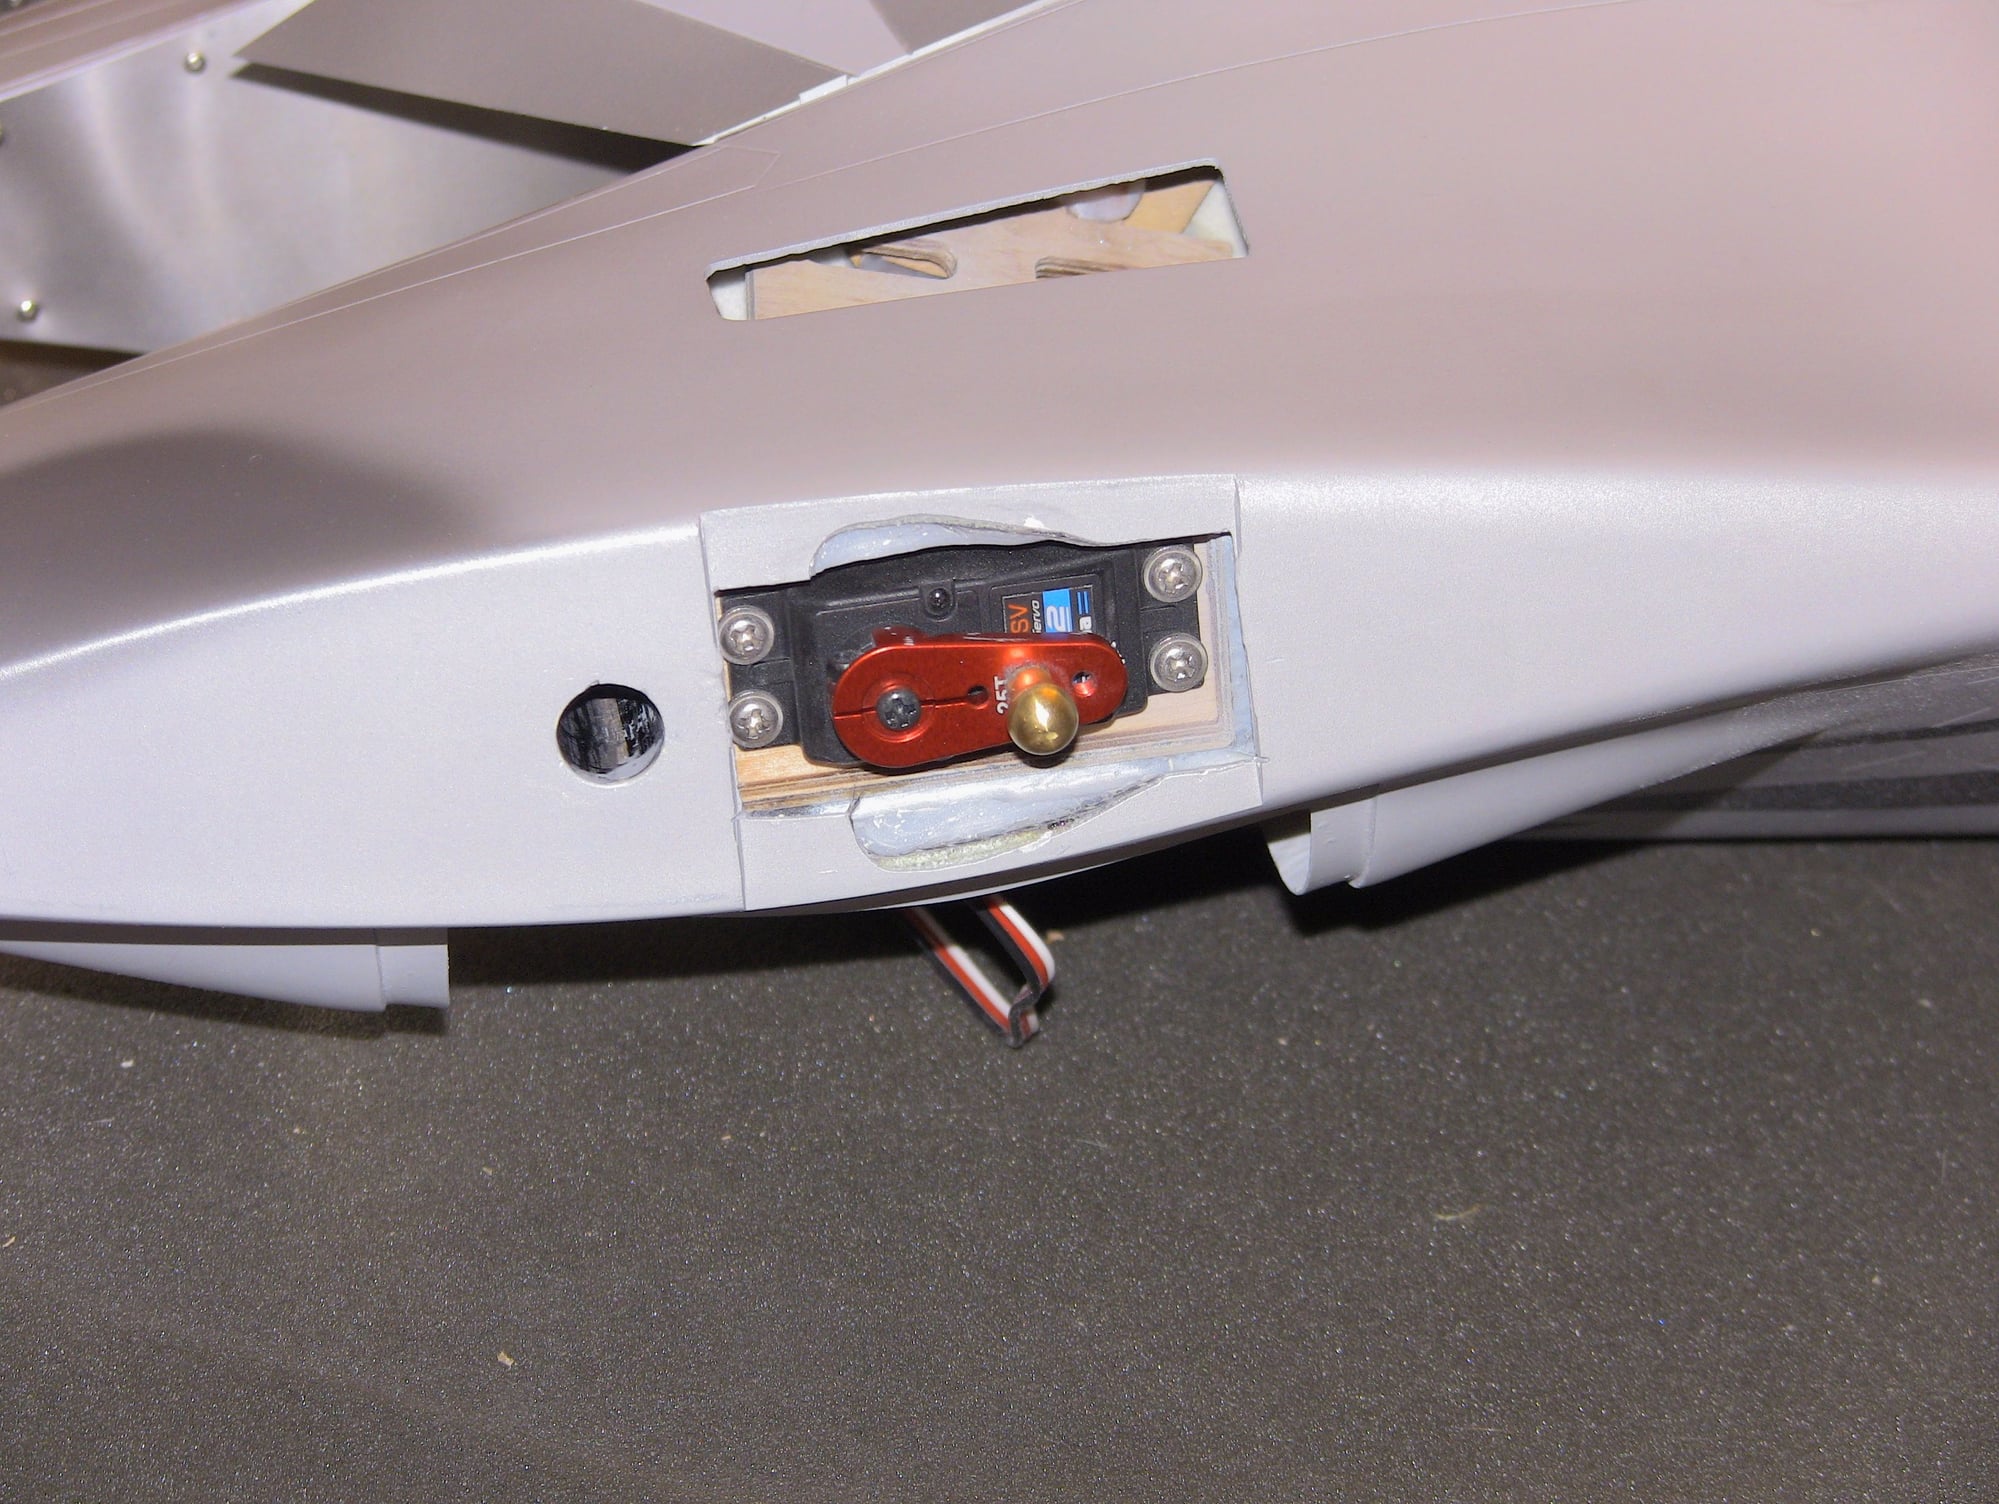
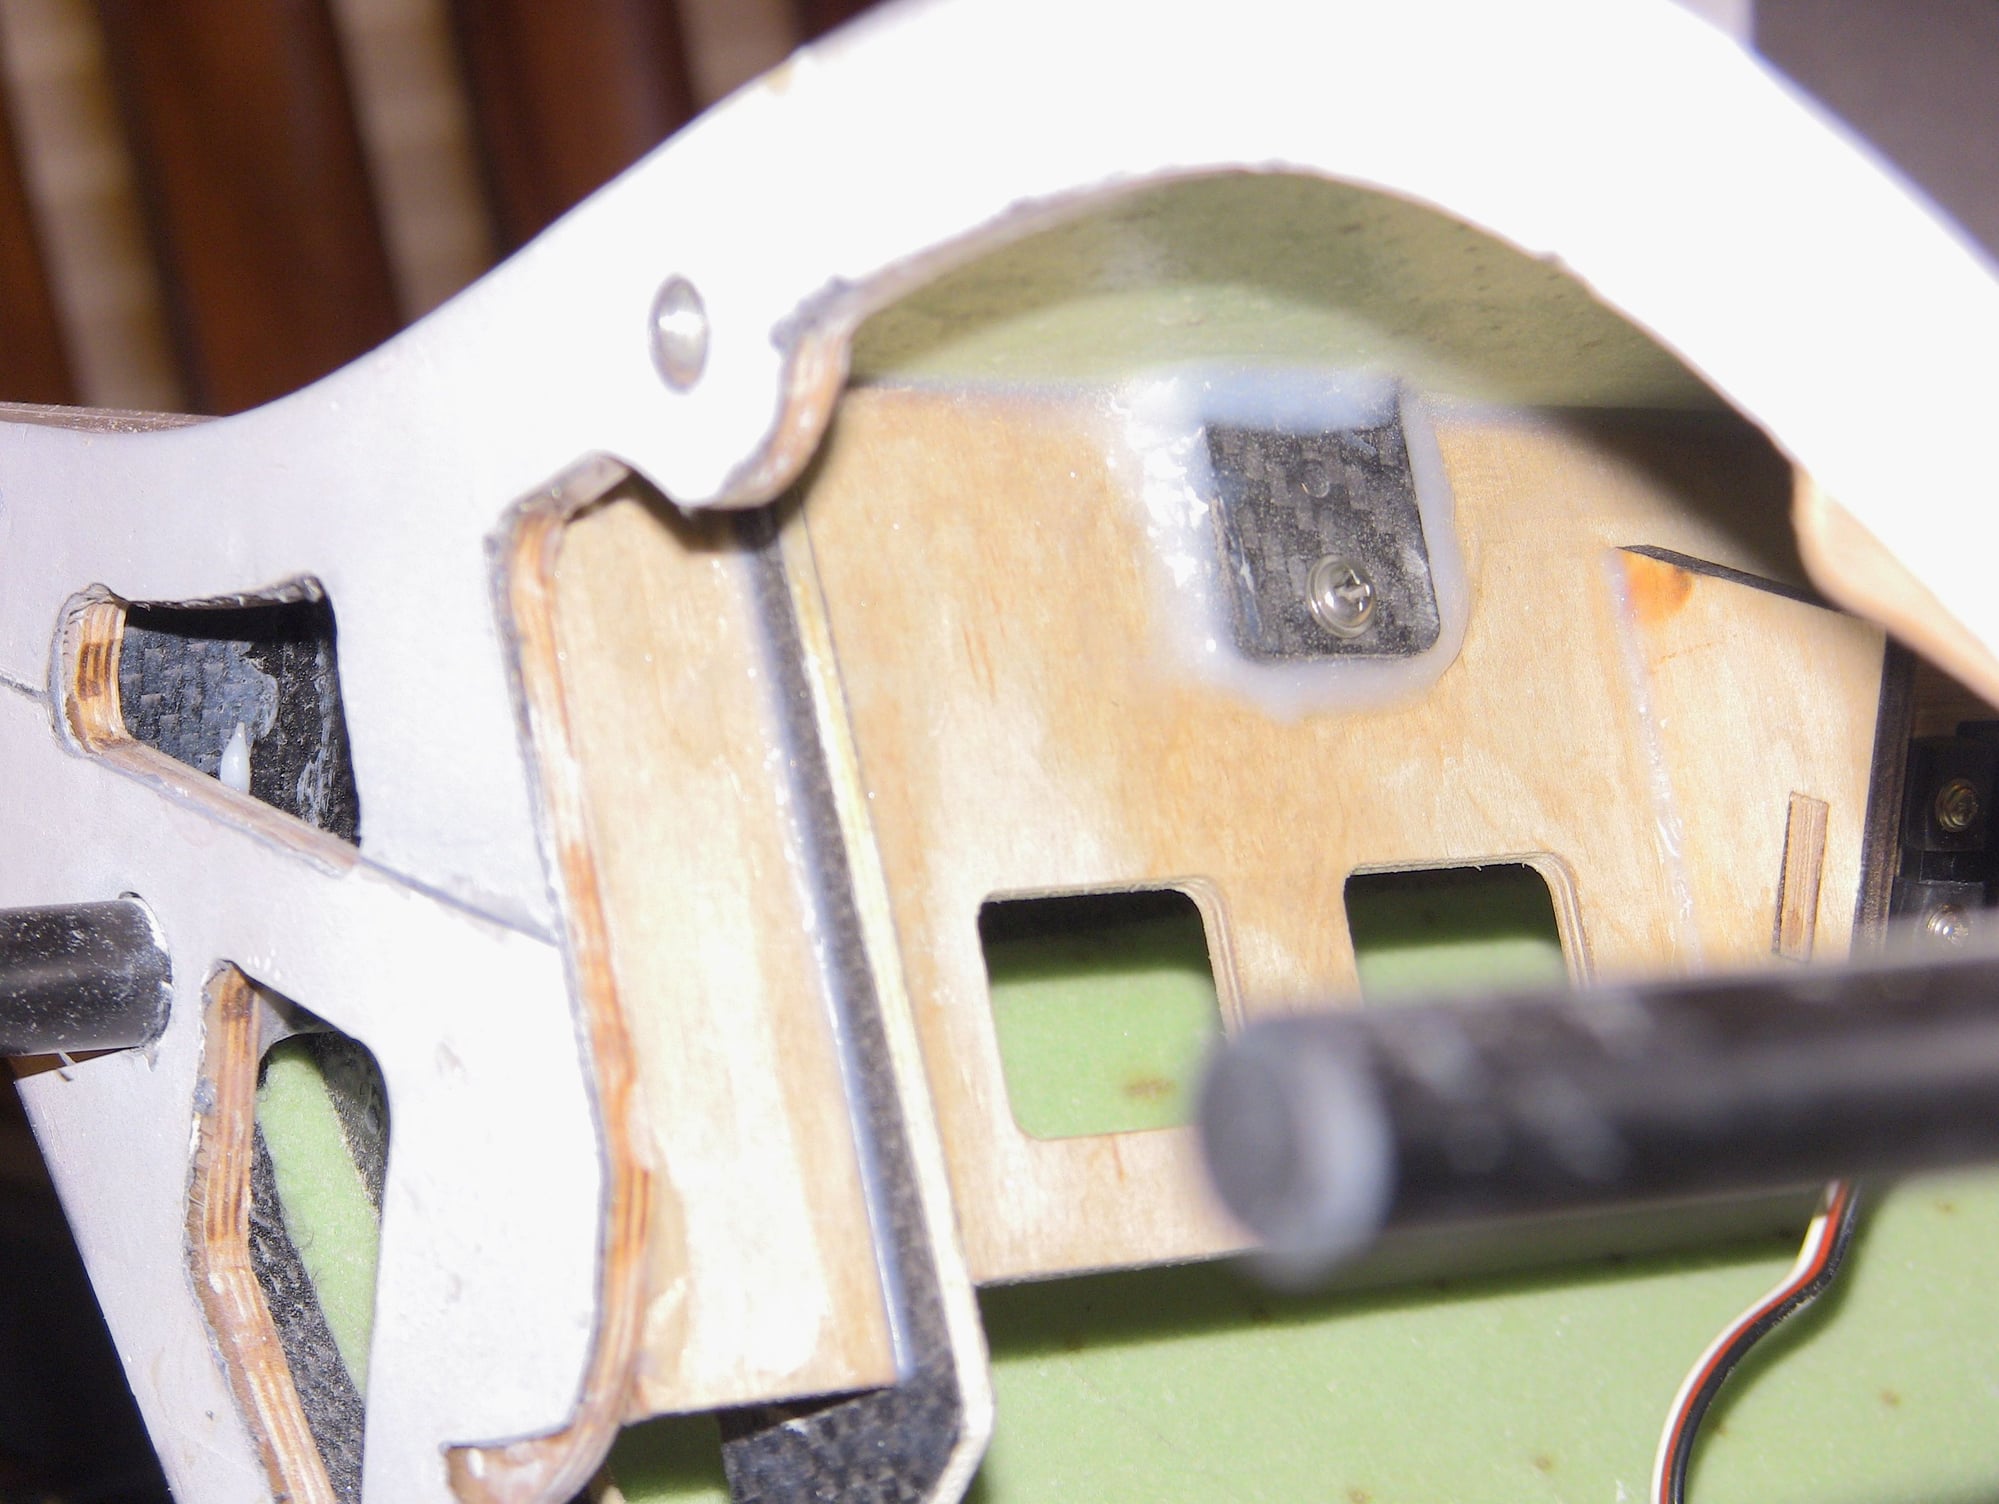
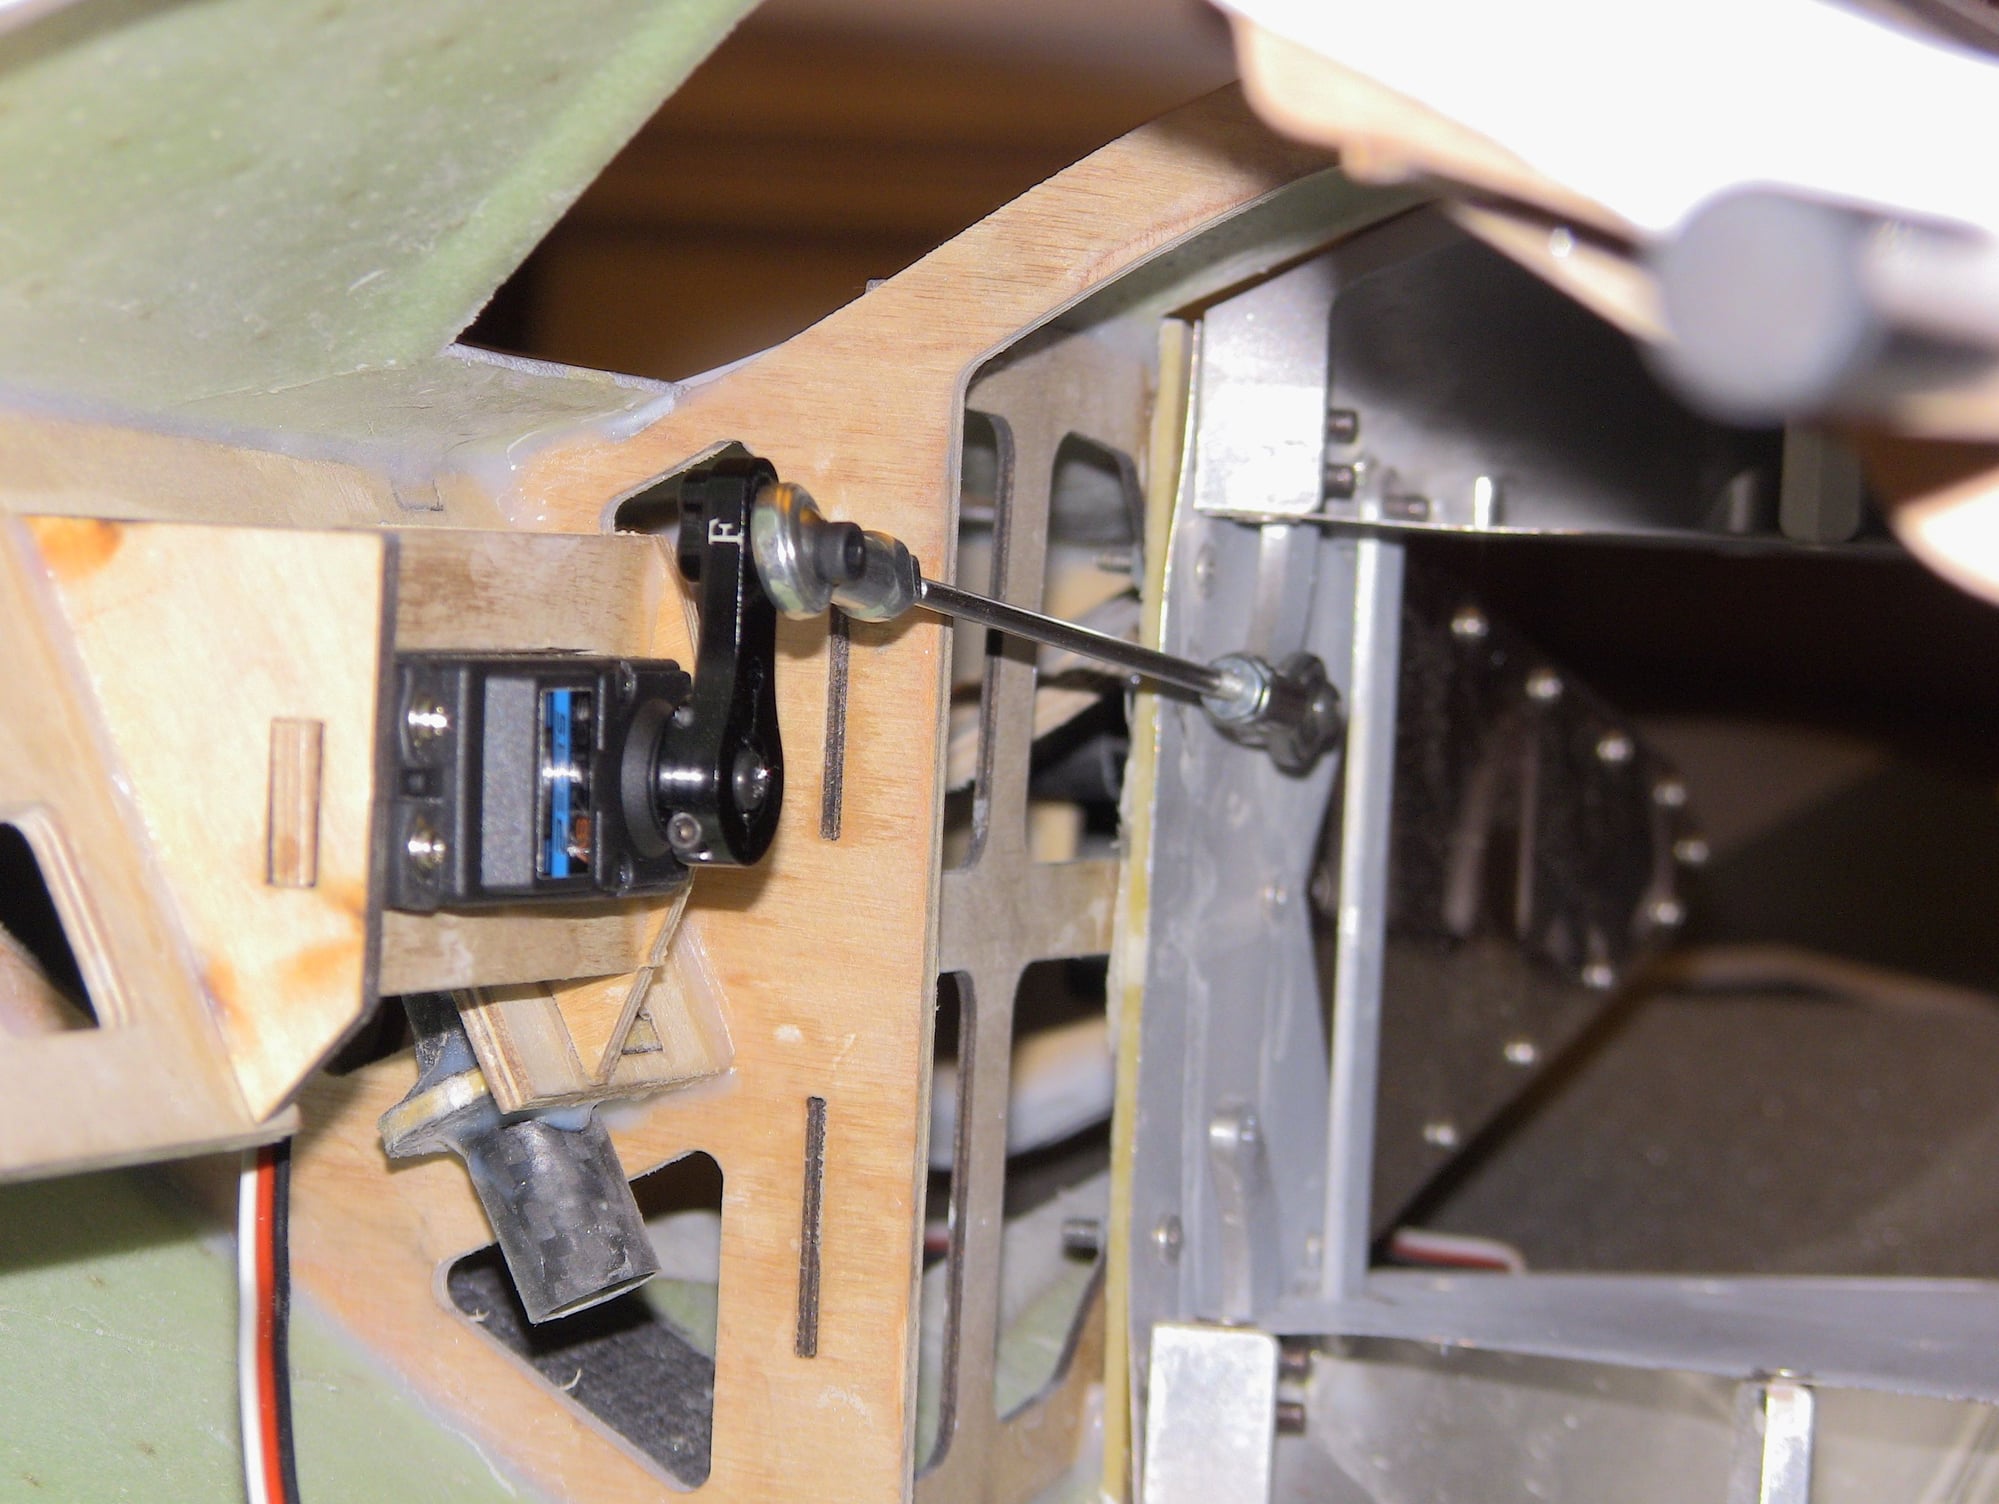
One wing is done, leading edge flap was a challenge since the two clevises were not connected. Care must be taken to connect these and add the safety clips without damaging it. Connect the outer first since is the inner has more of a gap to work with, plus you will need to adjust the clevis on on the second so the flap closes all the way. I opted for L brackets but after seeing others you can do wood blocks, but based on the design and the ply plate I think the L brackets is what you should go with just use short screws. I will say the only bad thing about the bell crank system is if something breaks you cannot fix it without cutting into the wing. Nest was the aileron servo, you will have to clean up the hysol so the T brackets fit as needed but straight forward install. The last servo is the trailing edge flap, very hard to get the servo screws in but its doable. I used my own control rod since the stock is too short unless i missed something. I setup up everything with as short as possible servo arms to use as much of the servo travel as possible.

Careful not to drill through the top of your wing

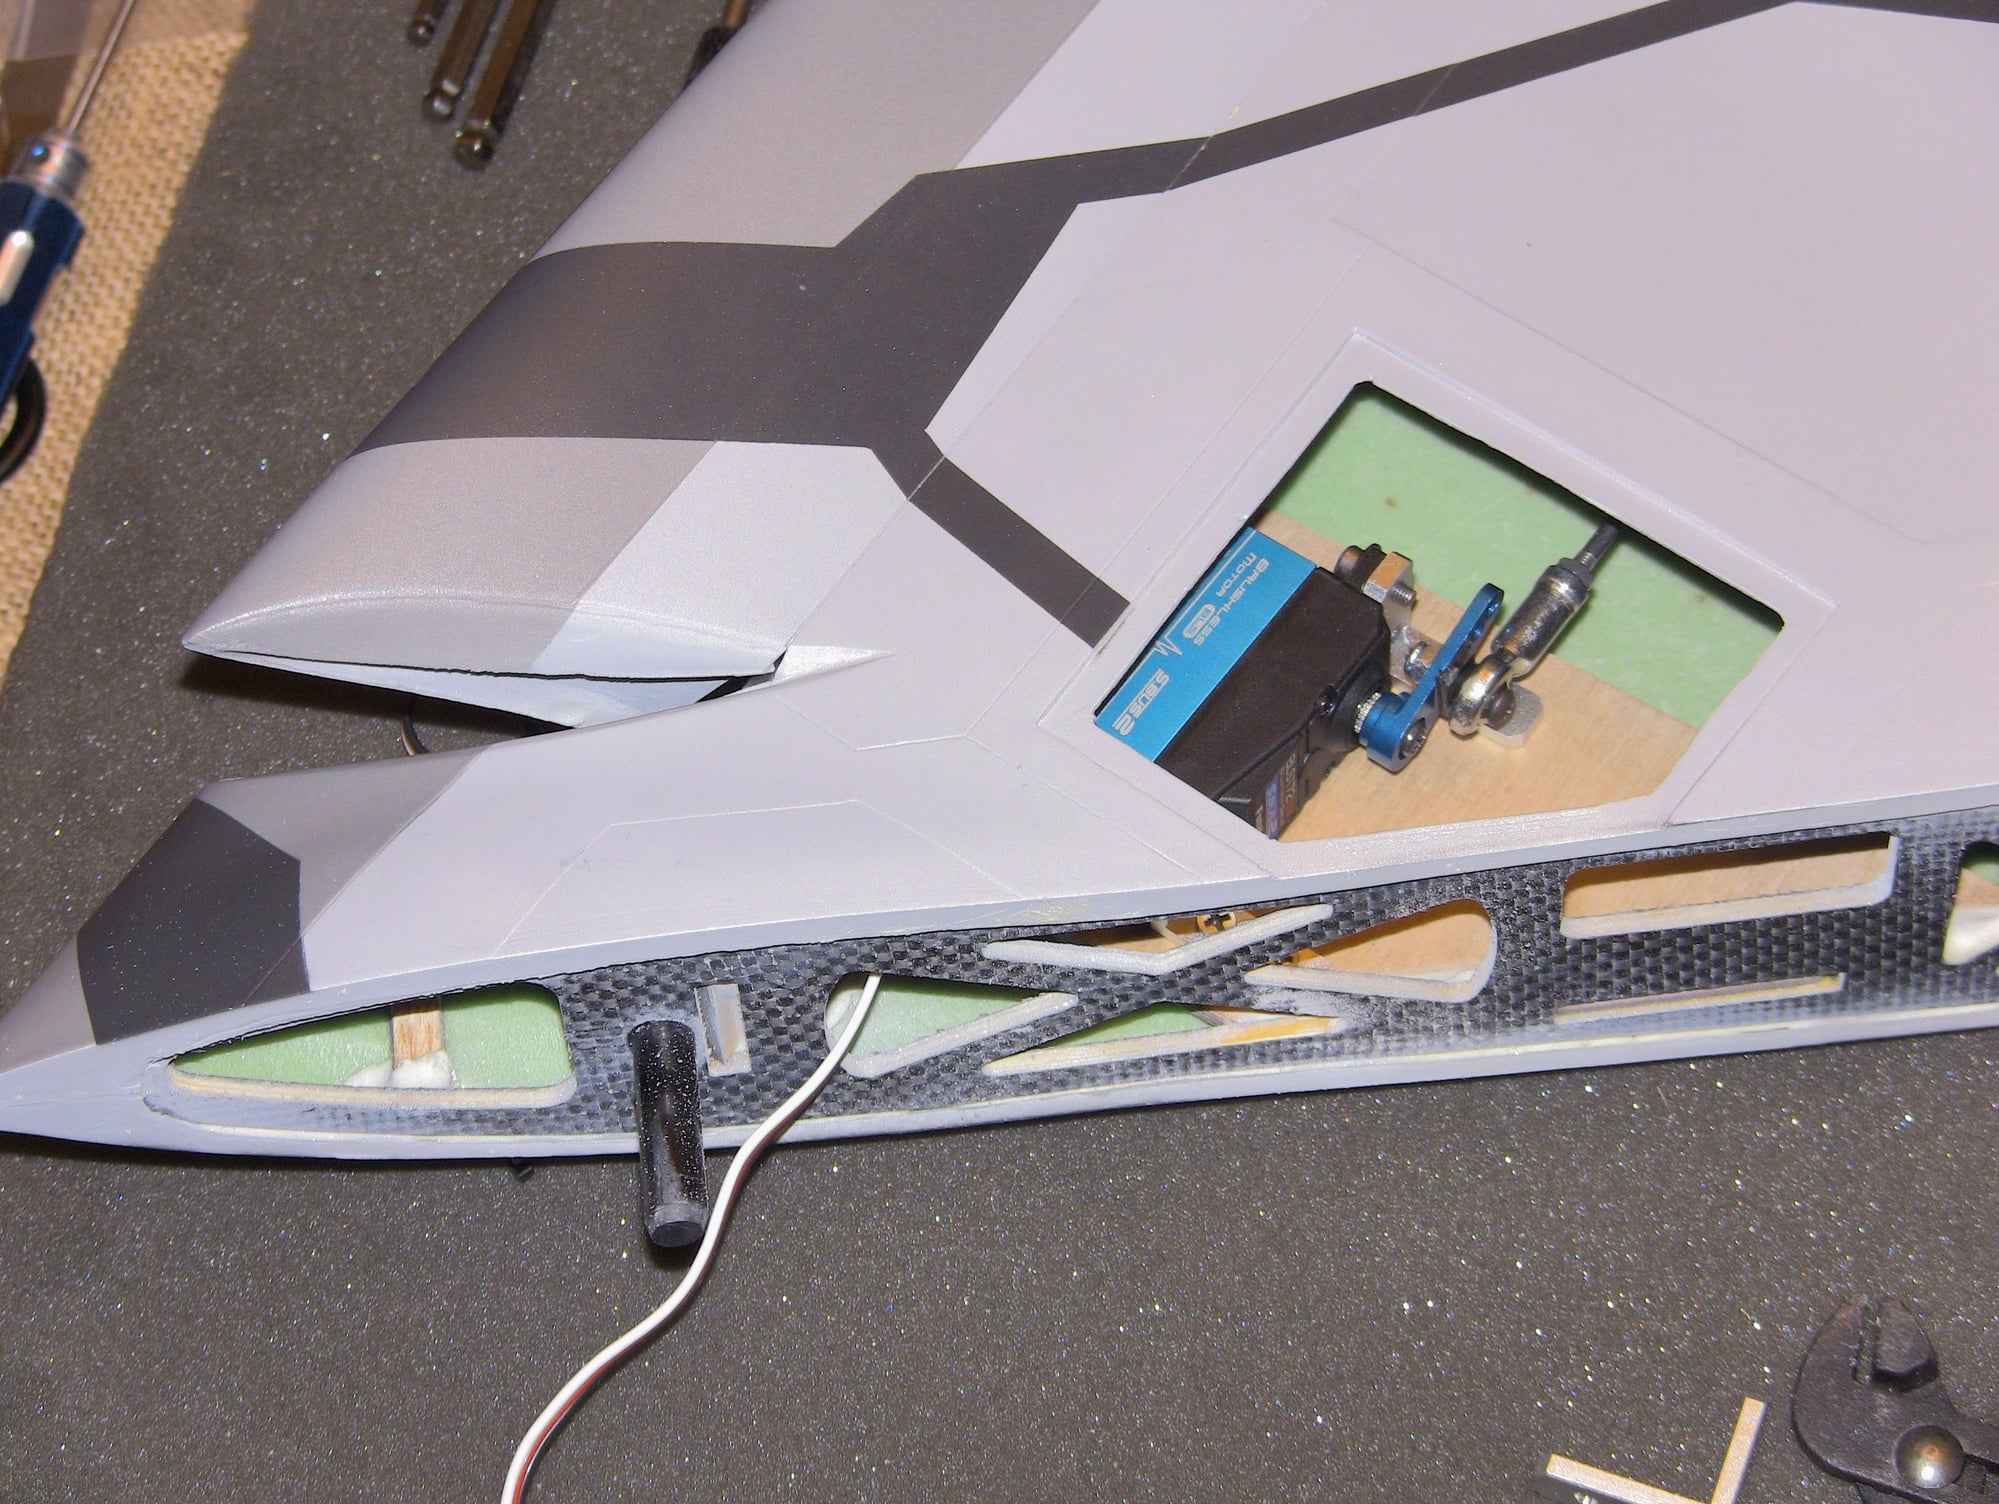
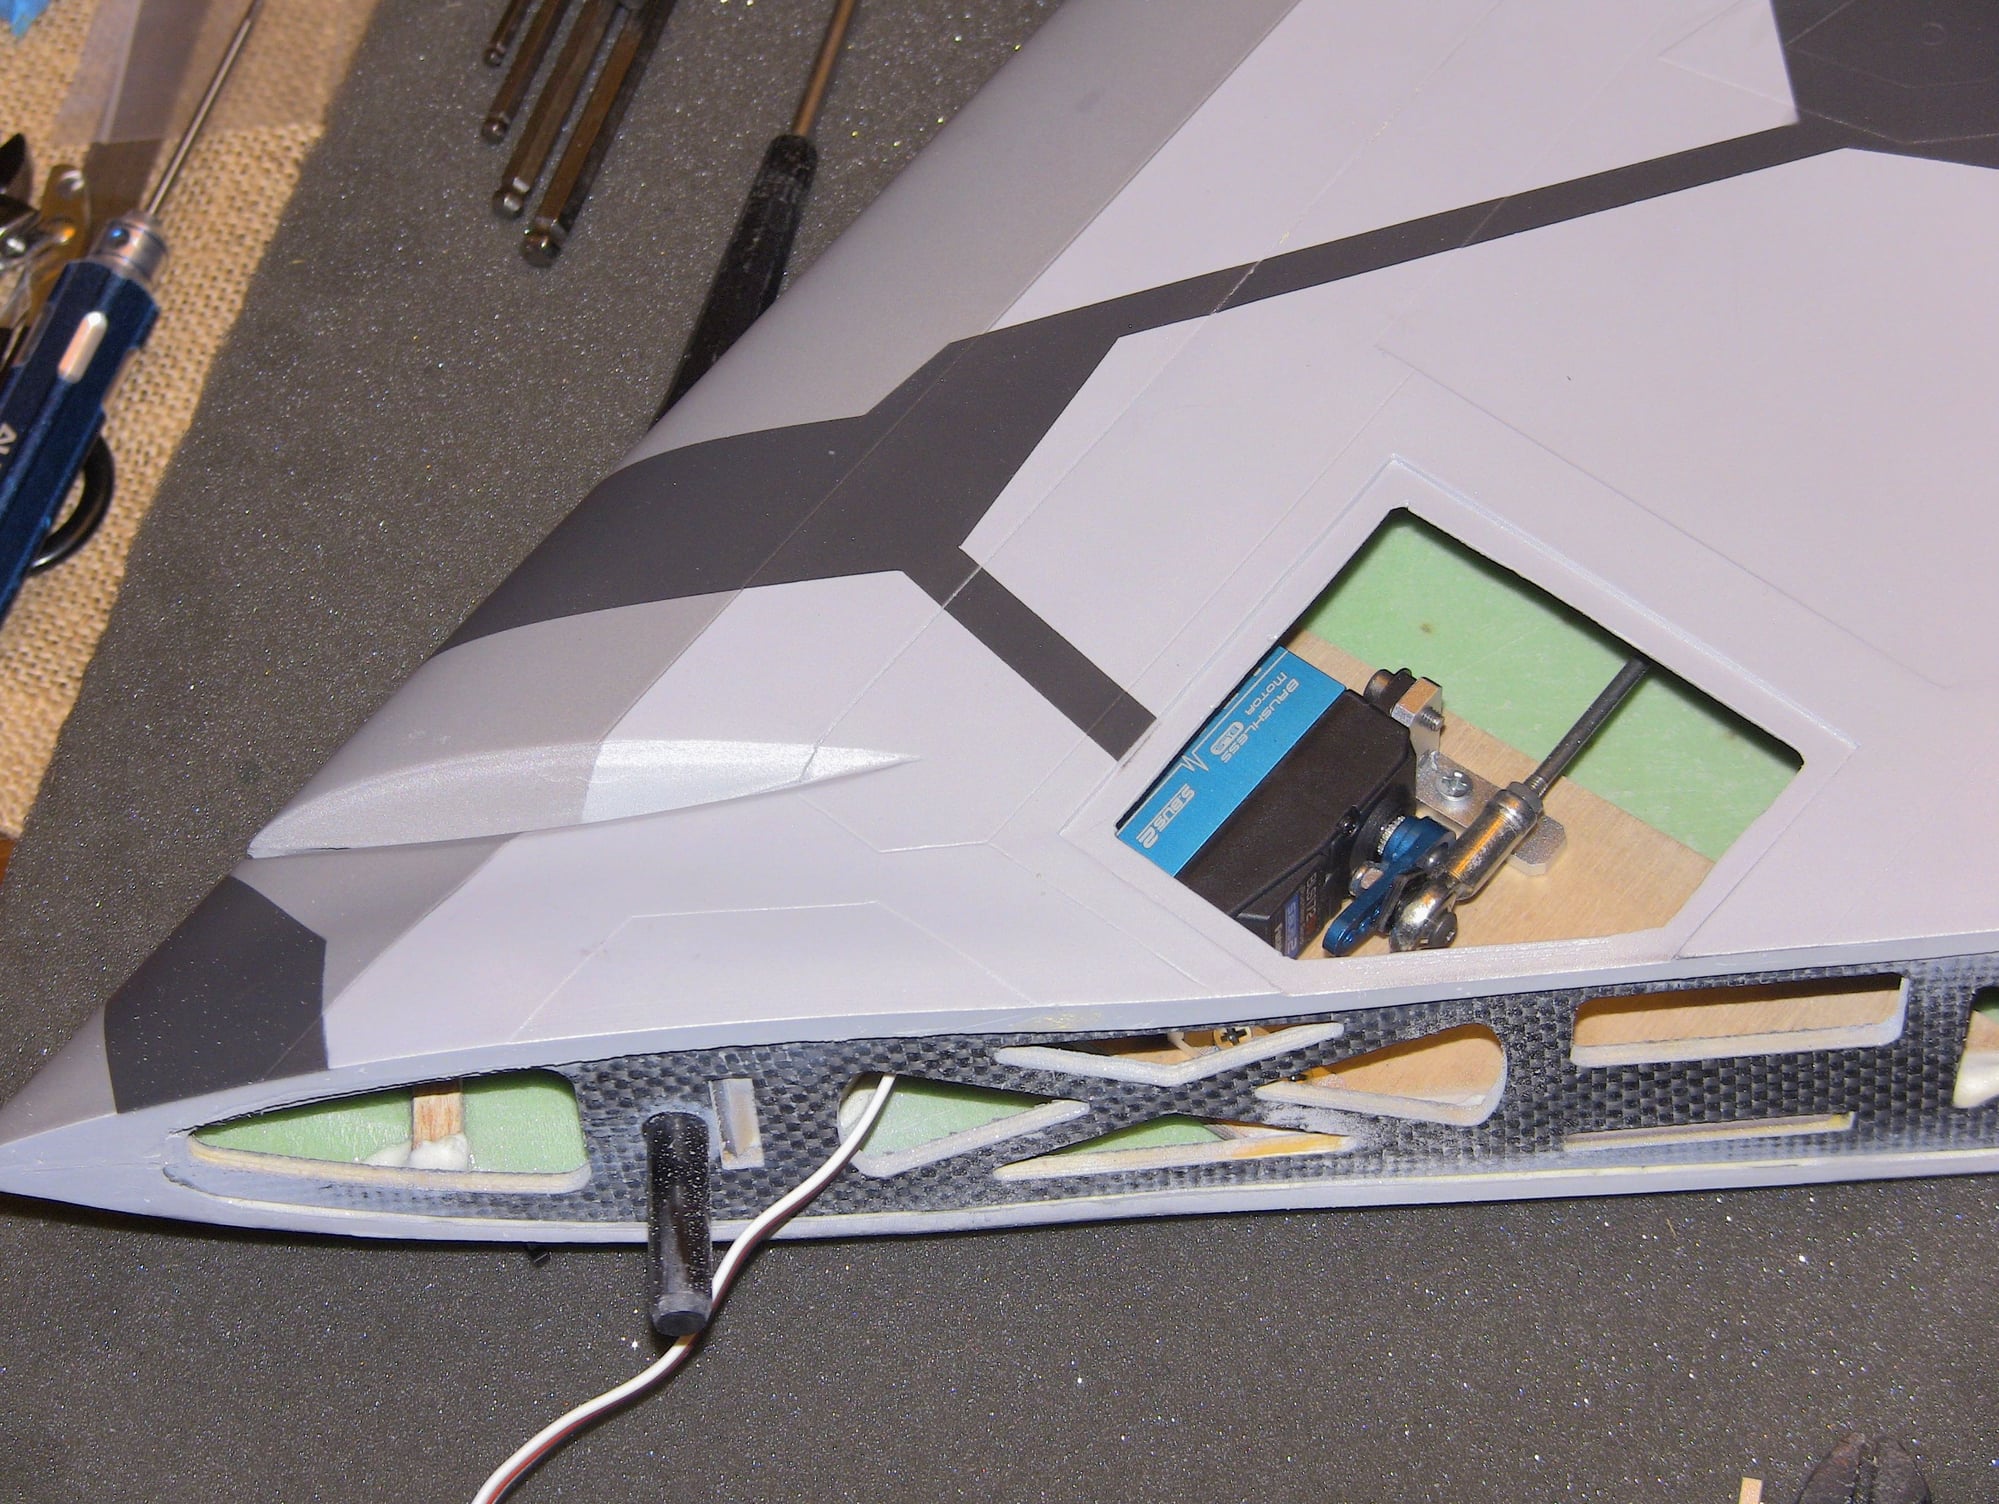
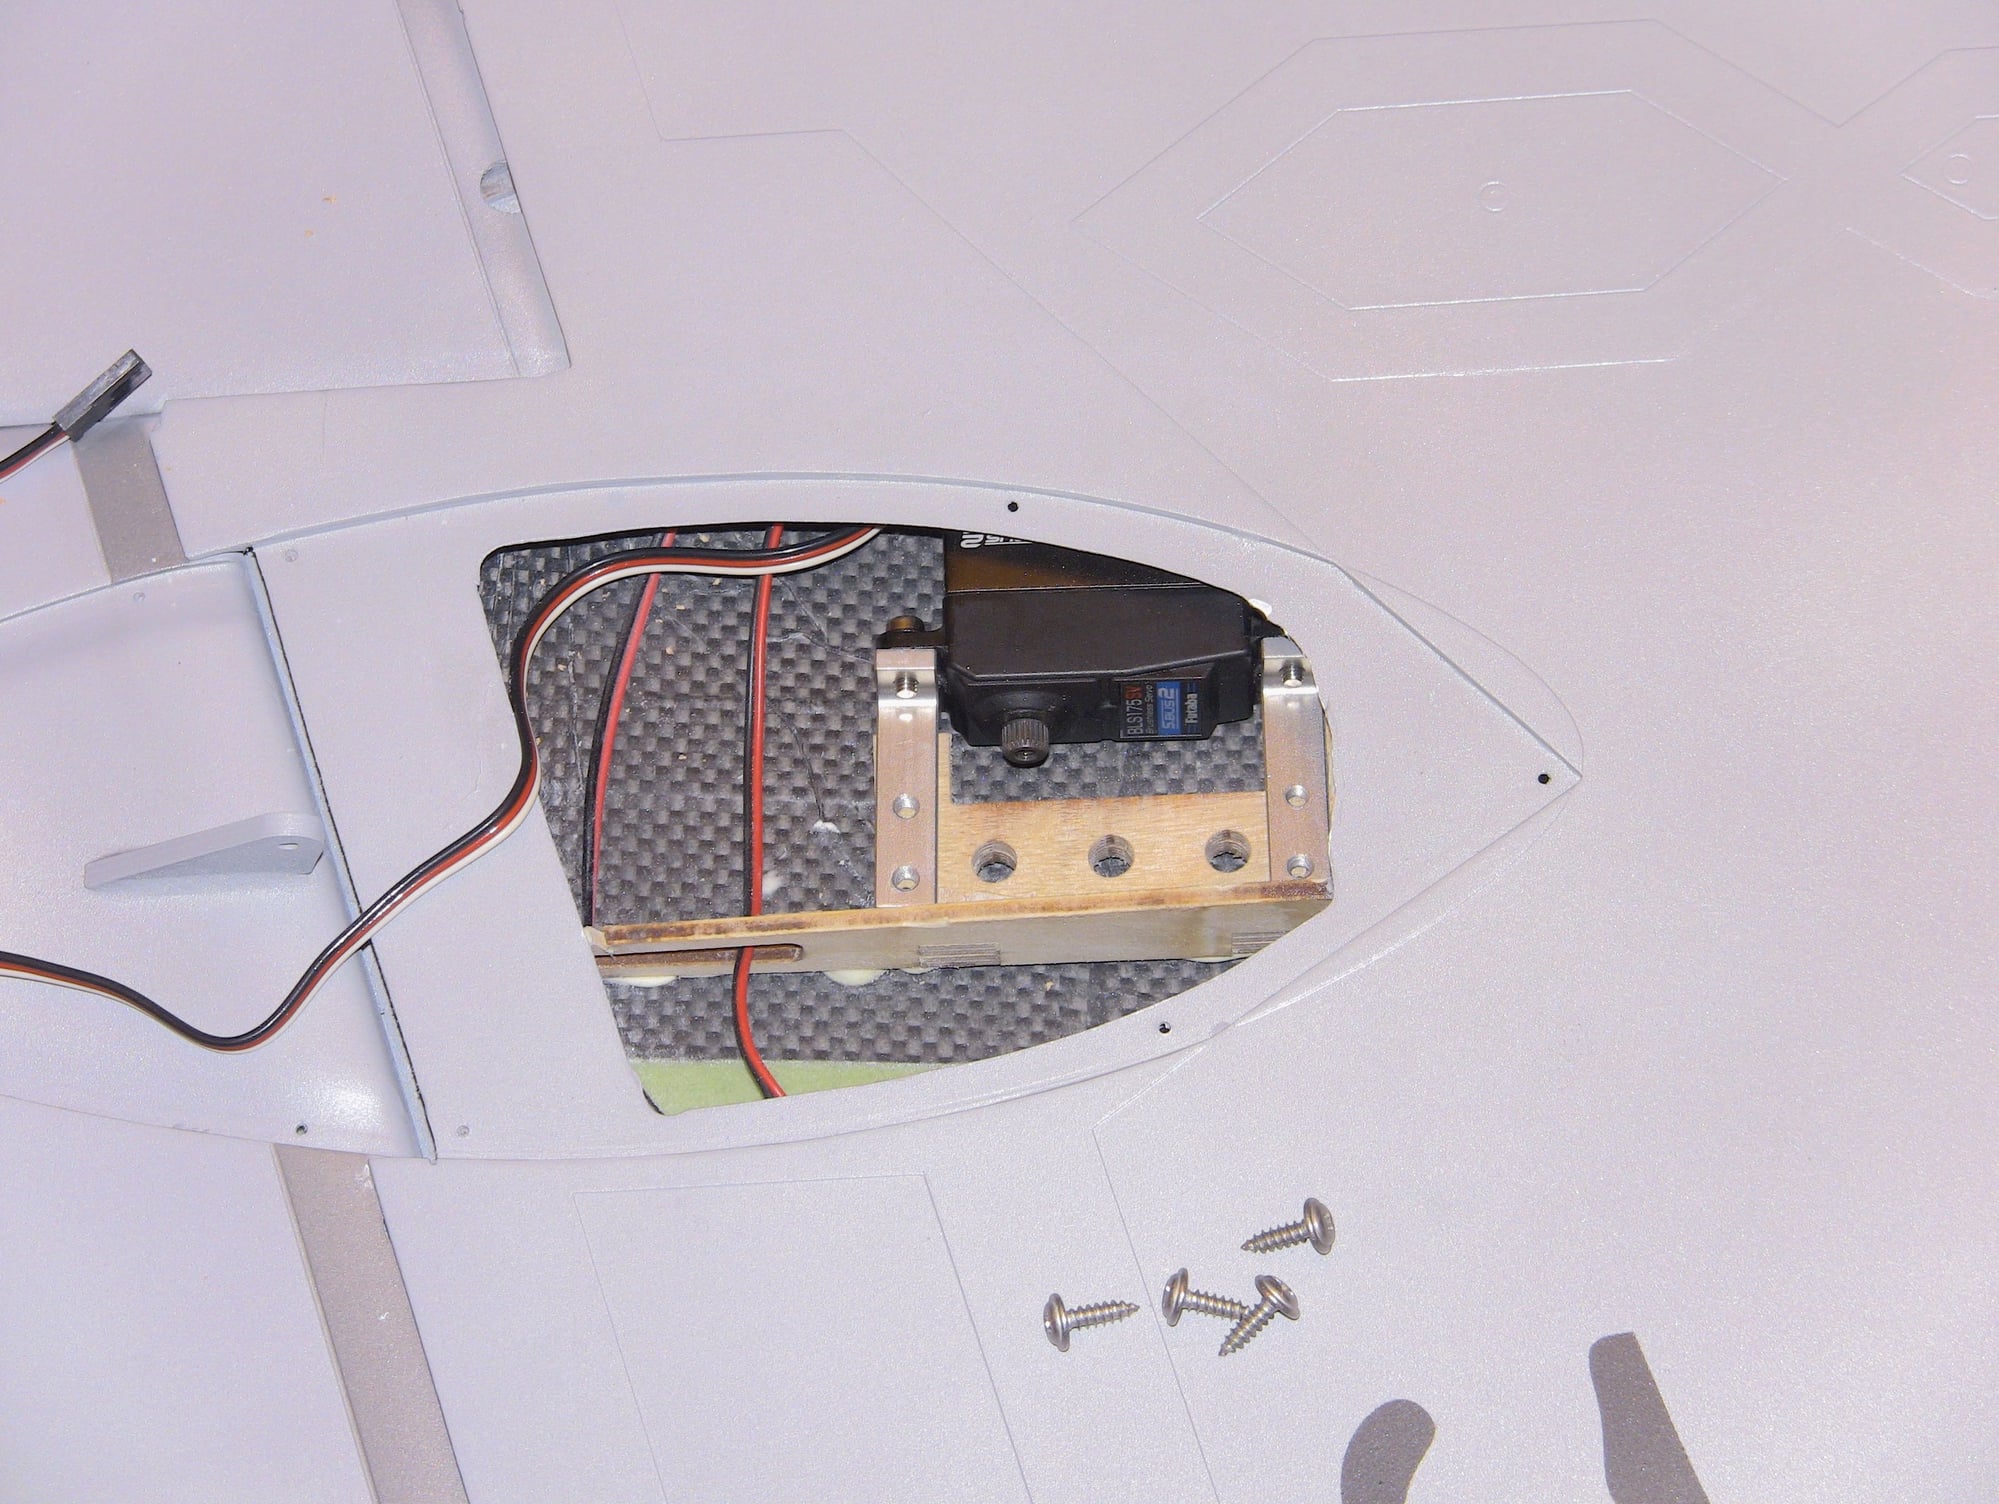


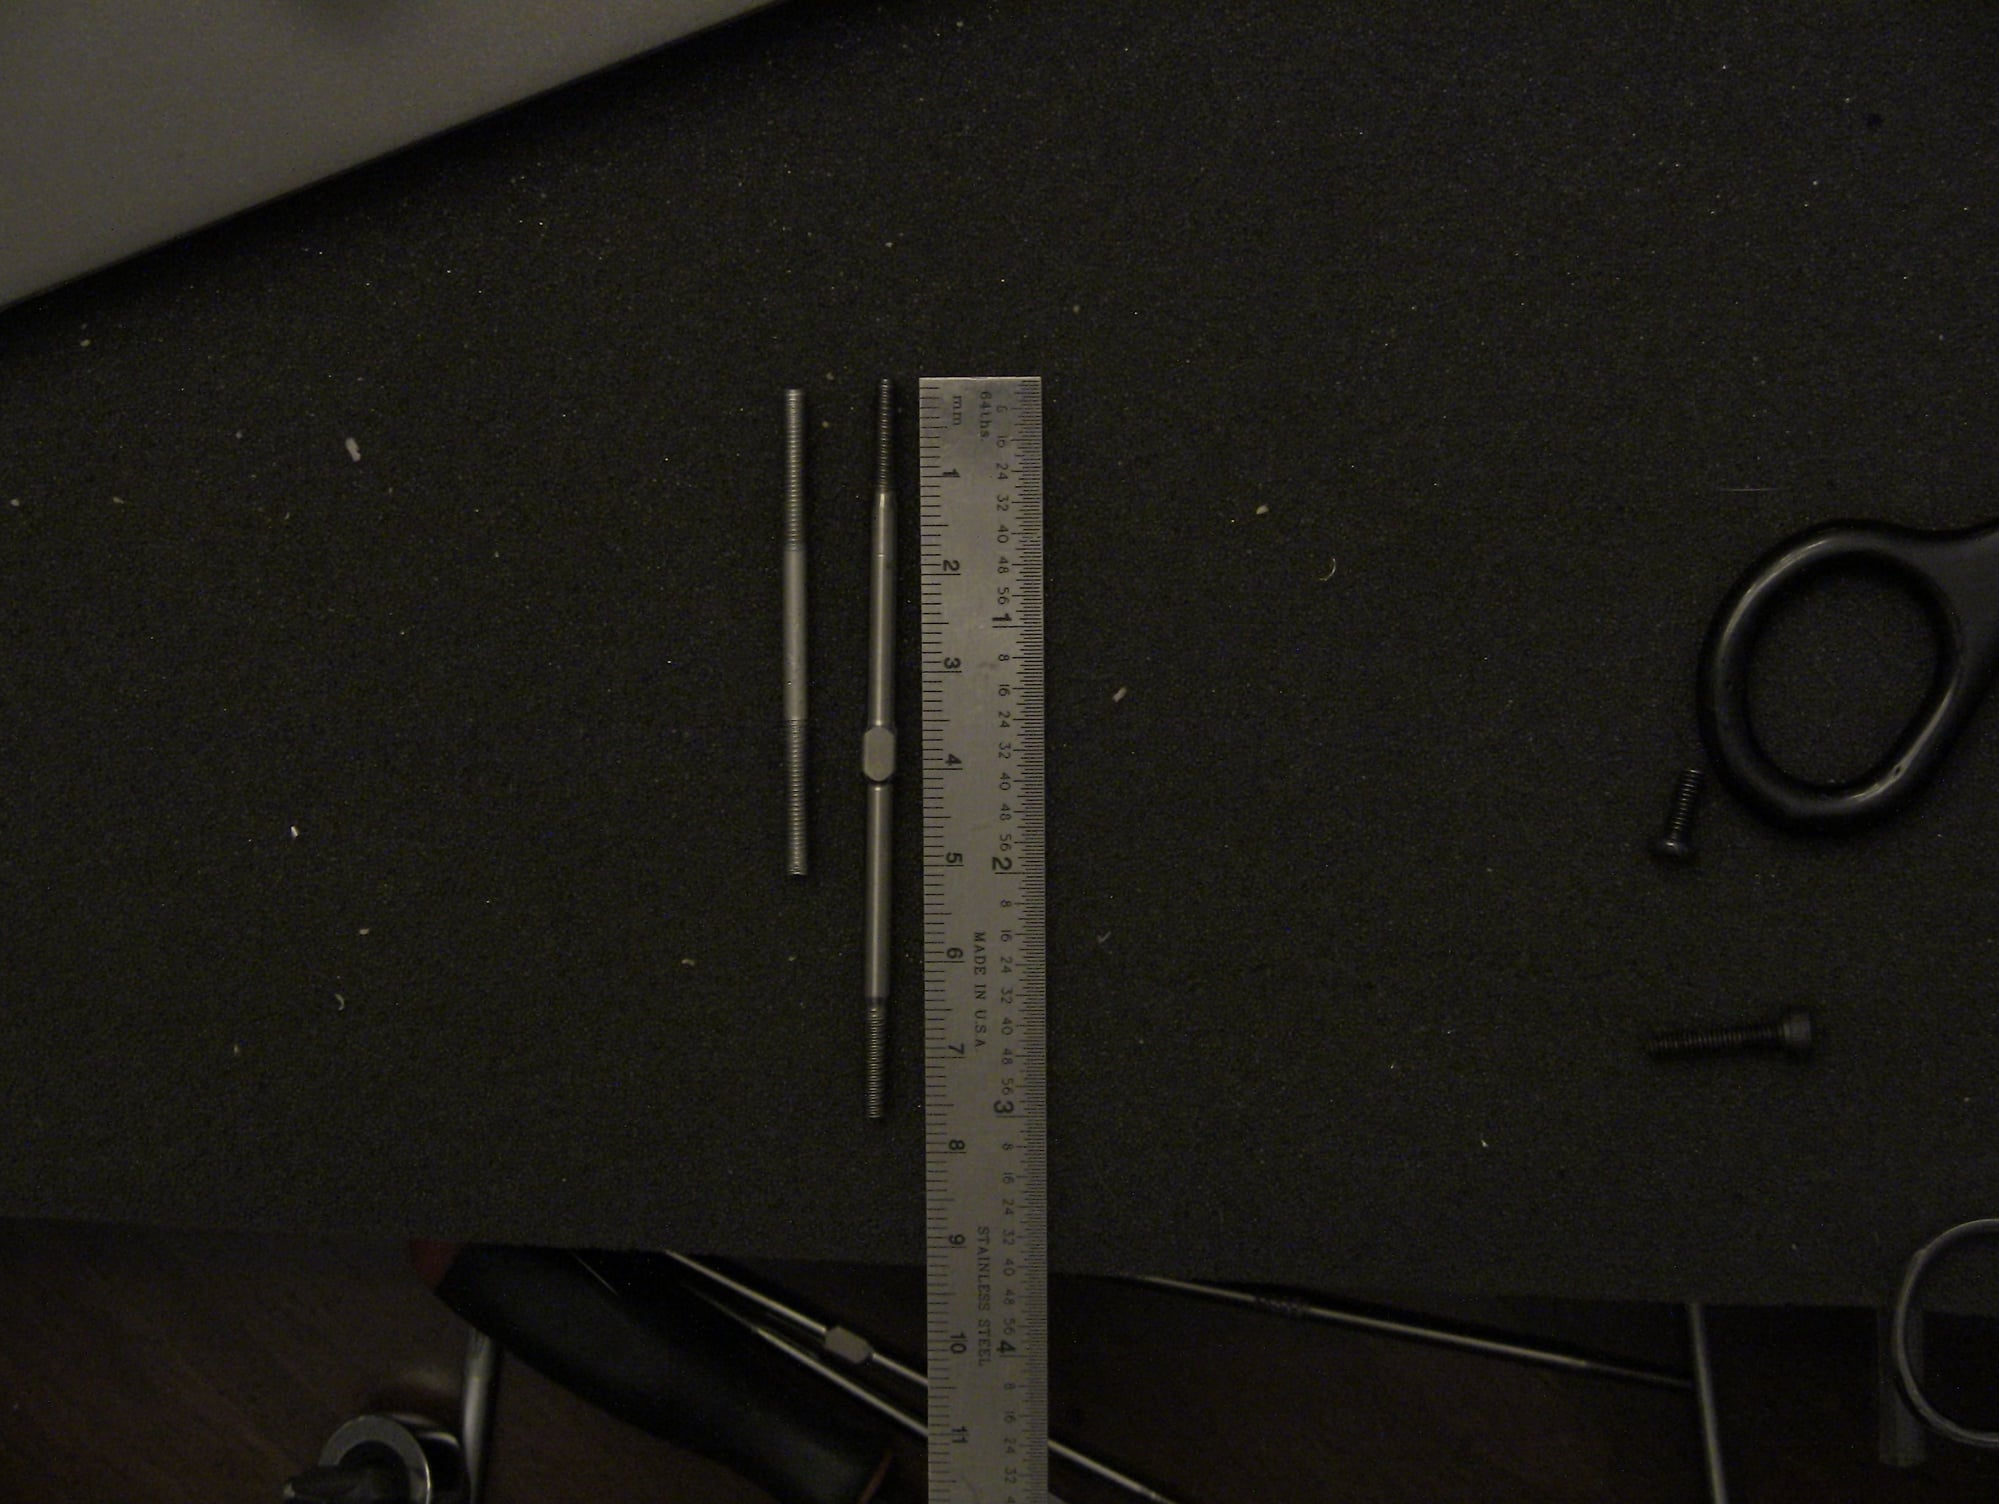
Stock rod is too short for the trailing edge flap
Careful not to drill through the top of your wing
Stock rod is too short for the trailing edge flap
01-26-2020, 02:25 PM
#68
Thread Starter
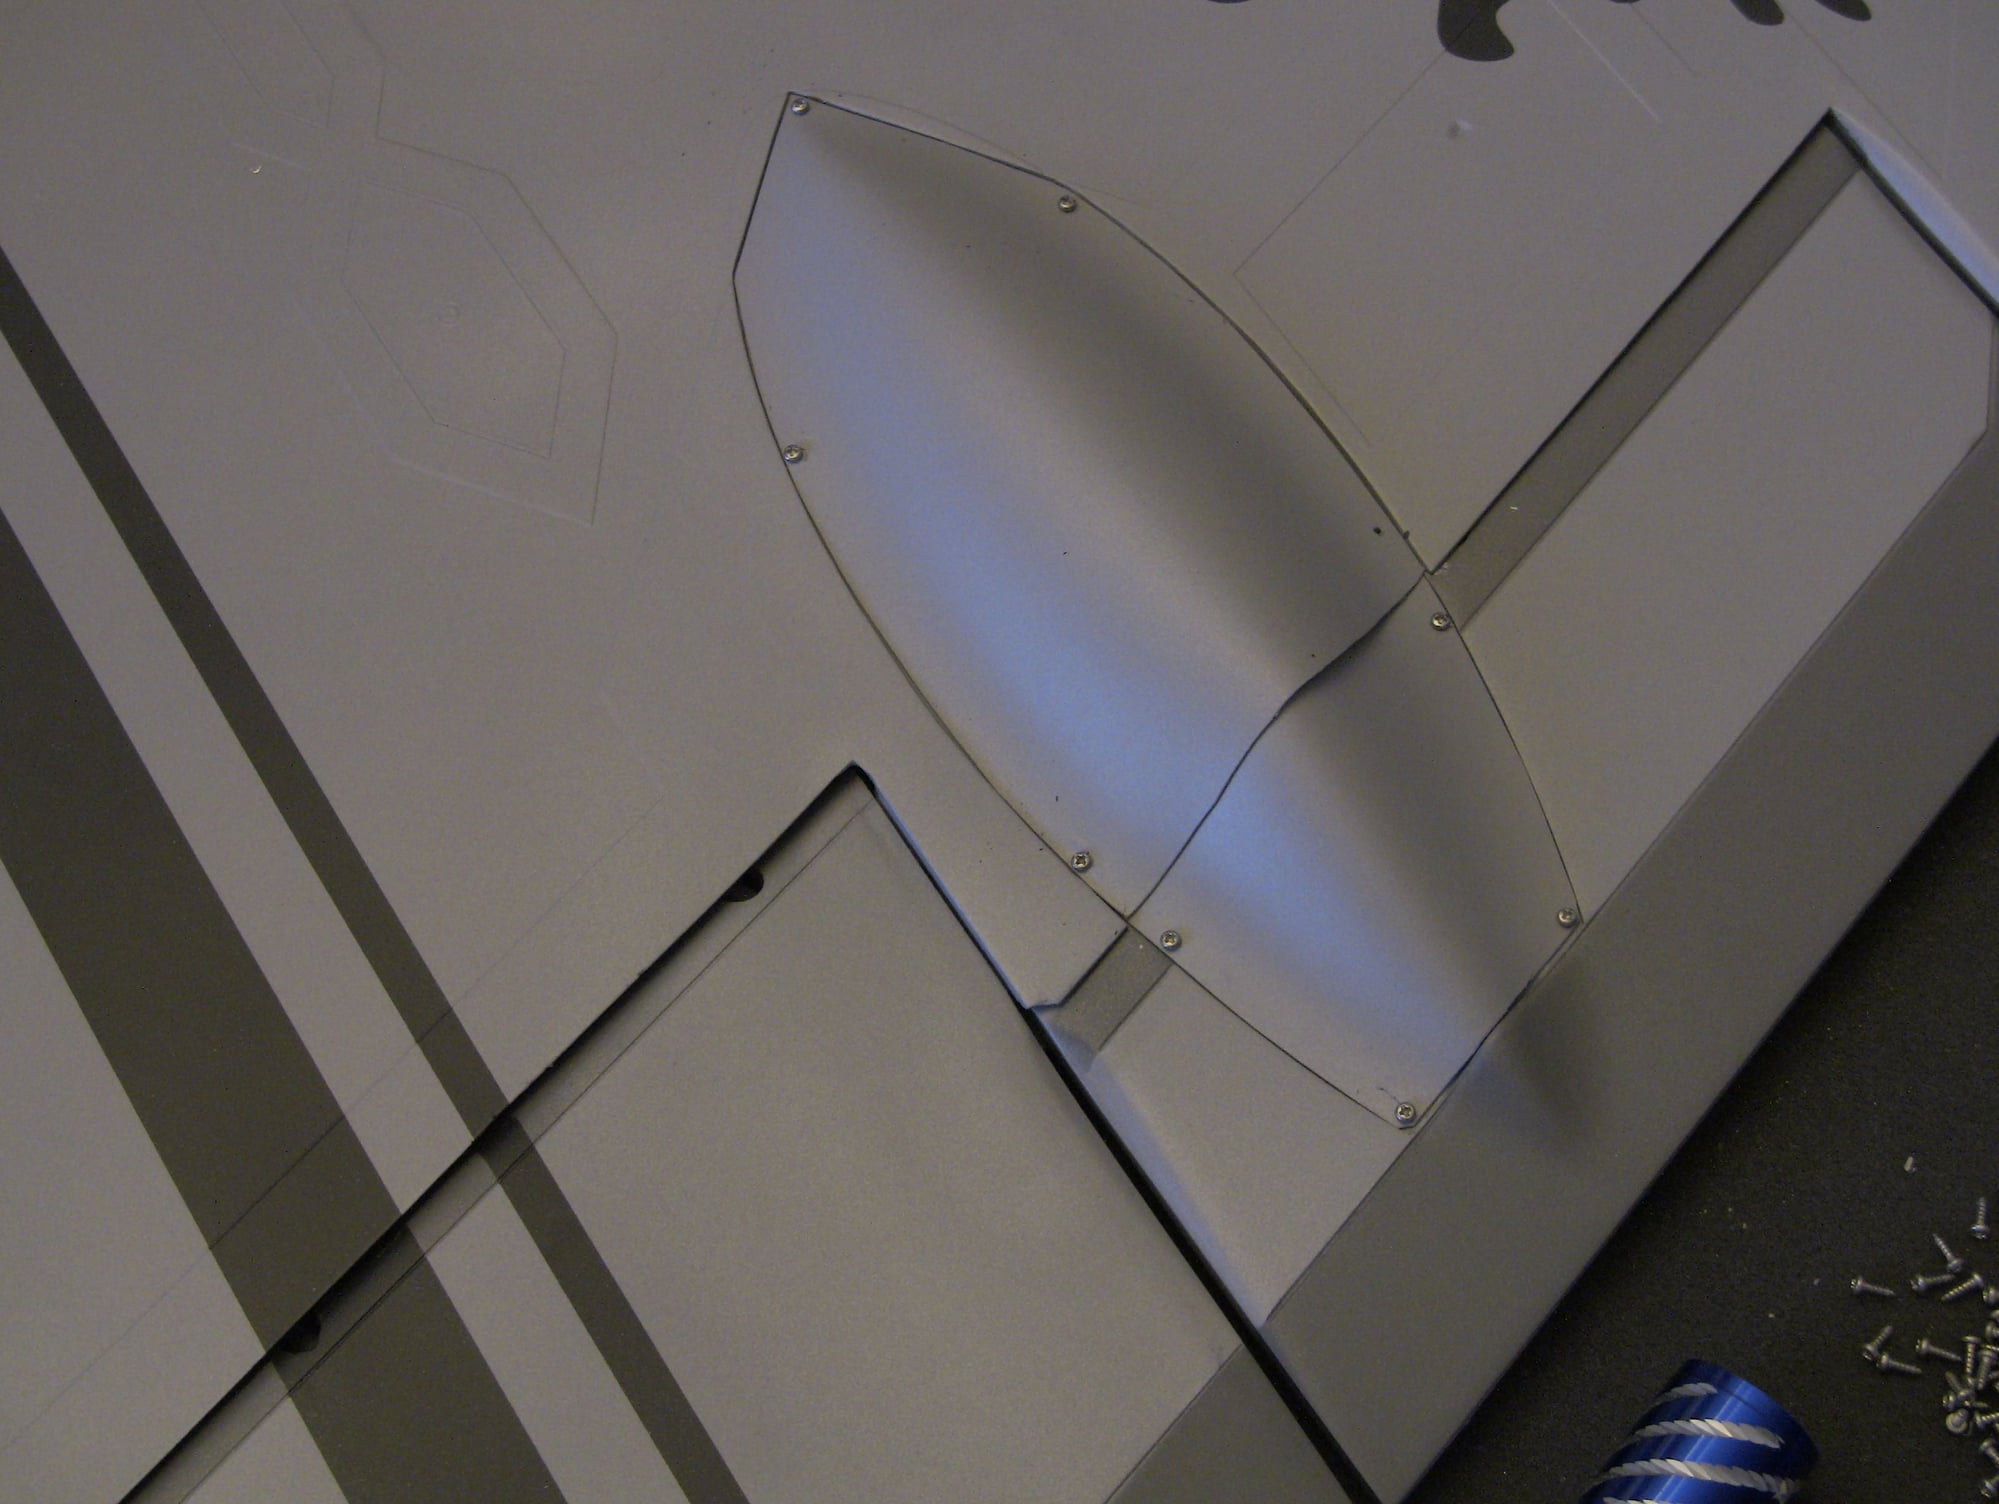
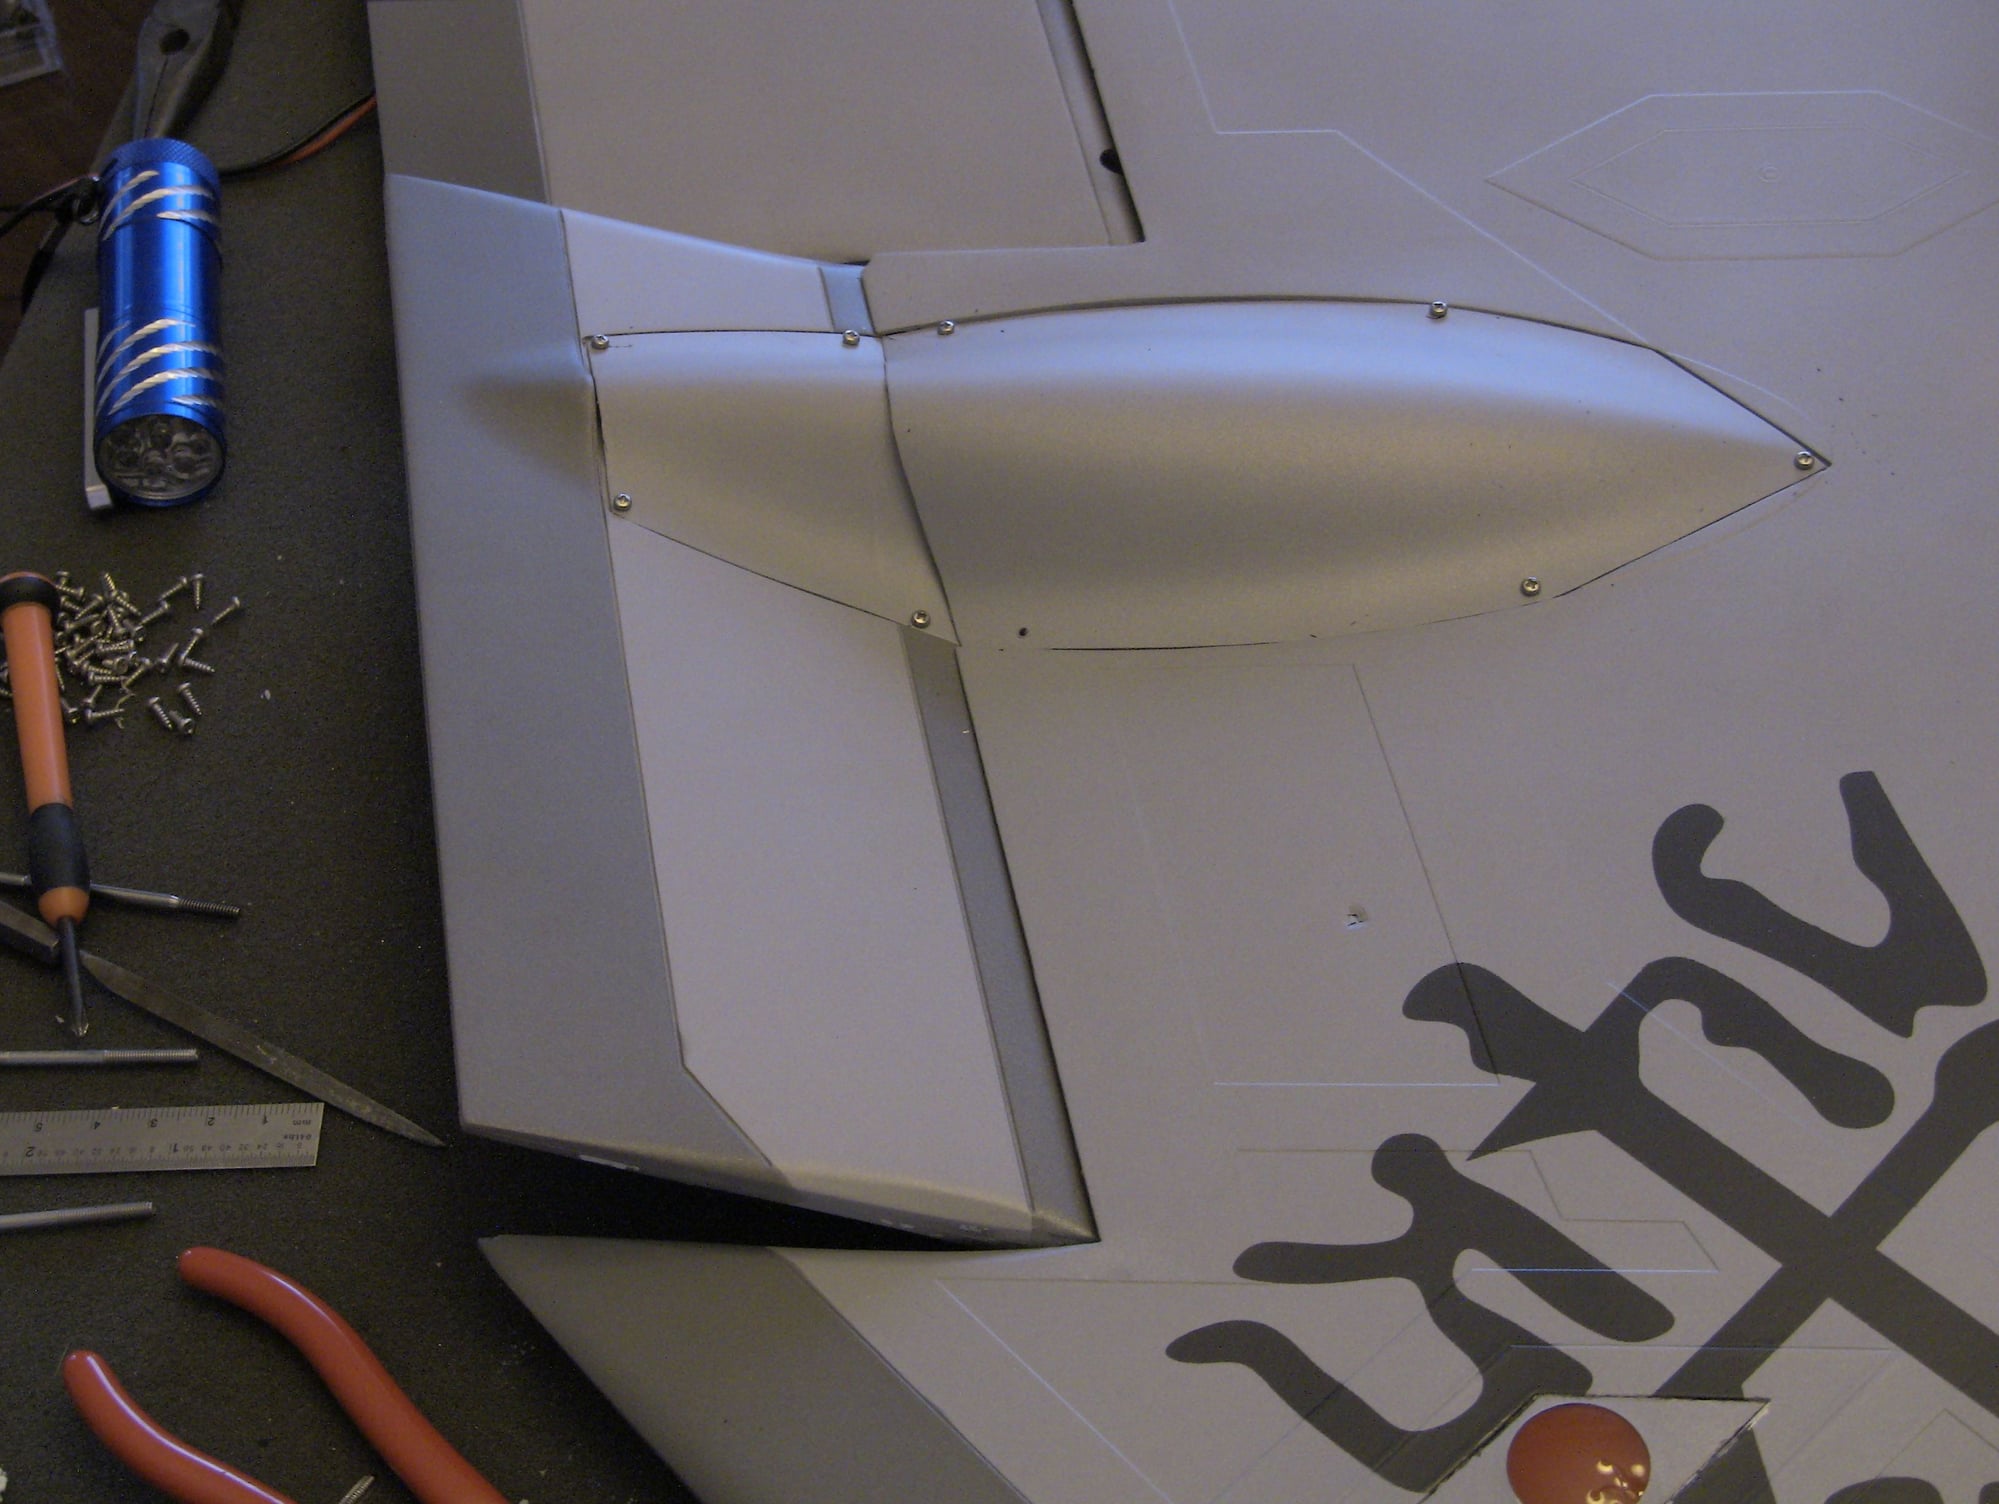
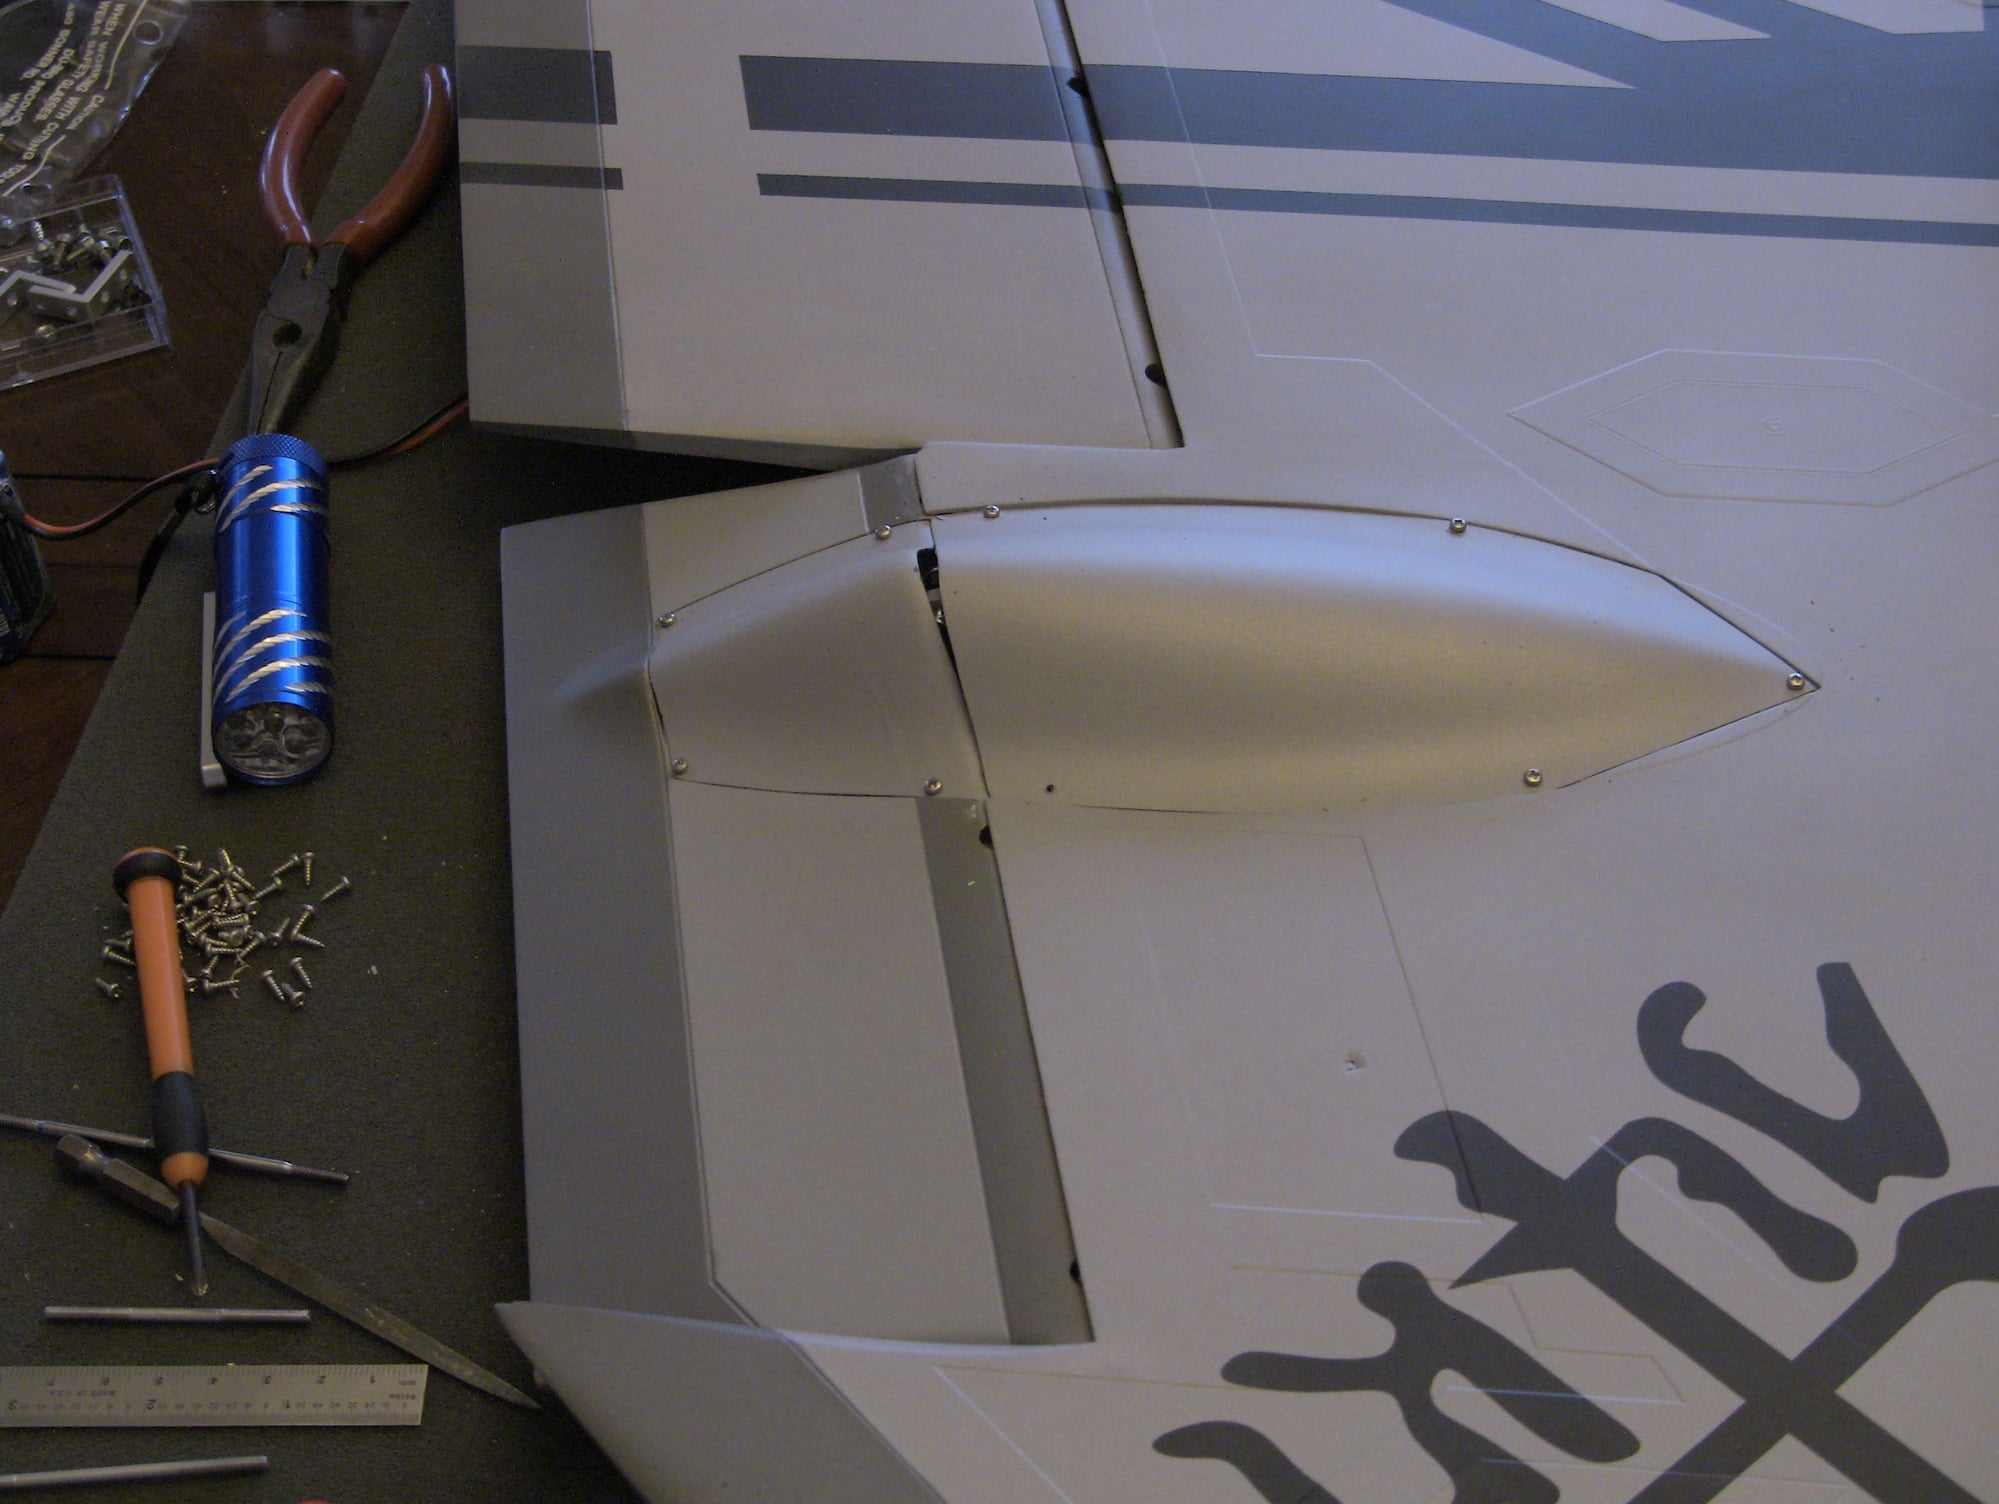
Finished up one wing, hatches came pre-drilled except the front leading edge flap servo. The fits are really good, and didnt require any trimming, the secret is to keep the servo arms smaller than 1 inch. This is something you should do anyways for jets since travel is very low and its better to keep as much of the travel as possible.
That's about all I can do until the end of the week, im heading out of town. The next wing I will do a video showing everything required, been busy with other things.
Aileron Centered
Aileron Down
Aileron Up
Flap Up
Flap Down
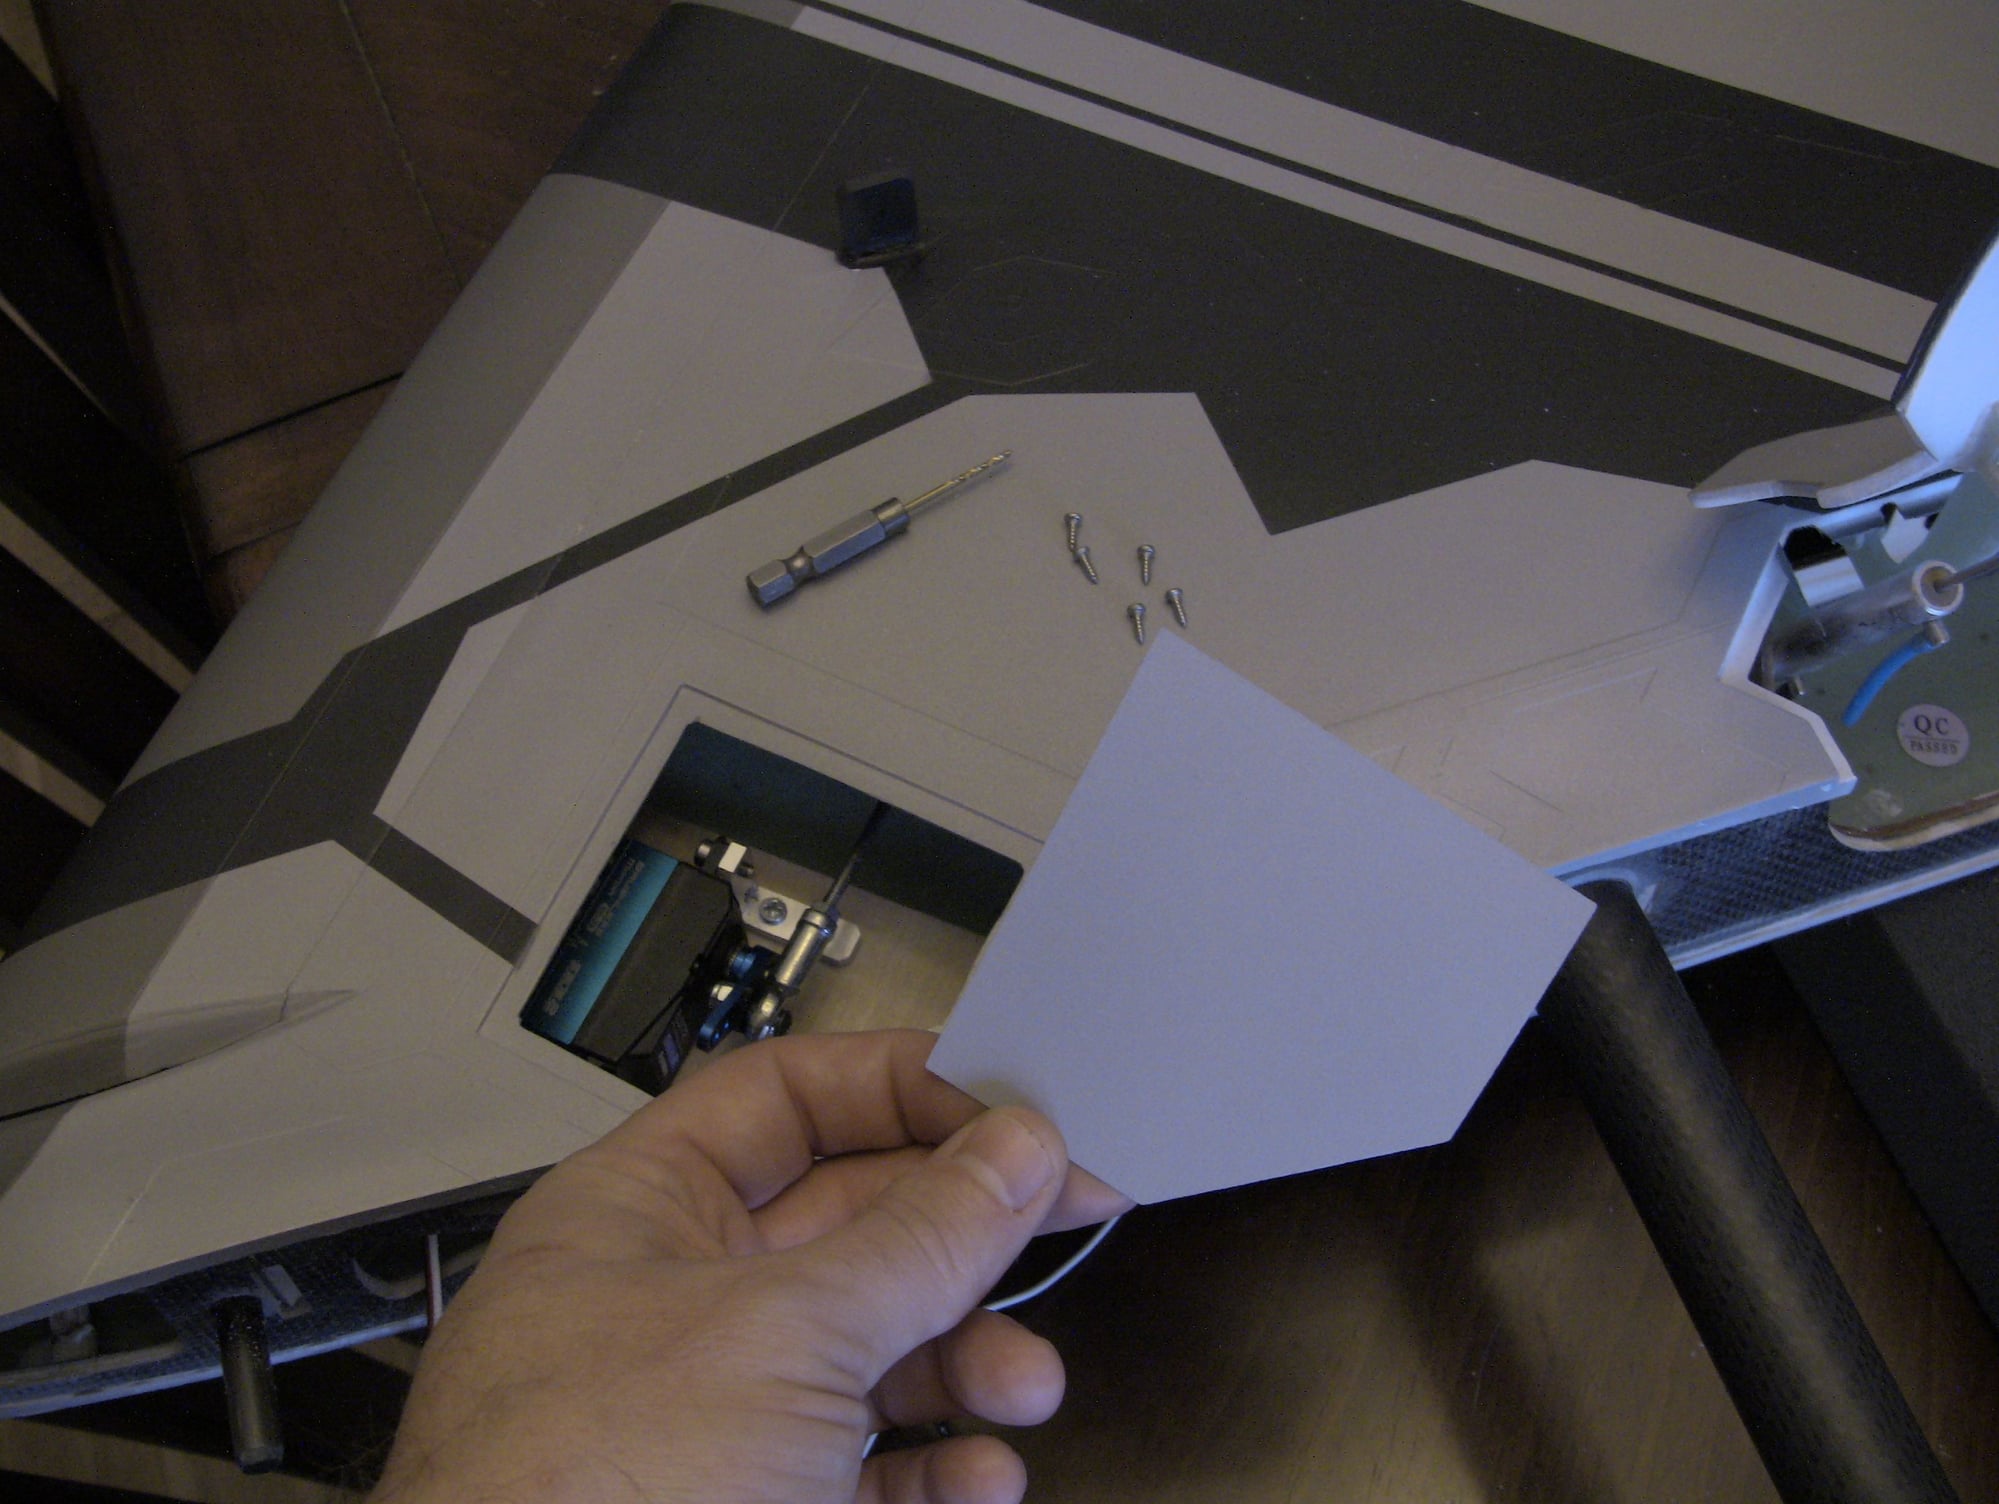
1/16 drill bit
1/16 Drilled with screws
That's about all I can do until the end of the week, im heading out of town. The next wing I will do a video showing everything required, been busy with other things.
Aileron Centered
Aileron Down
Aileron Up
Flap Up
Flap Down
1/16 drill bit
1/16 Drilled with screws
01-26-2020, 06:00 PM
#69
You are a fast builder.
For abit of scale effect, I am still pondering pros and cons whether to glue or additionally screw in the covers. Meanwhile I need to find a source for L brackets online. If I can't find then wood blocks will be it.
I resprayed the color of my drop tanks. They came way too light a grey IMO.
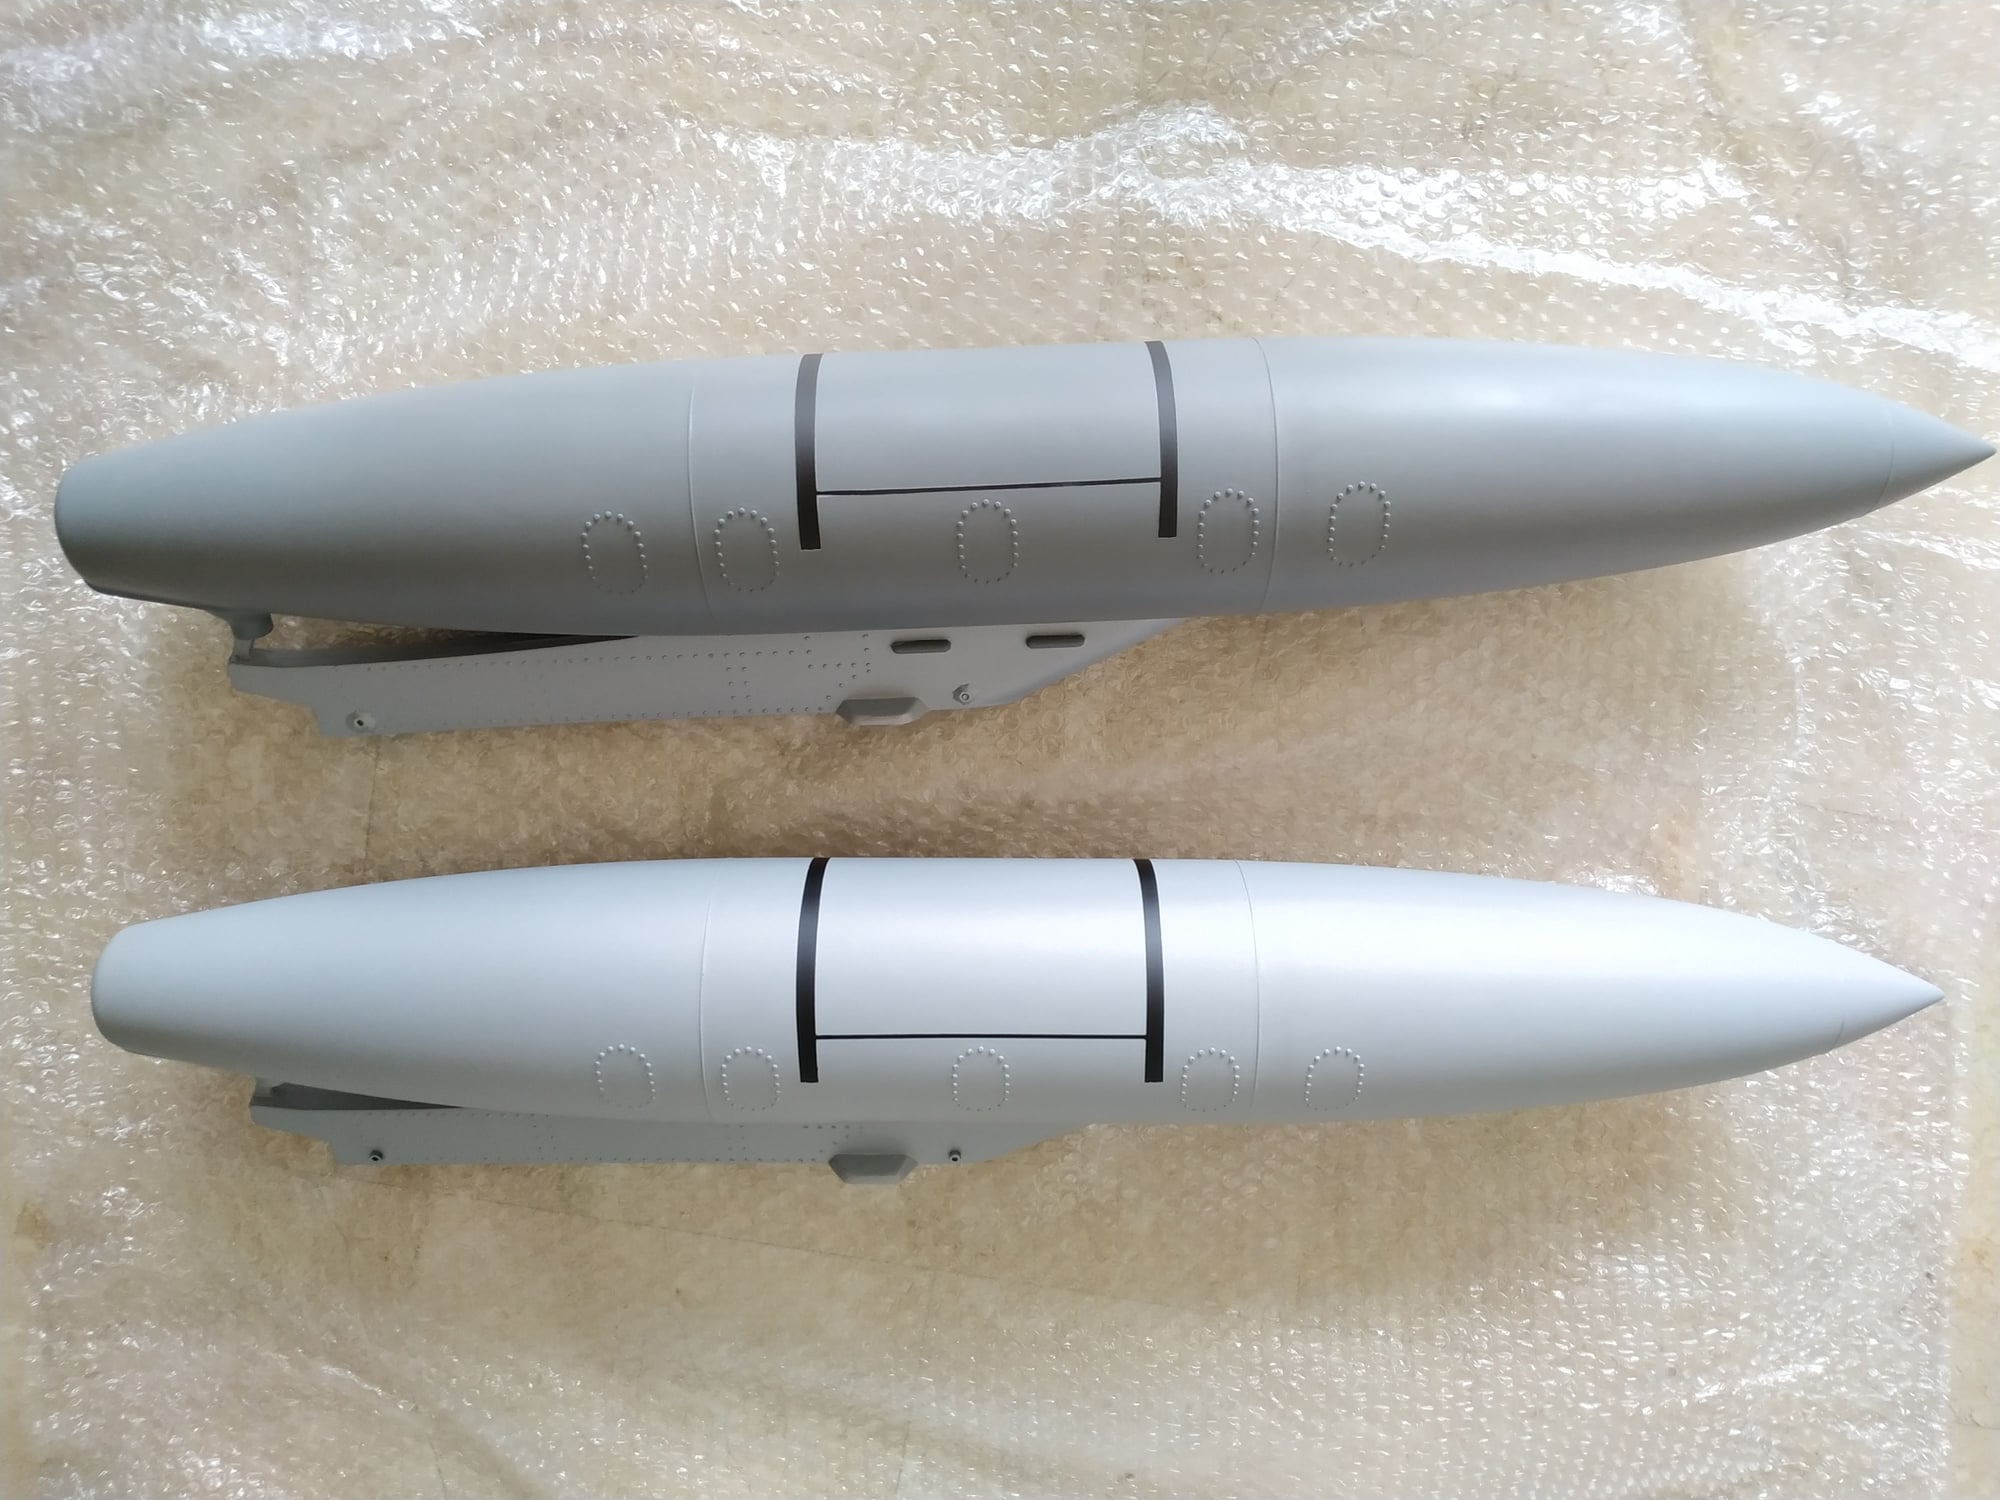
Original color is the bettom tank. The top was given a darker grey but still not dark enough.
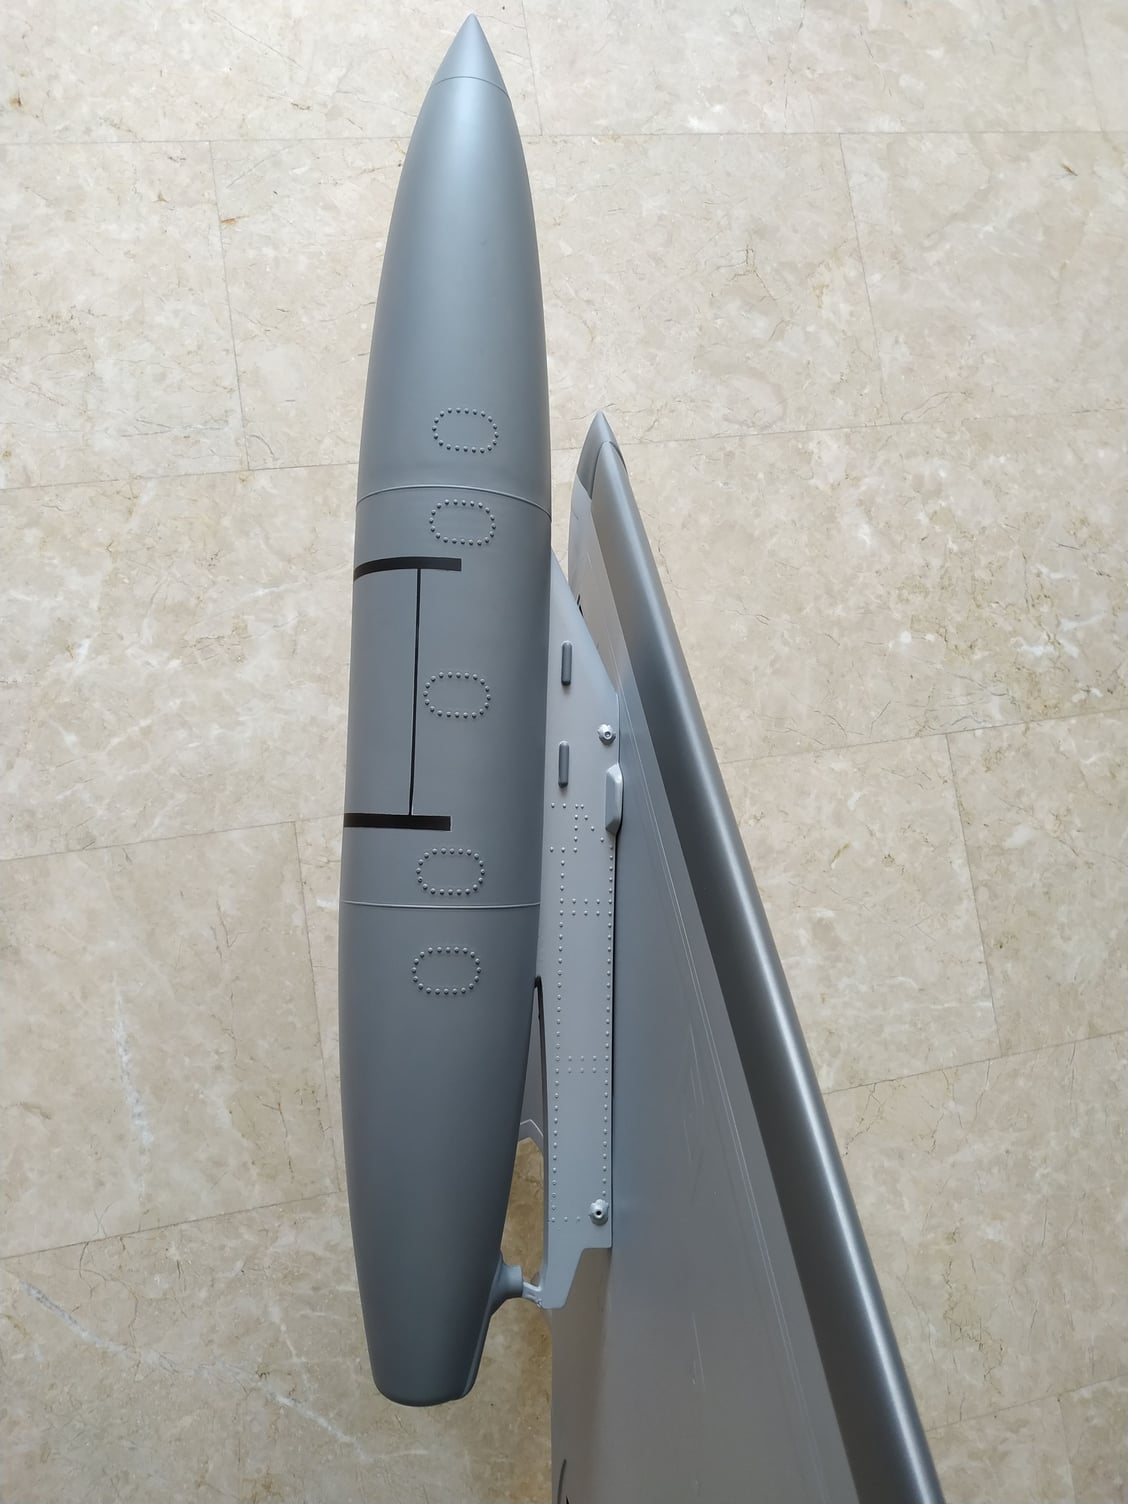
Final color. Sprayed from a rattle can.
For abit of scale effect, I am still pondering pros and cons whether to glue or additionally screw in the covers. Meanwhile I need to find a source for L brackets online. If I can't find then wood blocks will be it.
I resprayed the color of my drop tanks. They came way too light a grey IMO.
Original color is the bettom tank. The top was given a darker grey but still not dark enough.
Final color. Sprayed from a rattle can.
01-26-2020, 07:49 PM
#71
01-31-2020, 06:00 PM
#73
Thread Starter
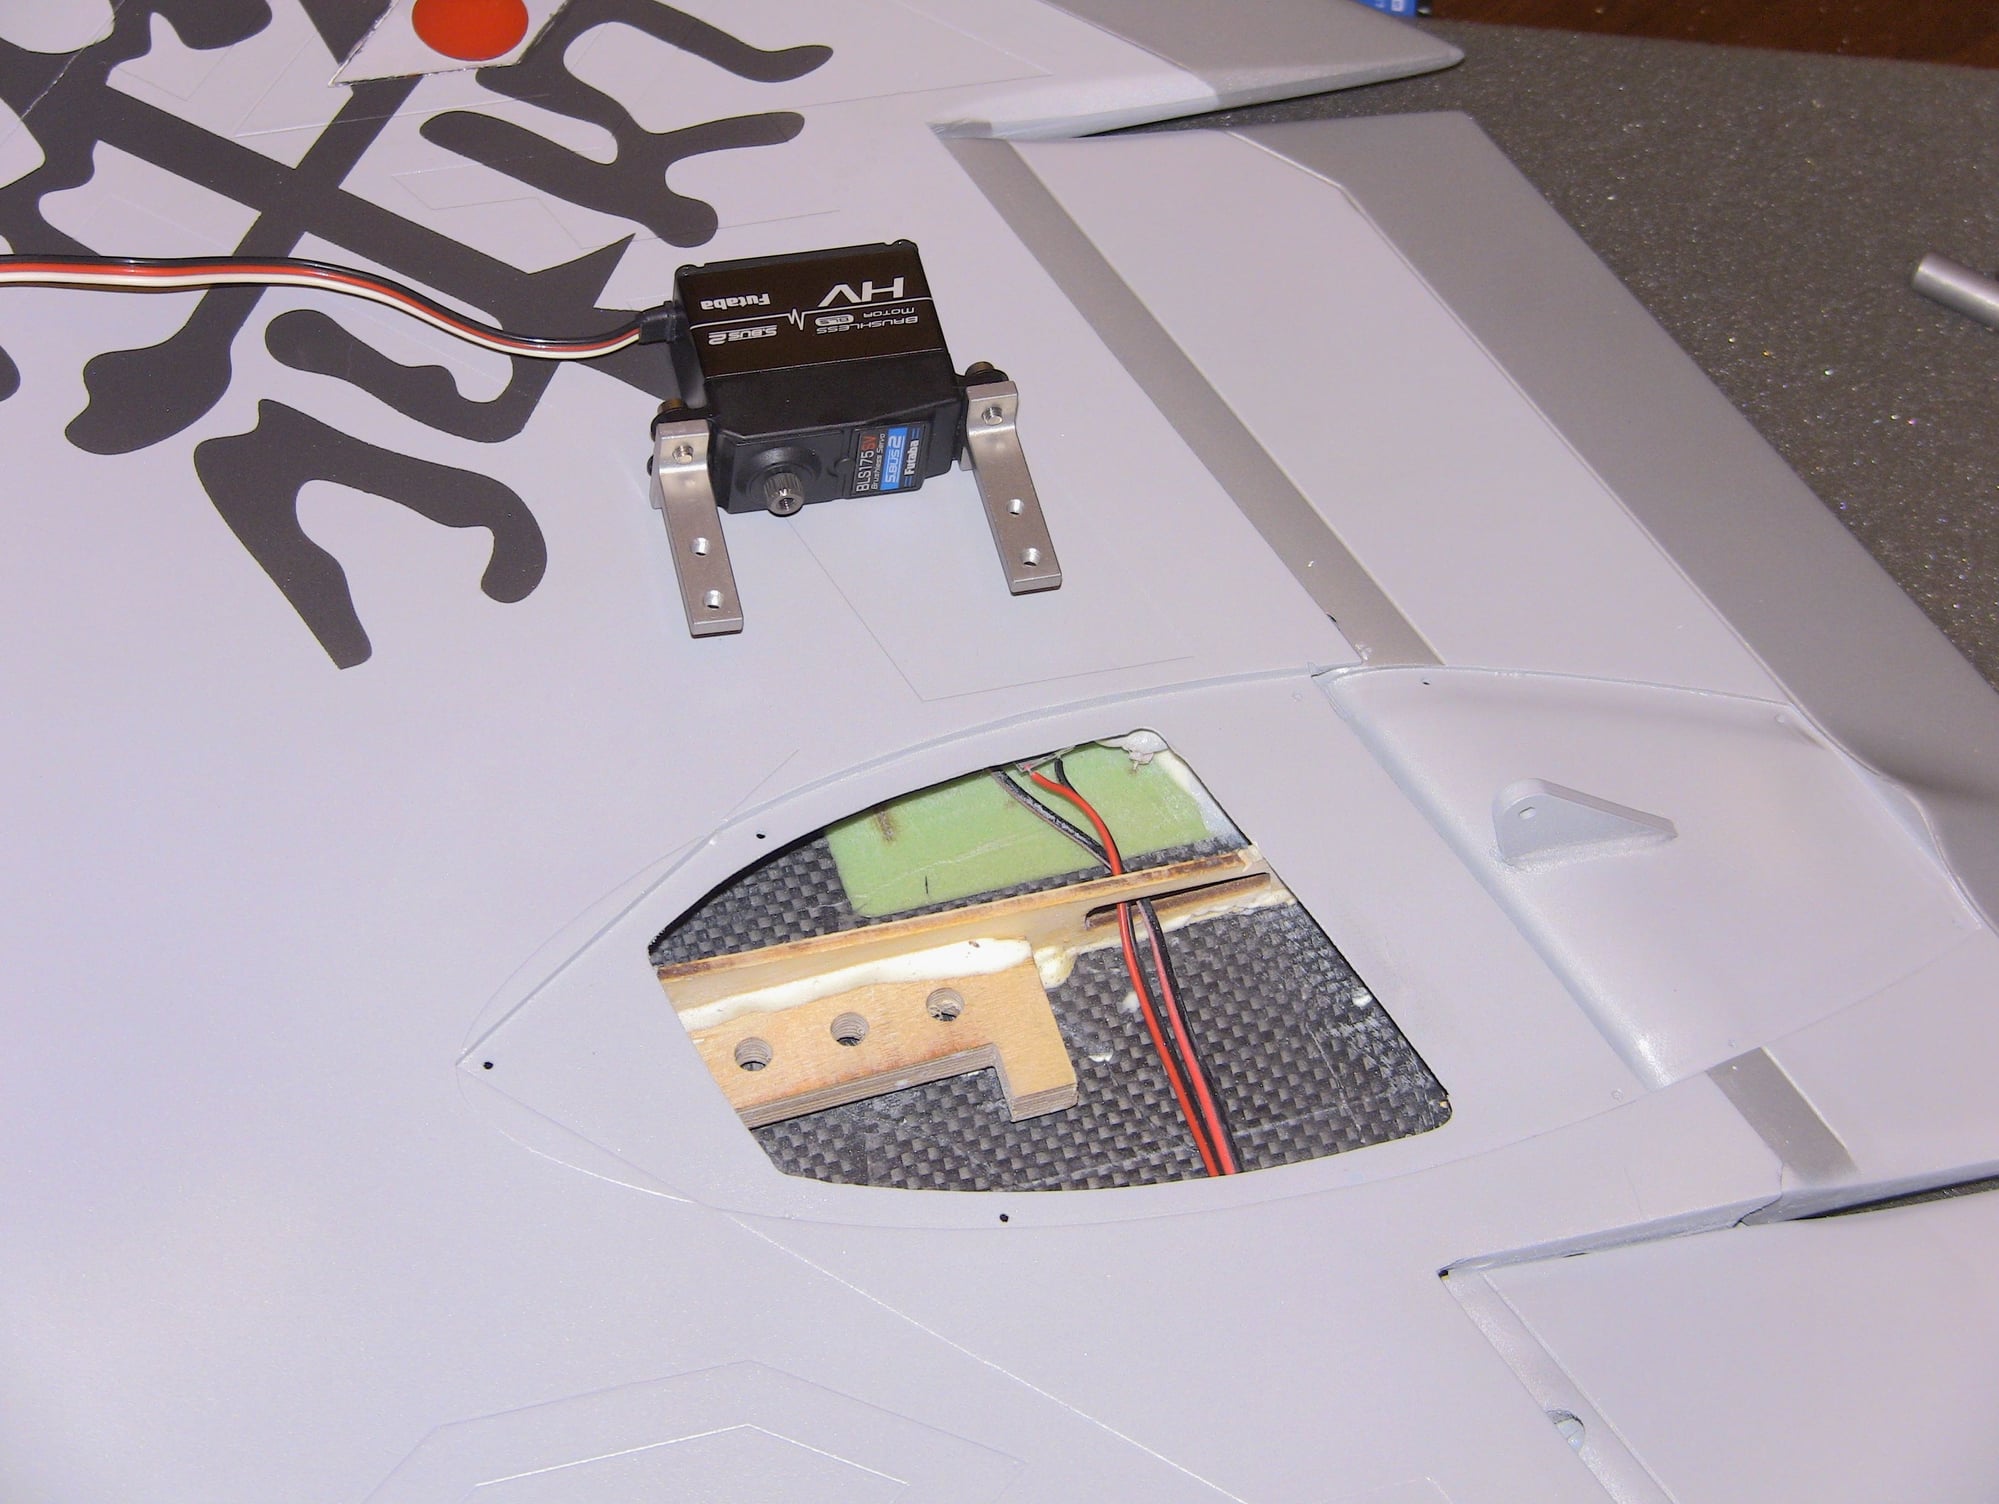
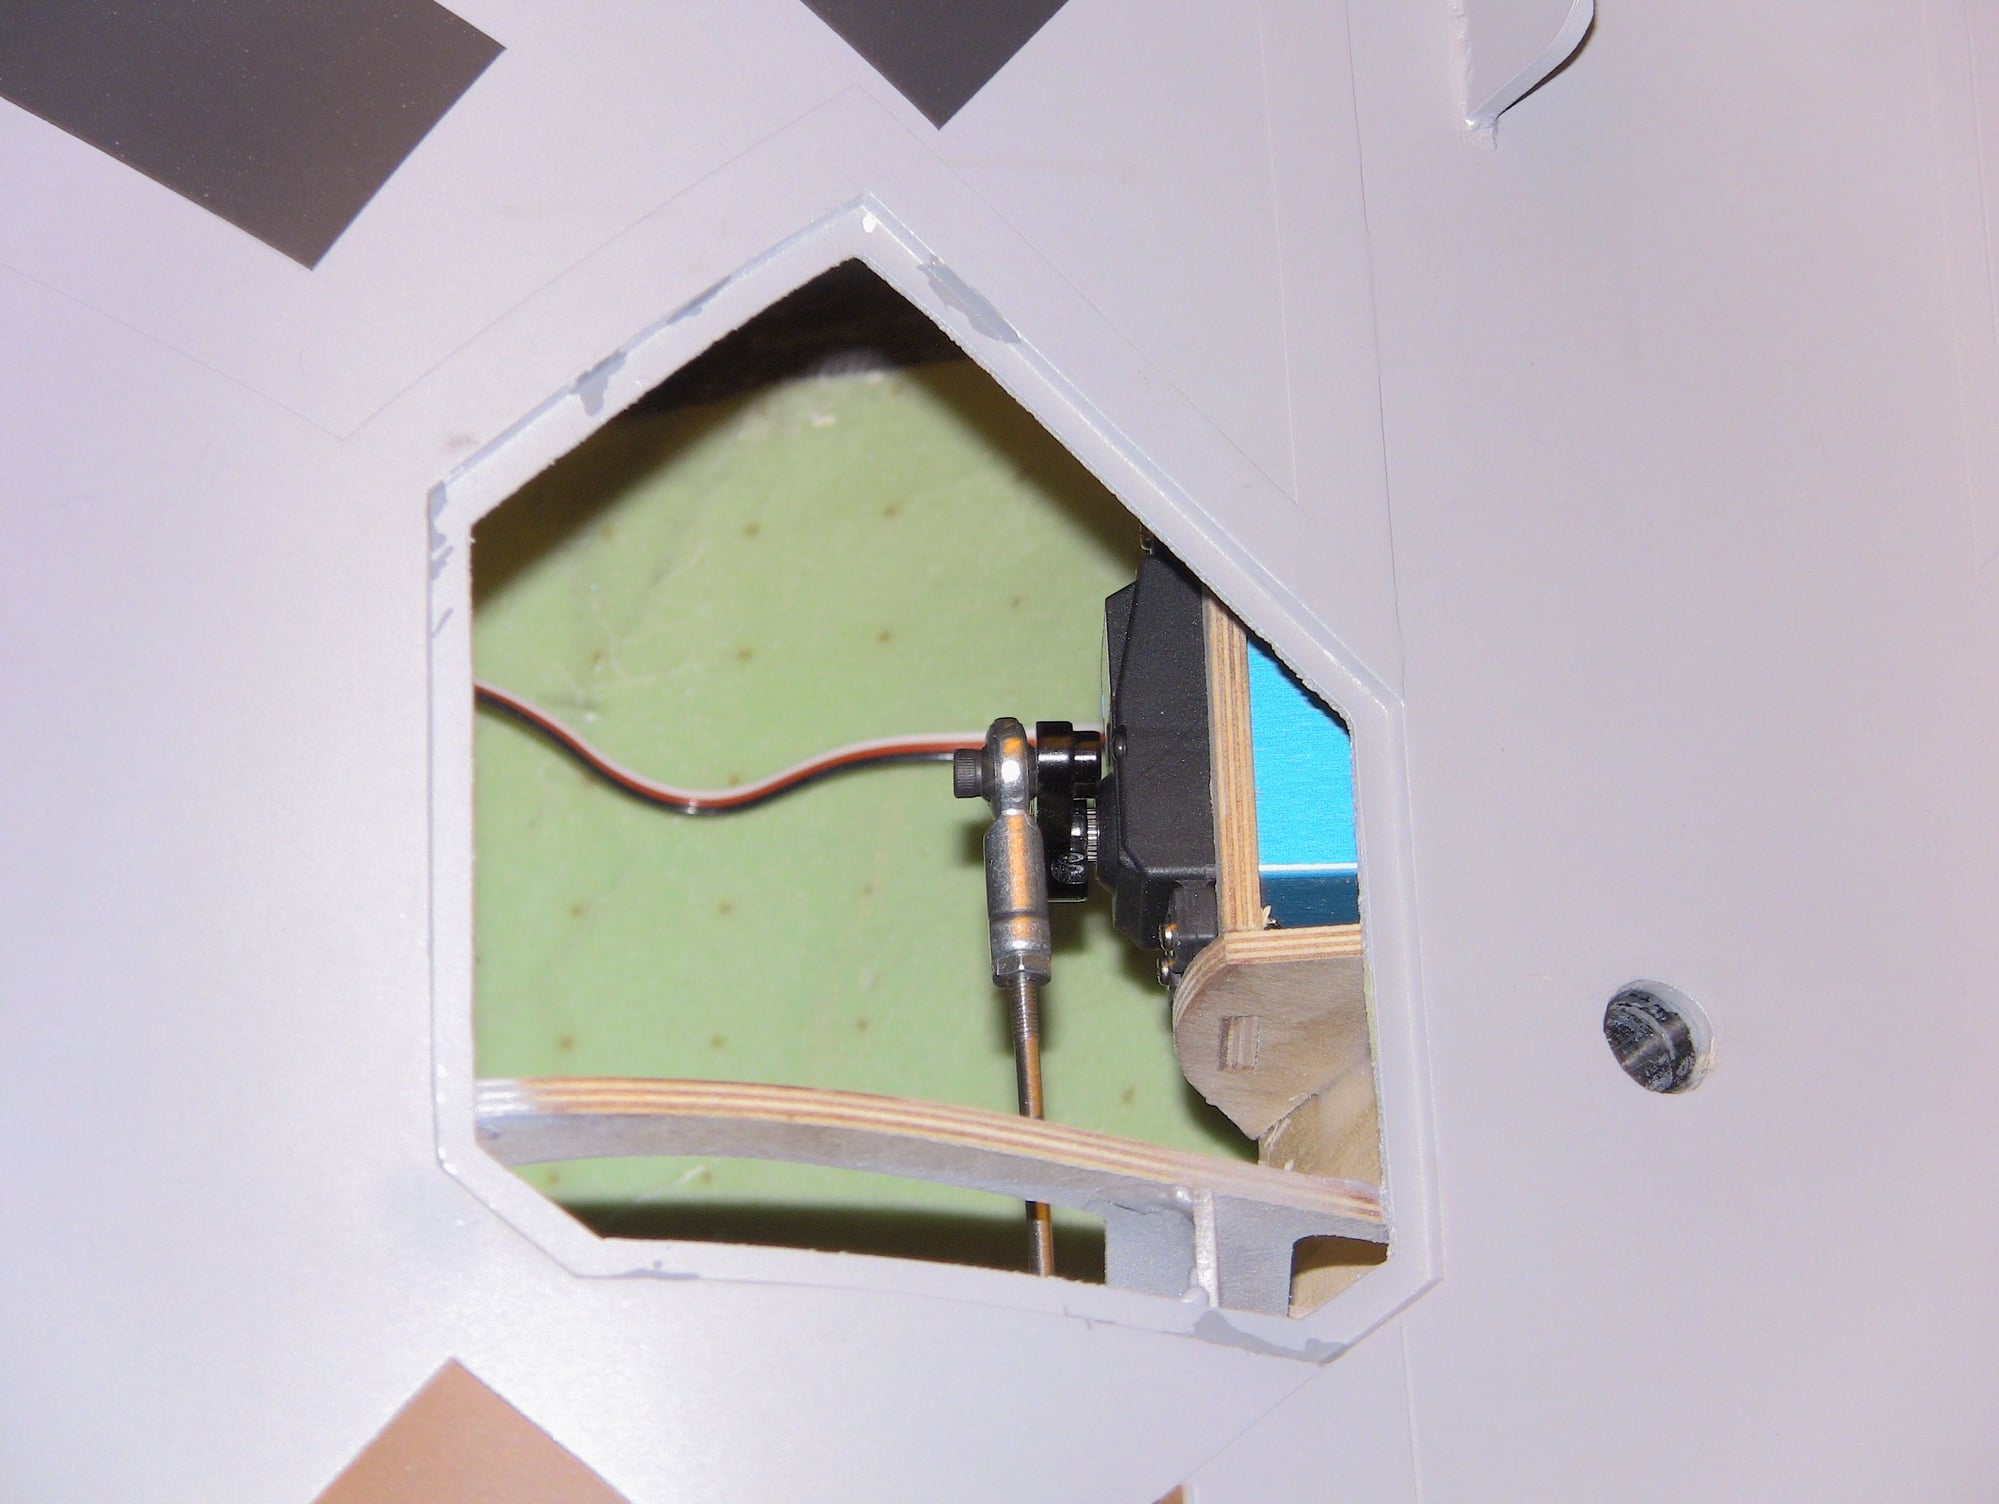
I finished the second wing today, im going back a bit showing the hardware per surface to help anyone. I added some extra washers on rod ends for clearance and extra safety, the brass balls pop out pretty easy.
1/2 arms is more than enough for servo throws and it still will probably require less than actually available. The flap servo is the hardest to get in but doable, I manage to put the servo in from the inside so I didnt have to cut the wing root at all.
video is uploading on my youtube channel showing all of this and more.
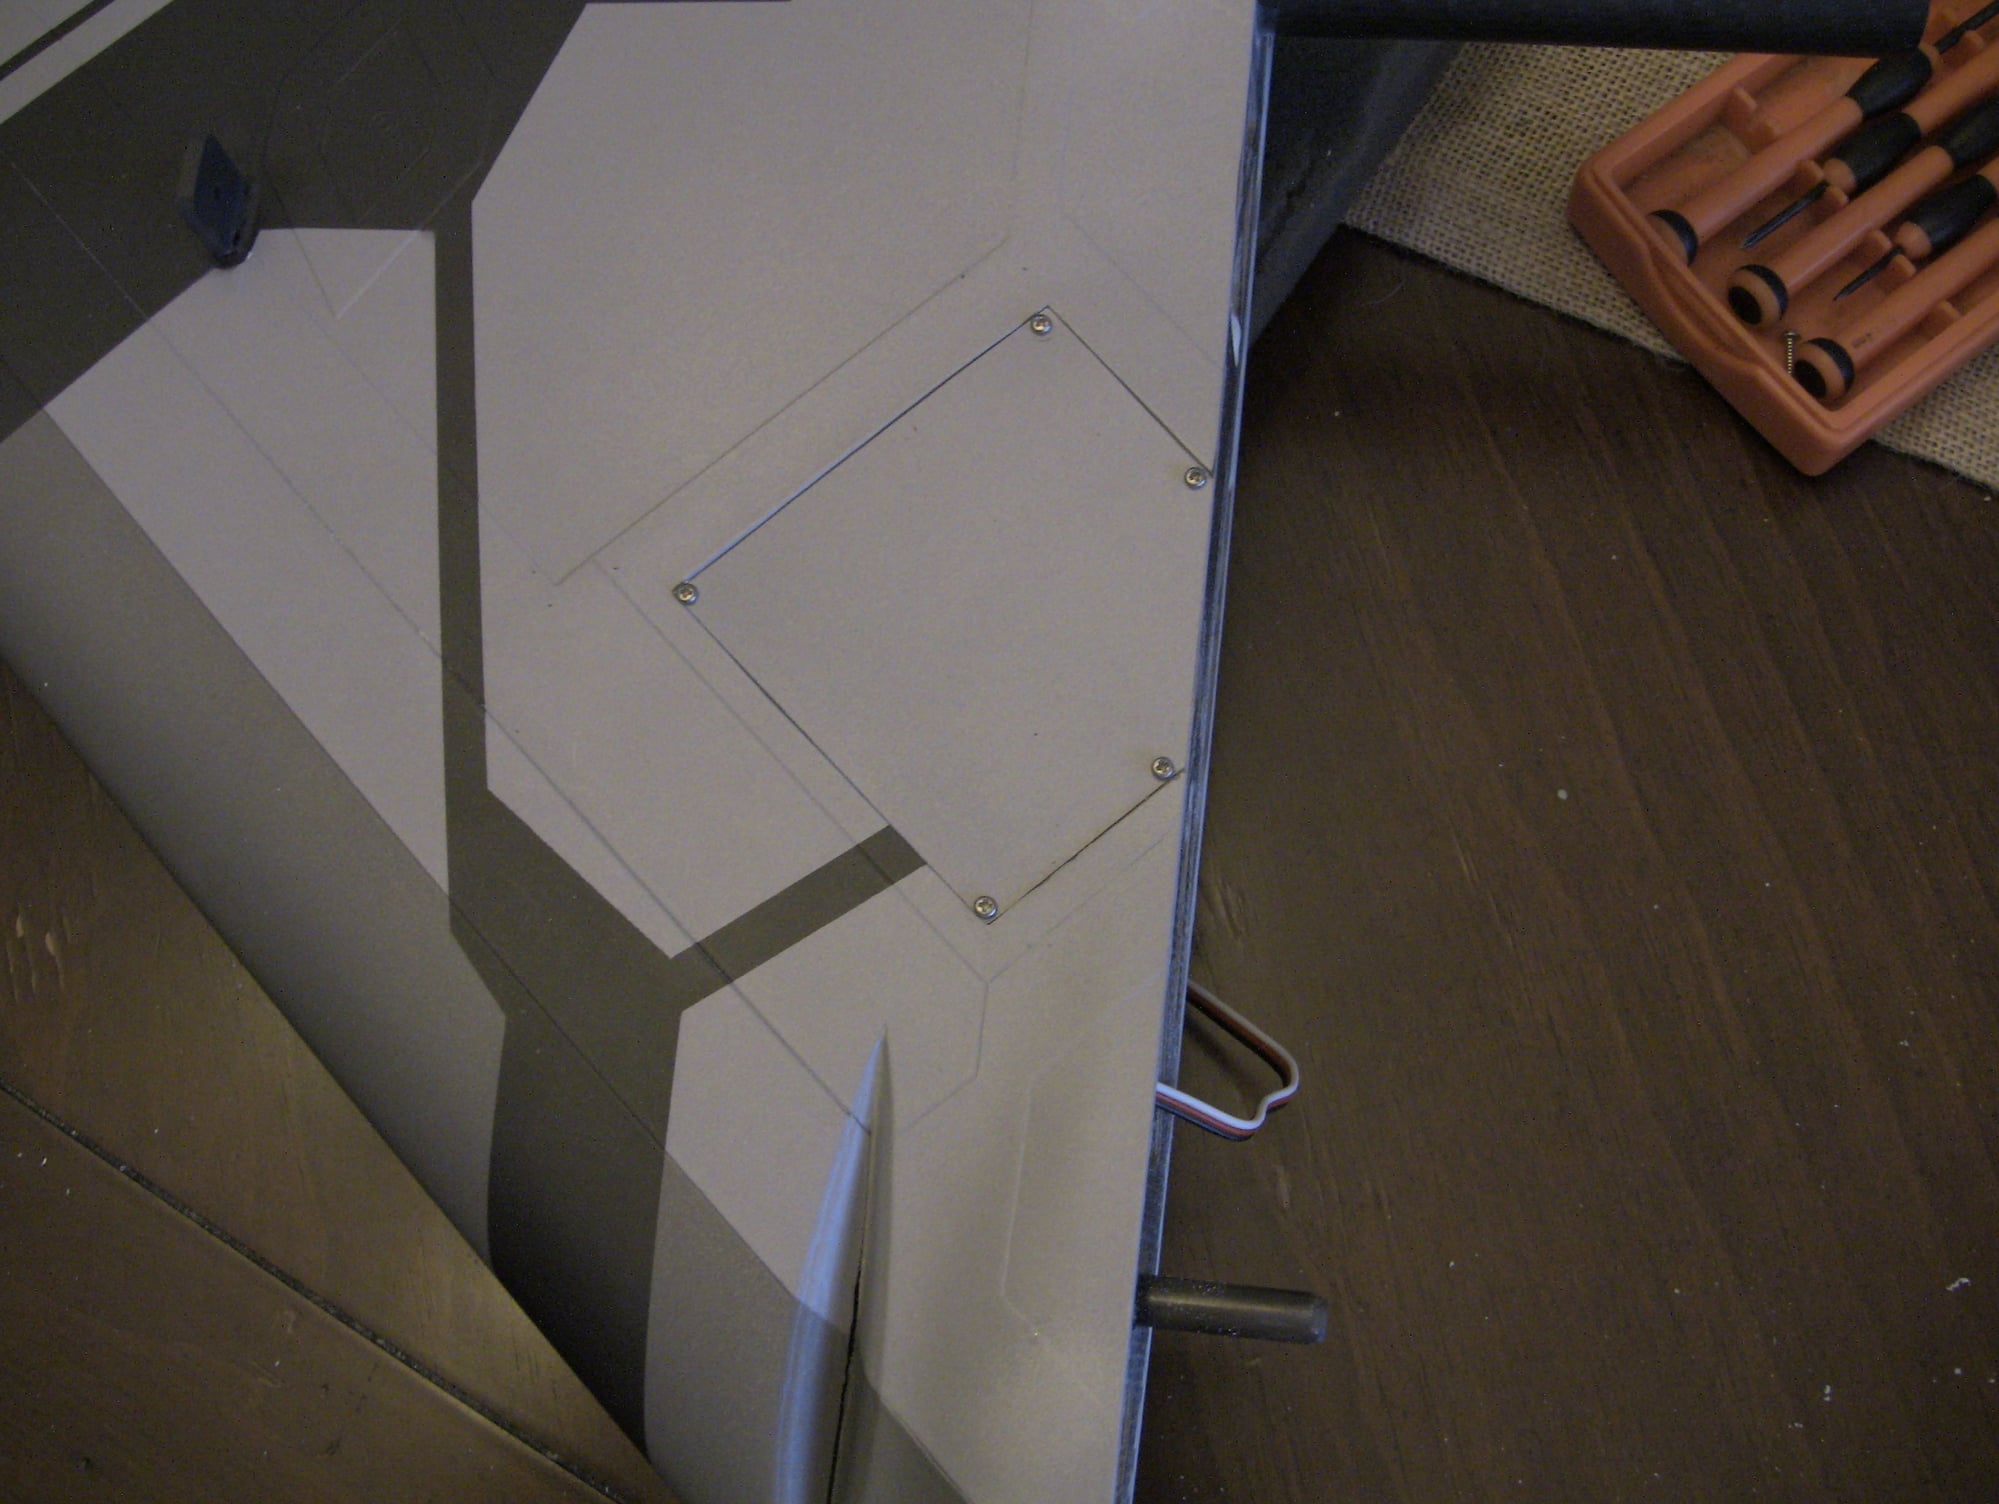
Leading edge flap hardware
Trailing edge flap hardware only thing wrong here is the rod, the rod in the aileron is the correct rod. The Stock is too short
Aileron setup

This glue was preventing the flap from moving at first. Once I broke the glue loose from the hinge I went back with a dremel and cleaned it out. its just extra weight
1/2 arms is more than enough for servo throws and it still will probably require less than actually available. The flap servo is the hardest to get in but doable, I manage to put the servo in from the inside so I didnt have to cut the wing root at all.
video is uploading on my youtube channel showing all of this and more.
Leading edge flap hardware
Trailing edge flap hardware only thing wrong here is the rod, the rod in the aileron is the correct rod. The Stock is too short
Aileron setup
This glue was preventing the flap from moving at first. Once I broke the glue loose from the hinge I went back with a dremel and cleaned it out. its just extra weight
Last edited by FenderBean; 01-31-2020 at 06:17 PM.
02-01-2020, 09:37 AM
#74
Thread Starter
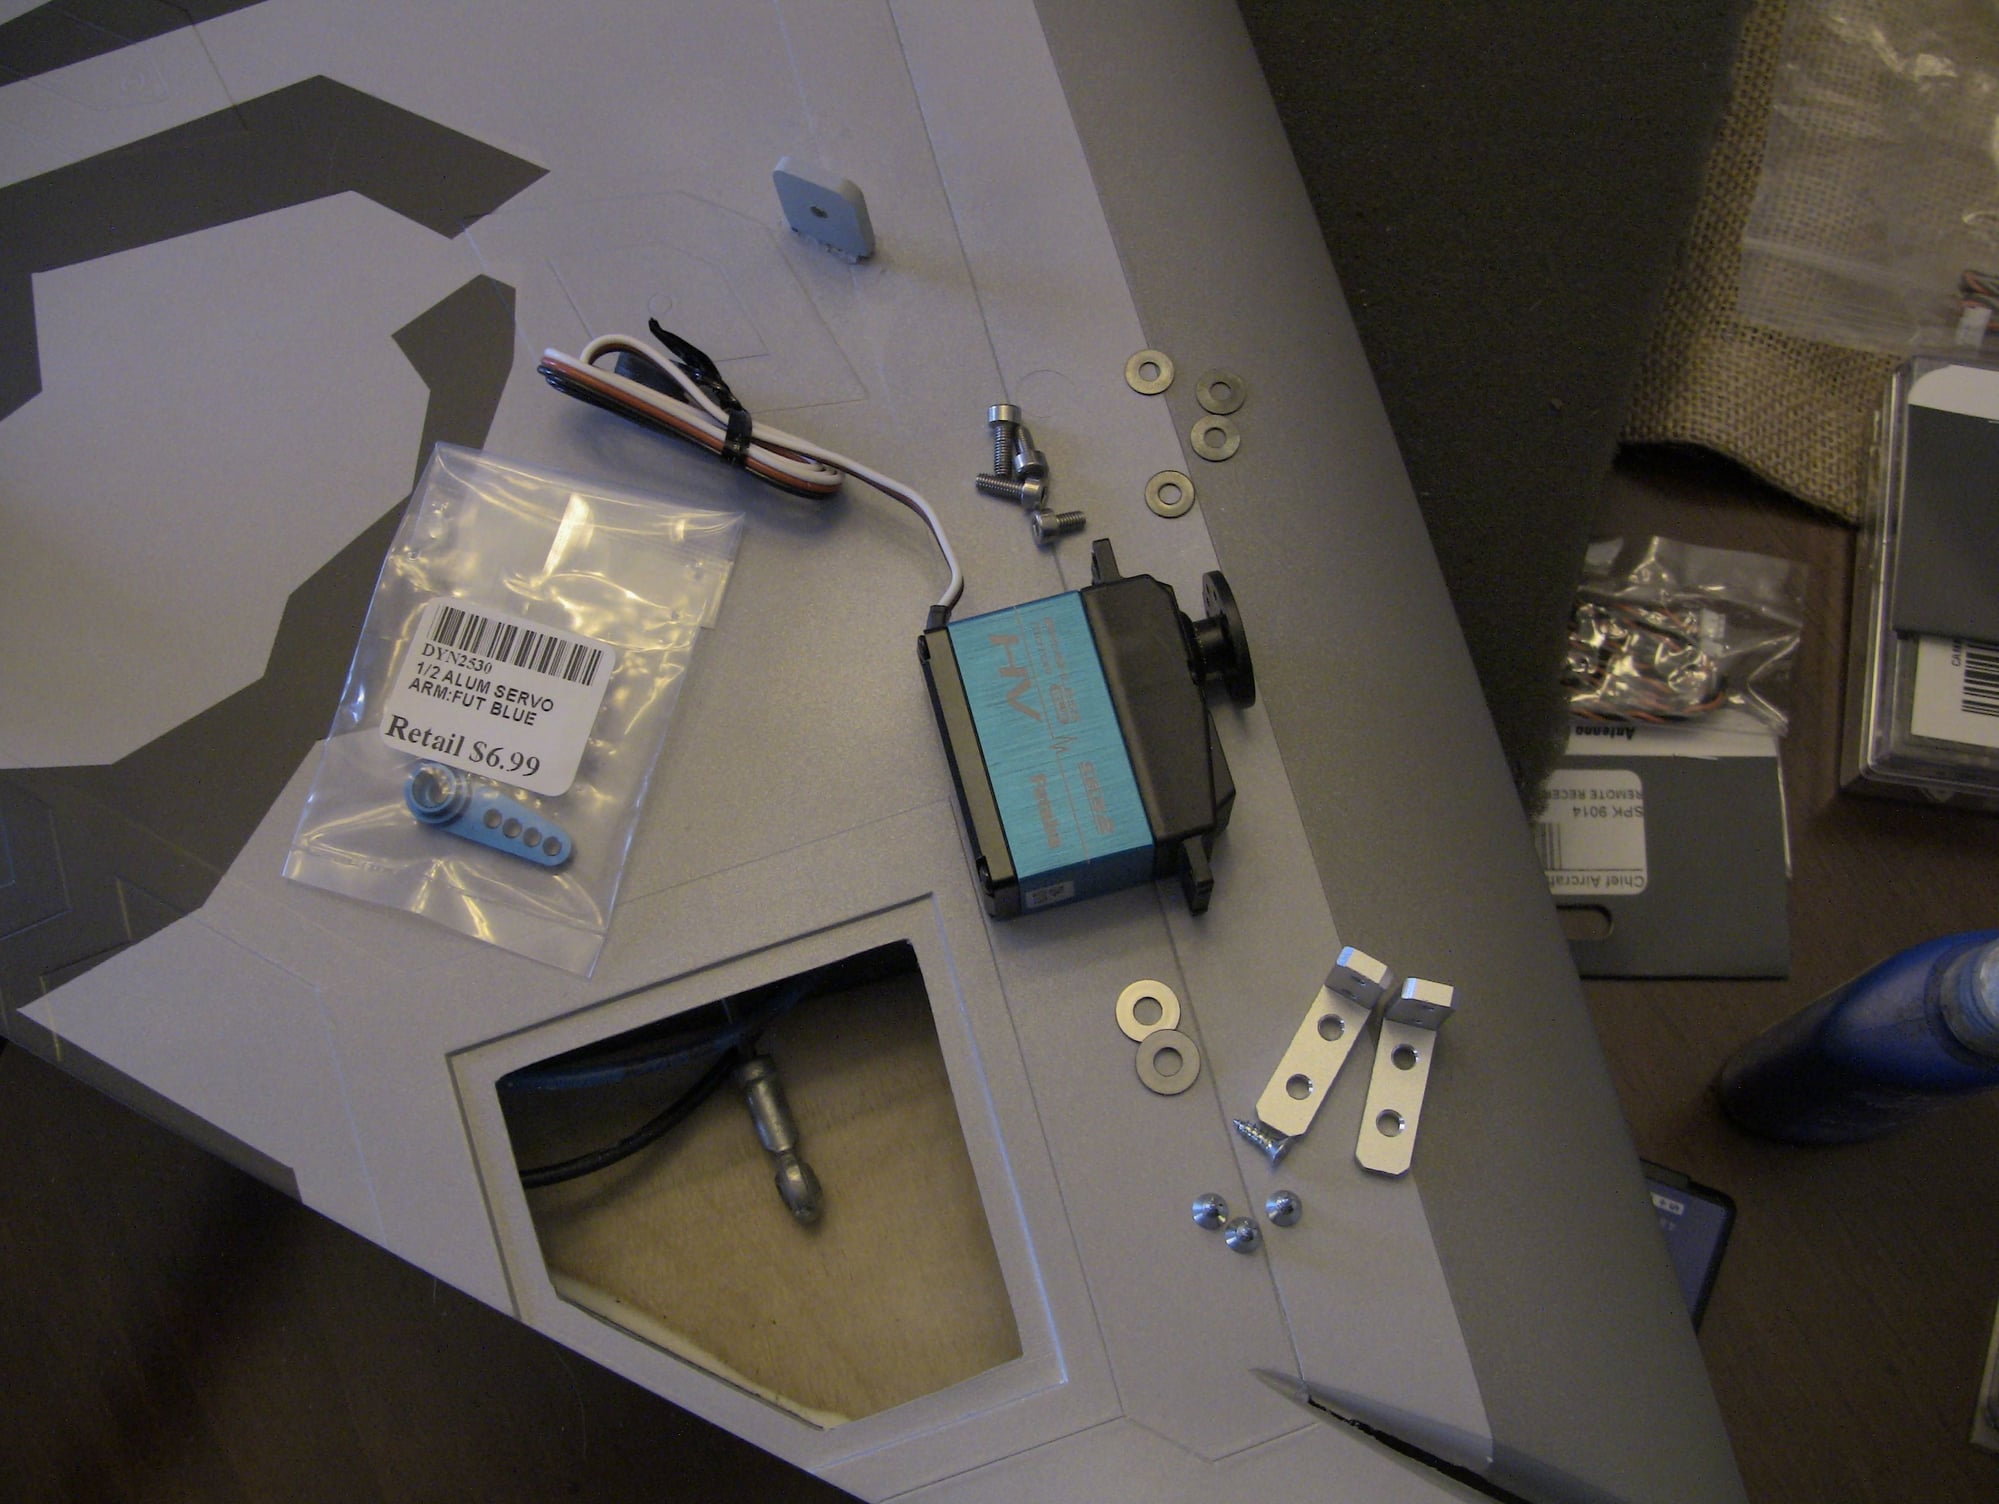
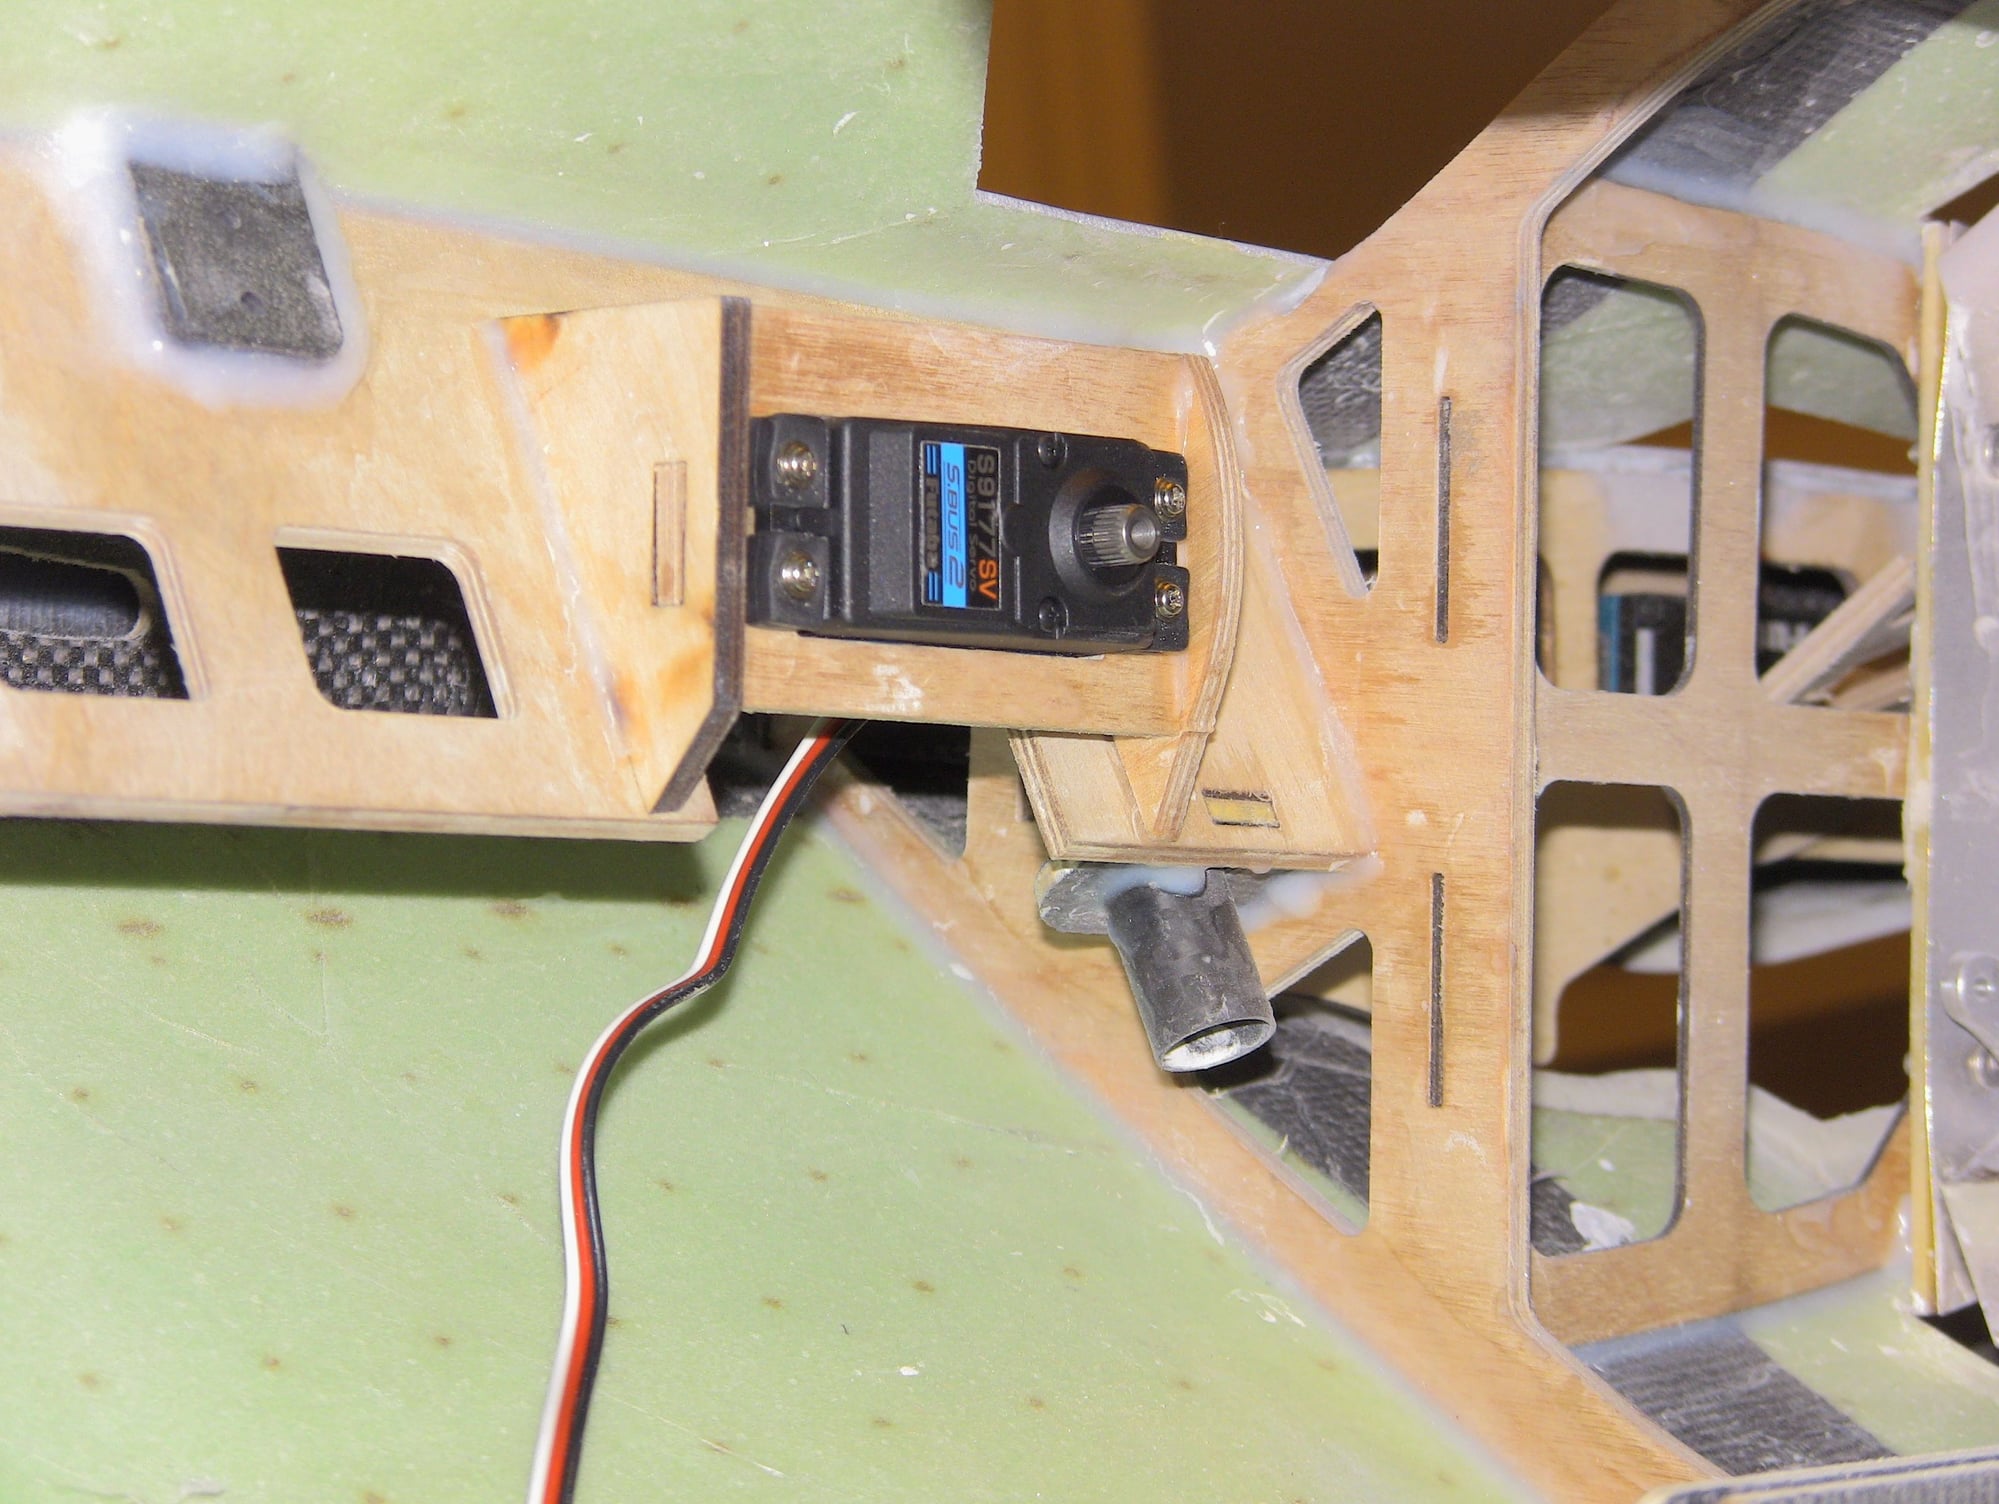
Both wings are done, both stab servos are in, and rudders are underway. The rudder design can be a pain, I may have found a road block on mine I am investigating and will post if need be.
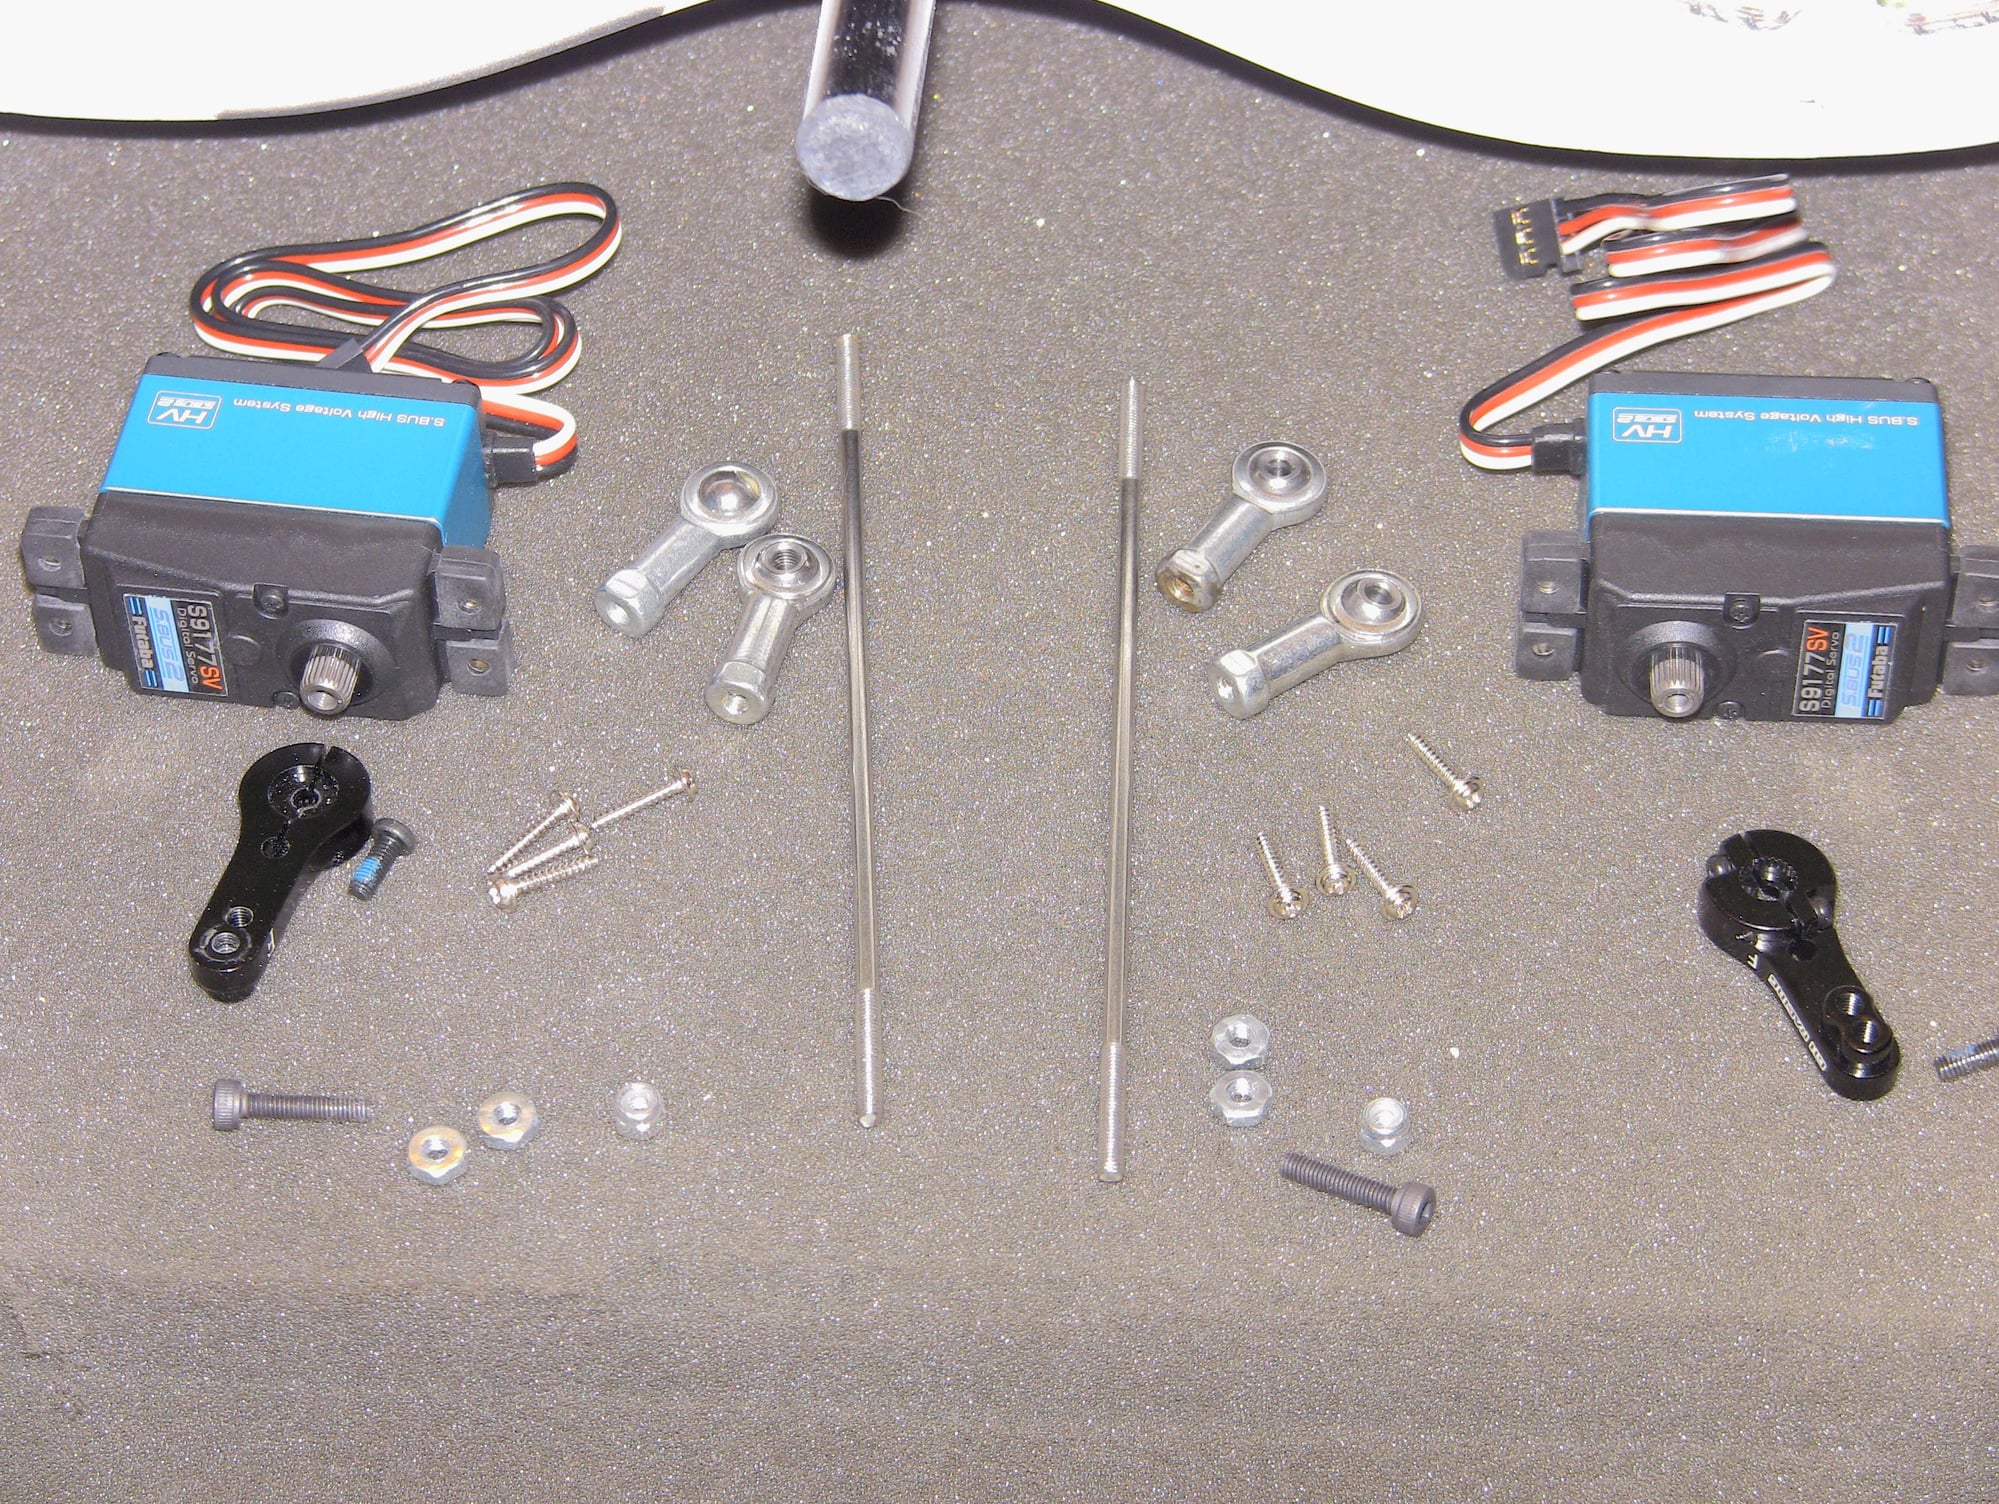
The stab servos have a little movement so when u install and drill mount holes try and align the center of the servo output shaft to the center of the stab shaft. The rudder servos no matter what servo you use will require work on alignment and height adjustment to prevent binding.
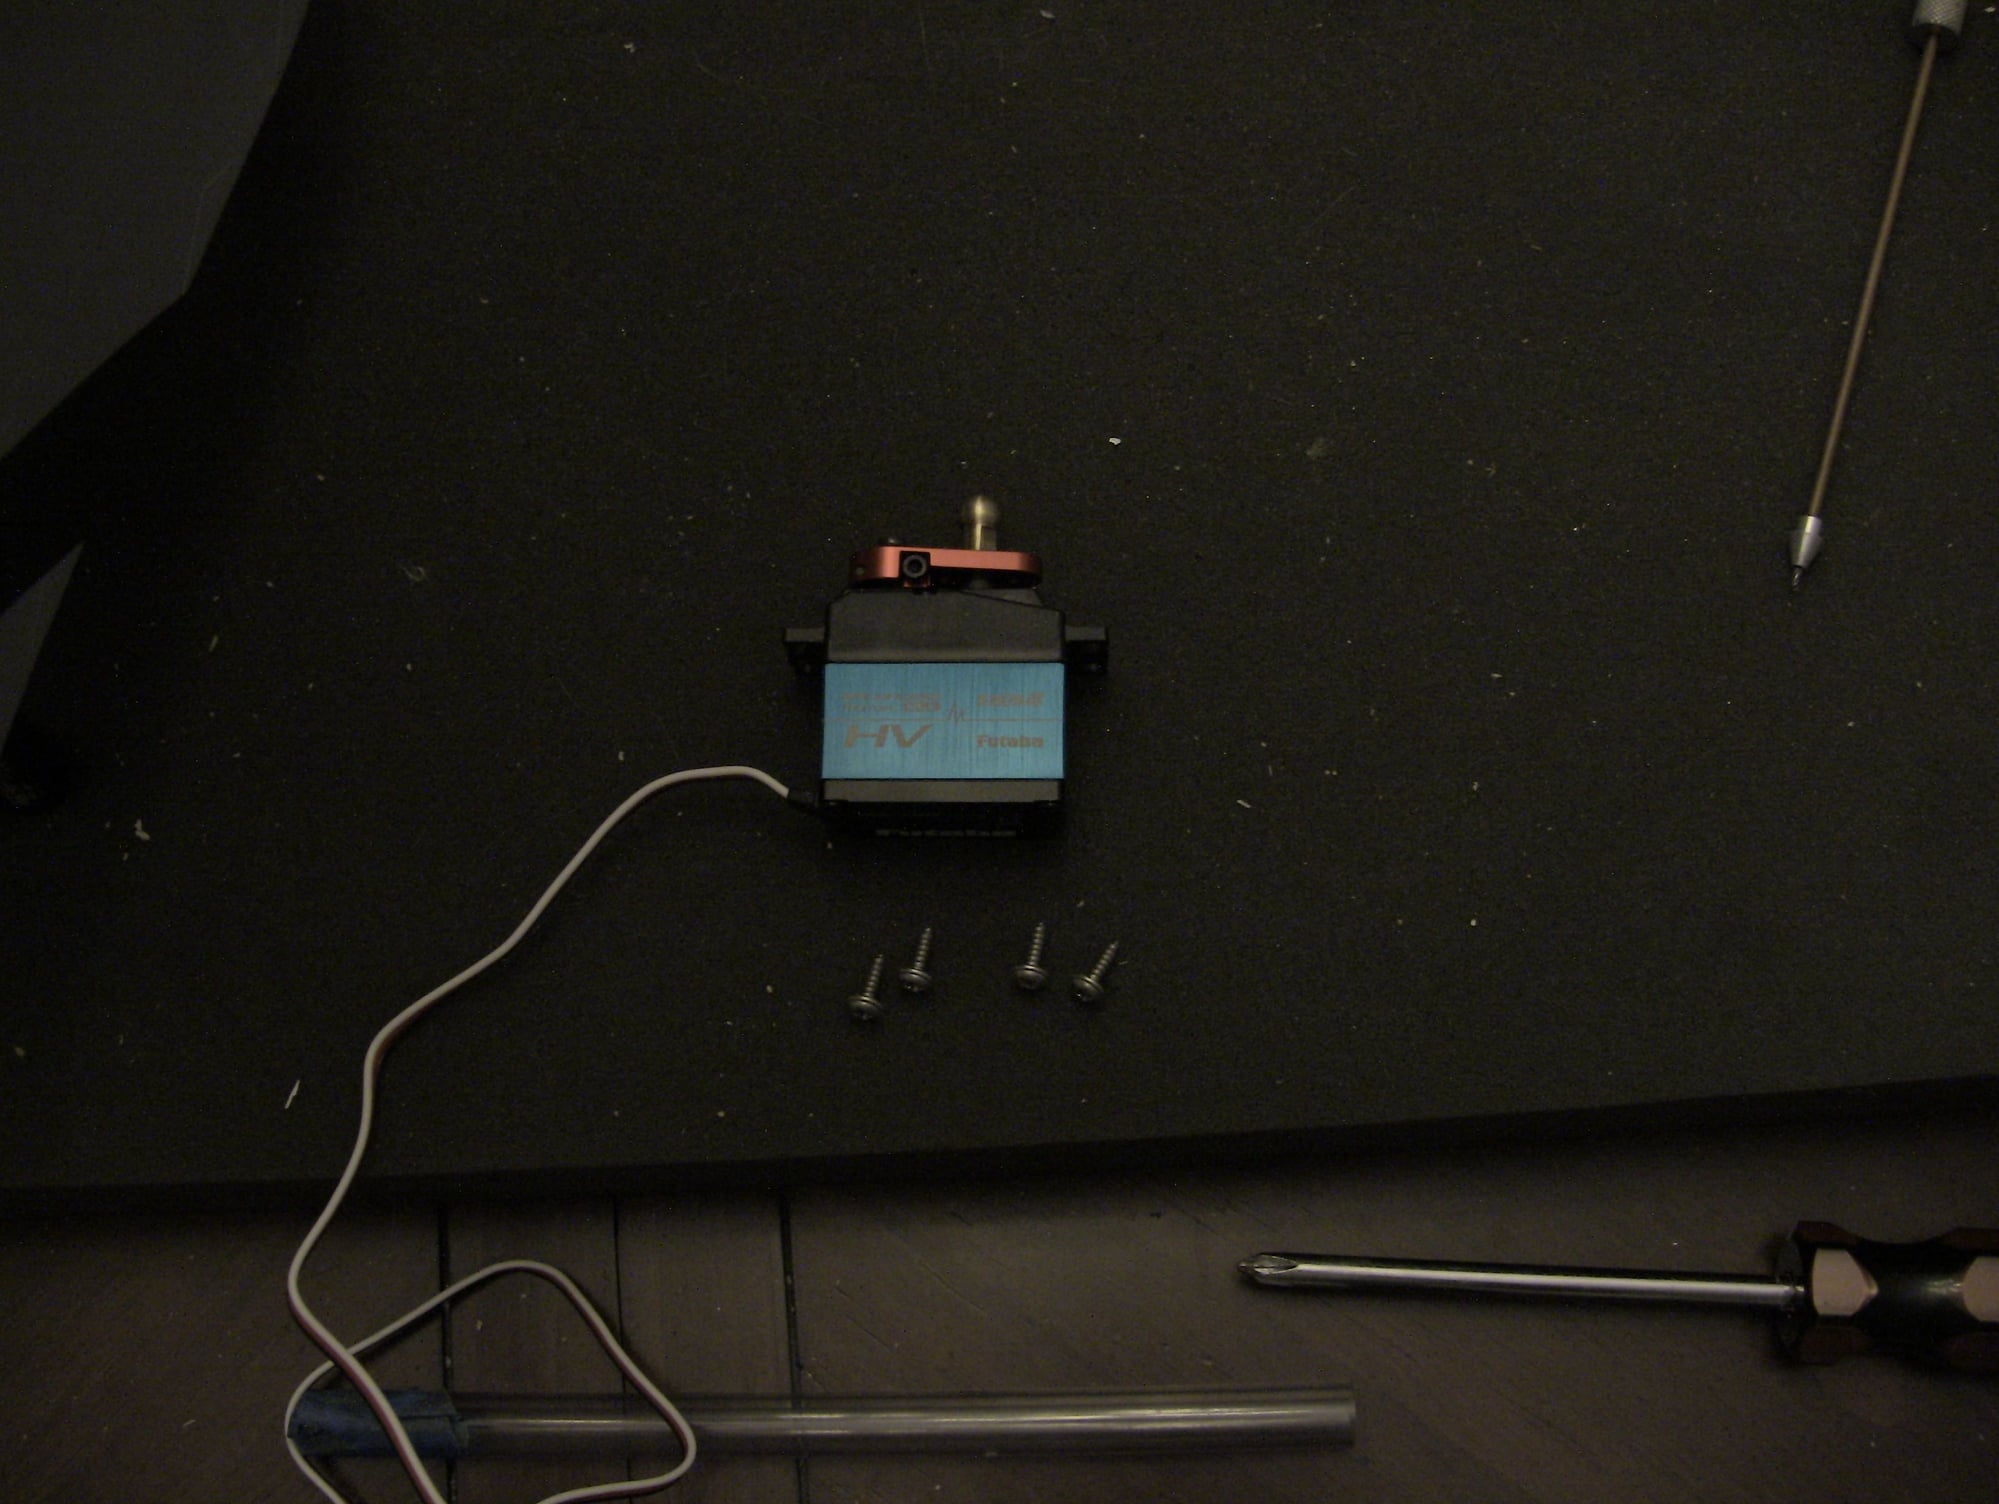
Supplied servo arm, ball and 3mm screw

Use inner hole on the servo arm and four supplied screws
Stab servo install and still need to trim the area above and below to allow for the screw head clearance
Houston we have a problem, good glue joint
Bad glue joint!!!
The stab servos have a little movement so when u install and drill mount holes try and align the center of the servo output shaft to the center of the stab shaft. The rudder servos no matter what servo you use will require work on alignment and height adjustment to prevent binding.
Supplied servo arm, ball and 3mm screw
Use inner hole on the servo arm and four supplied screws
Stab servo install and still need to trim the area above and below to allow for the screw head clearance
Houston we have a problem, good glue joint
Bad glue joint!!!
02-01-2020, 03:50 PM
#75
Thread Starter
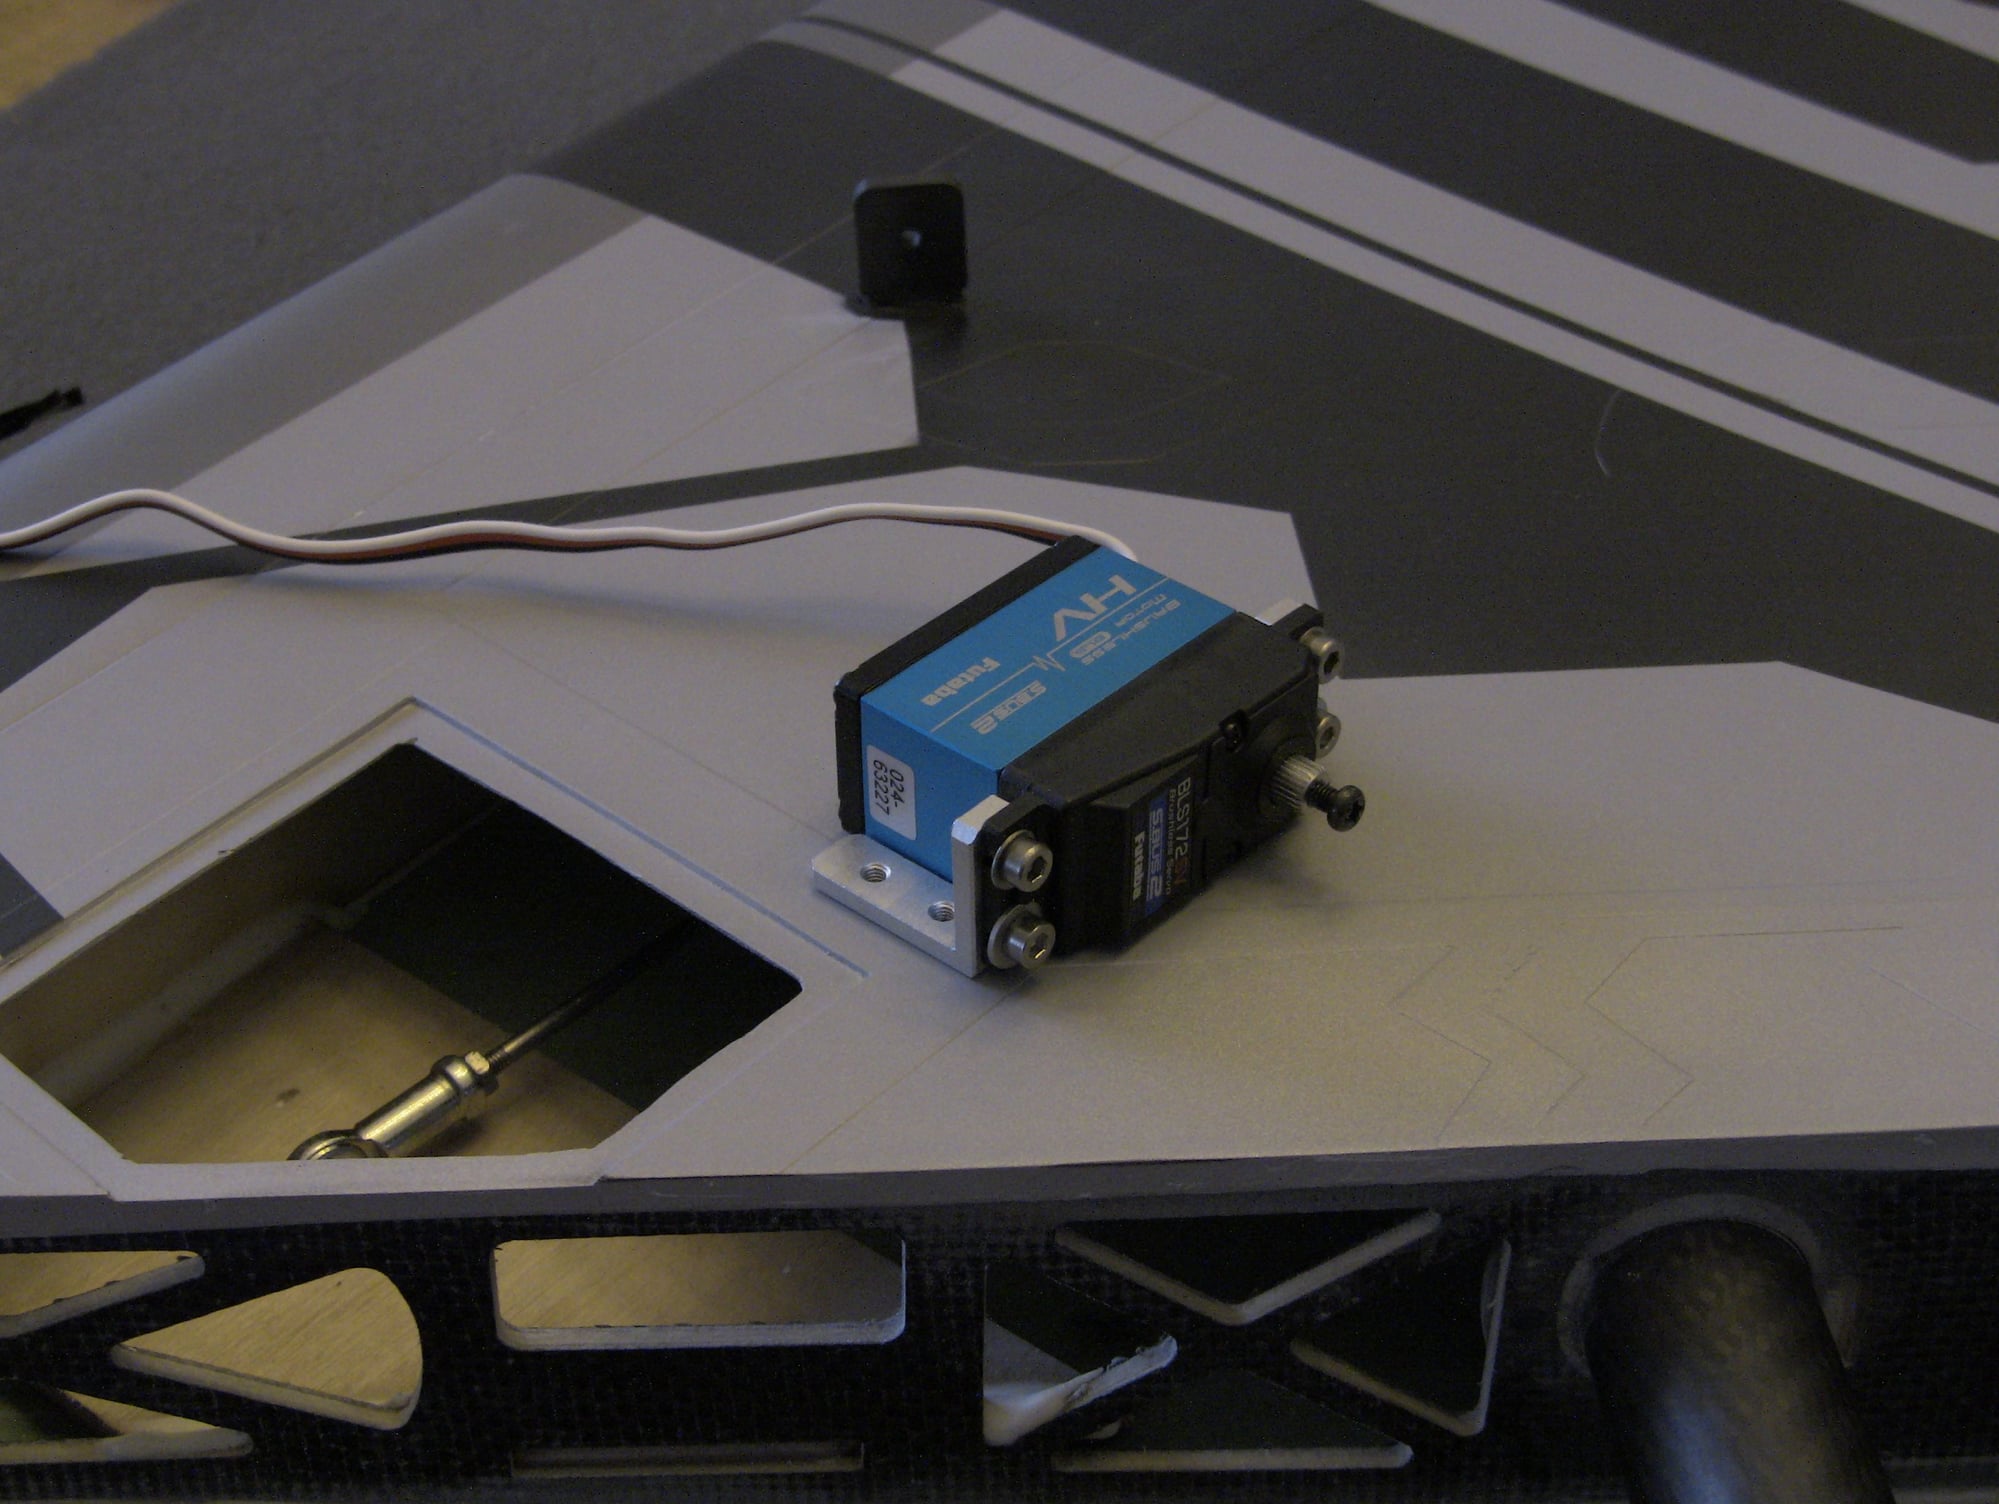
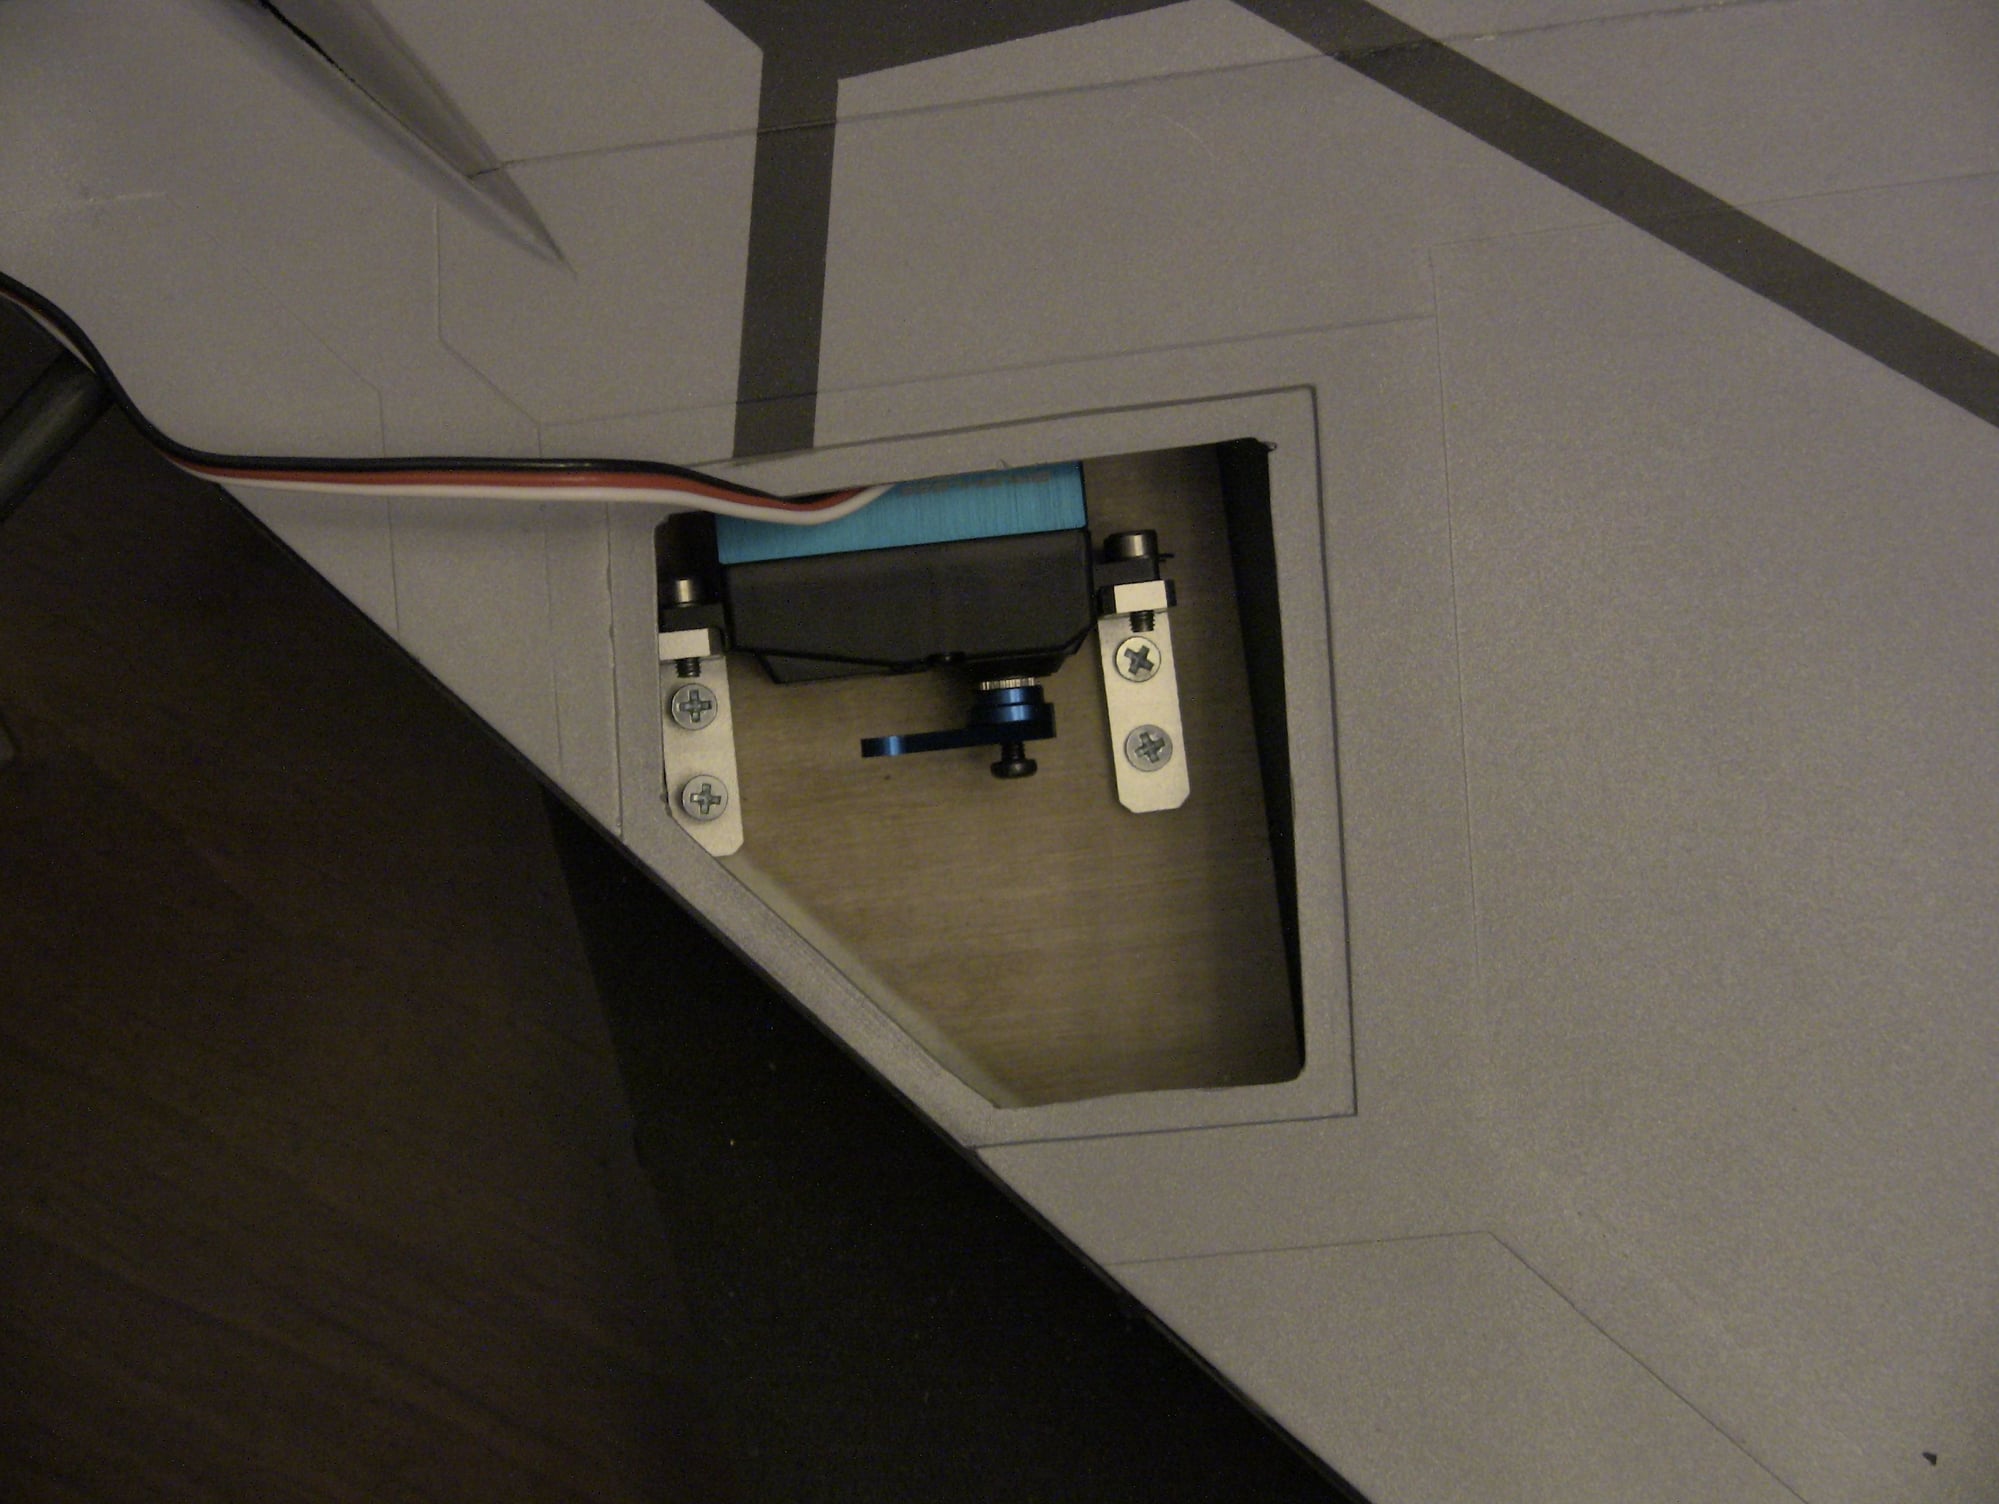
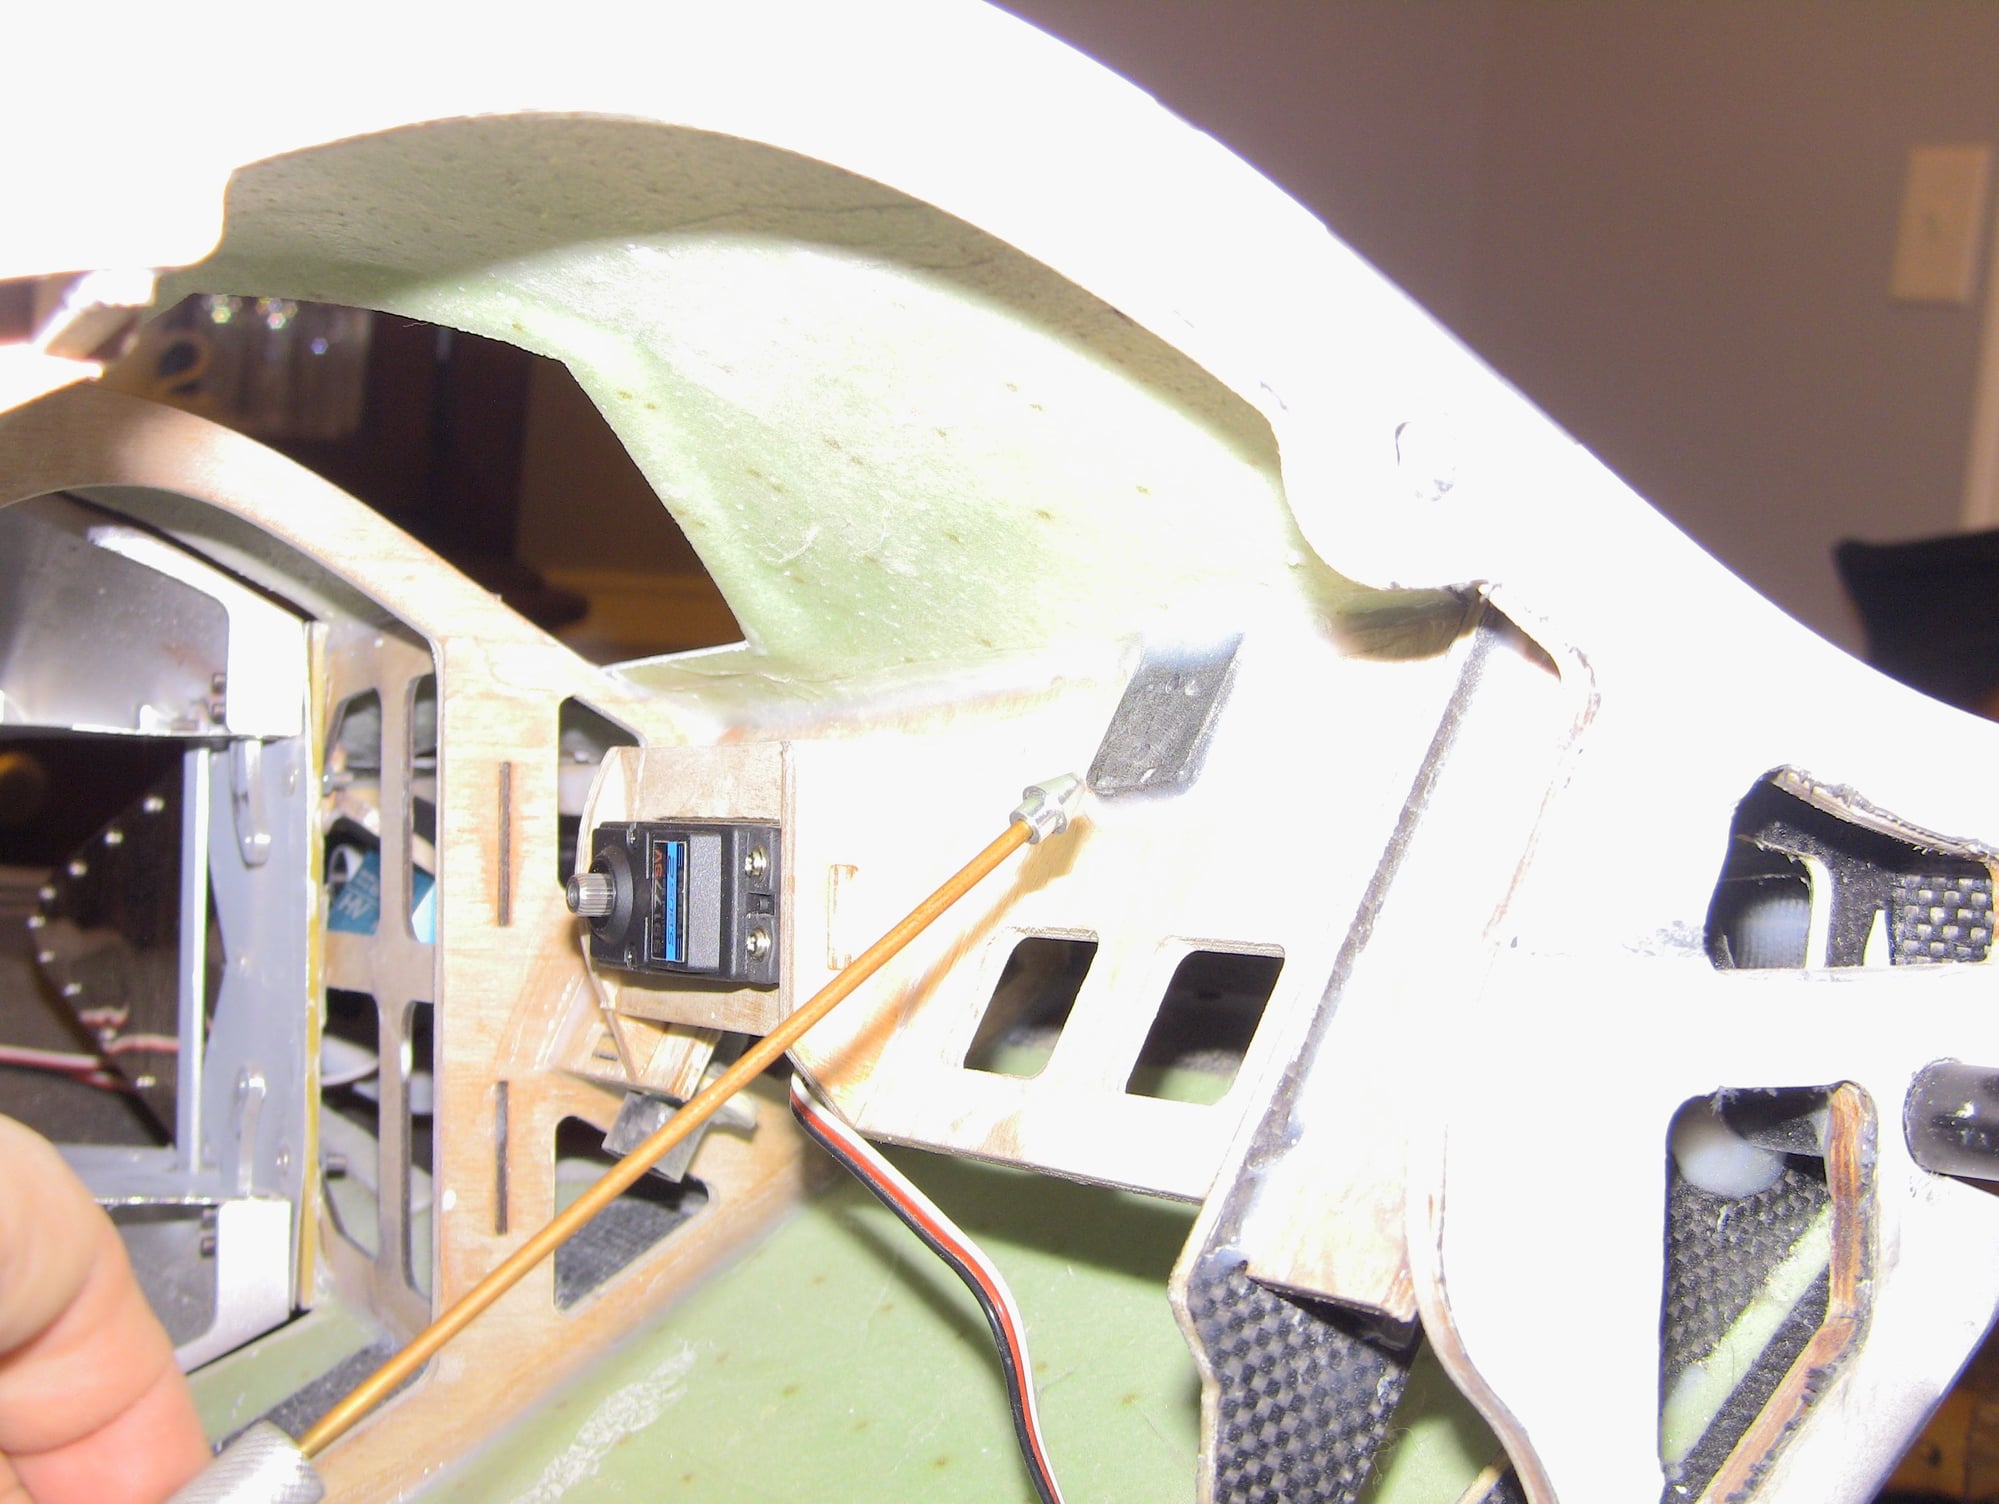
Stab servos and hatches are done, minor trimming on the frame and stab for servo arm clearance. The thrust vectoring servos are in as well as the top hatches, I did have to remove a lots of the ply behind the servos mounts on for the thrust vectoring. The servos would not seat without it, plus I needed to cut an area for the servo leads at the base of the servo.
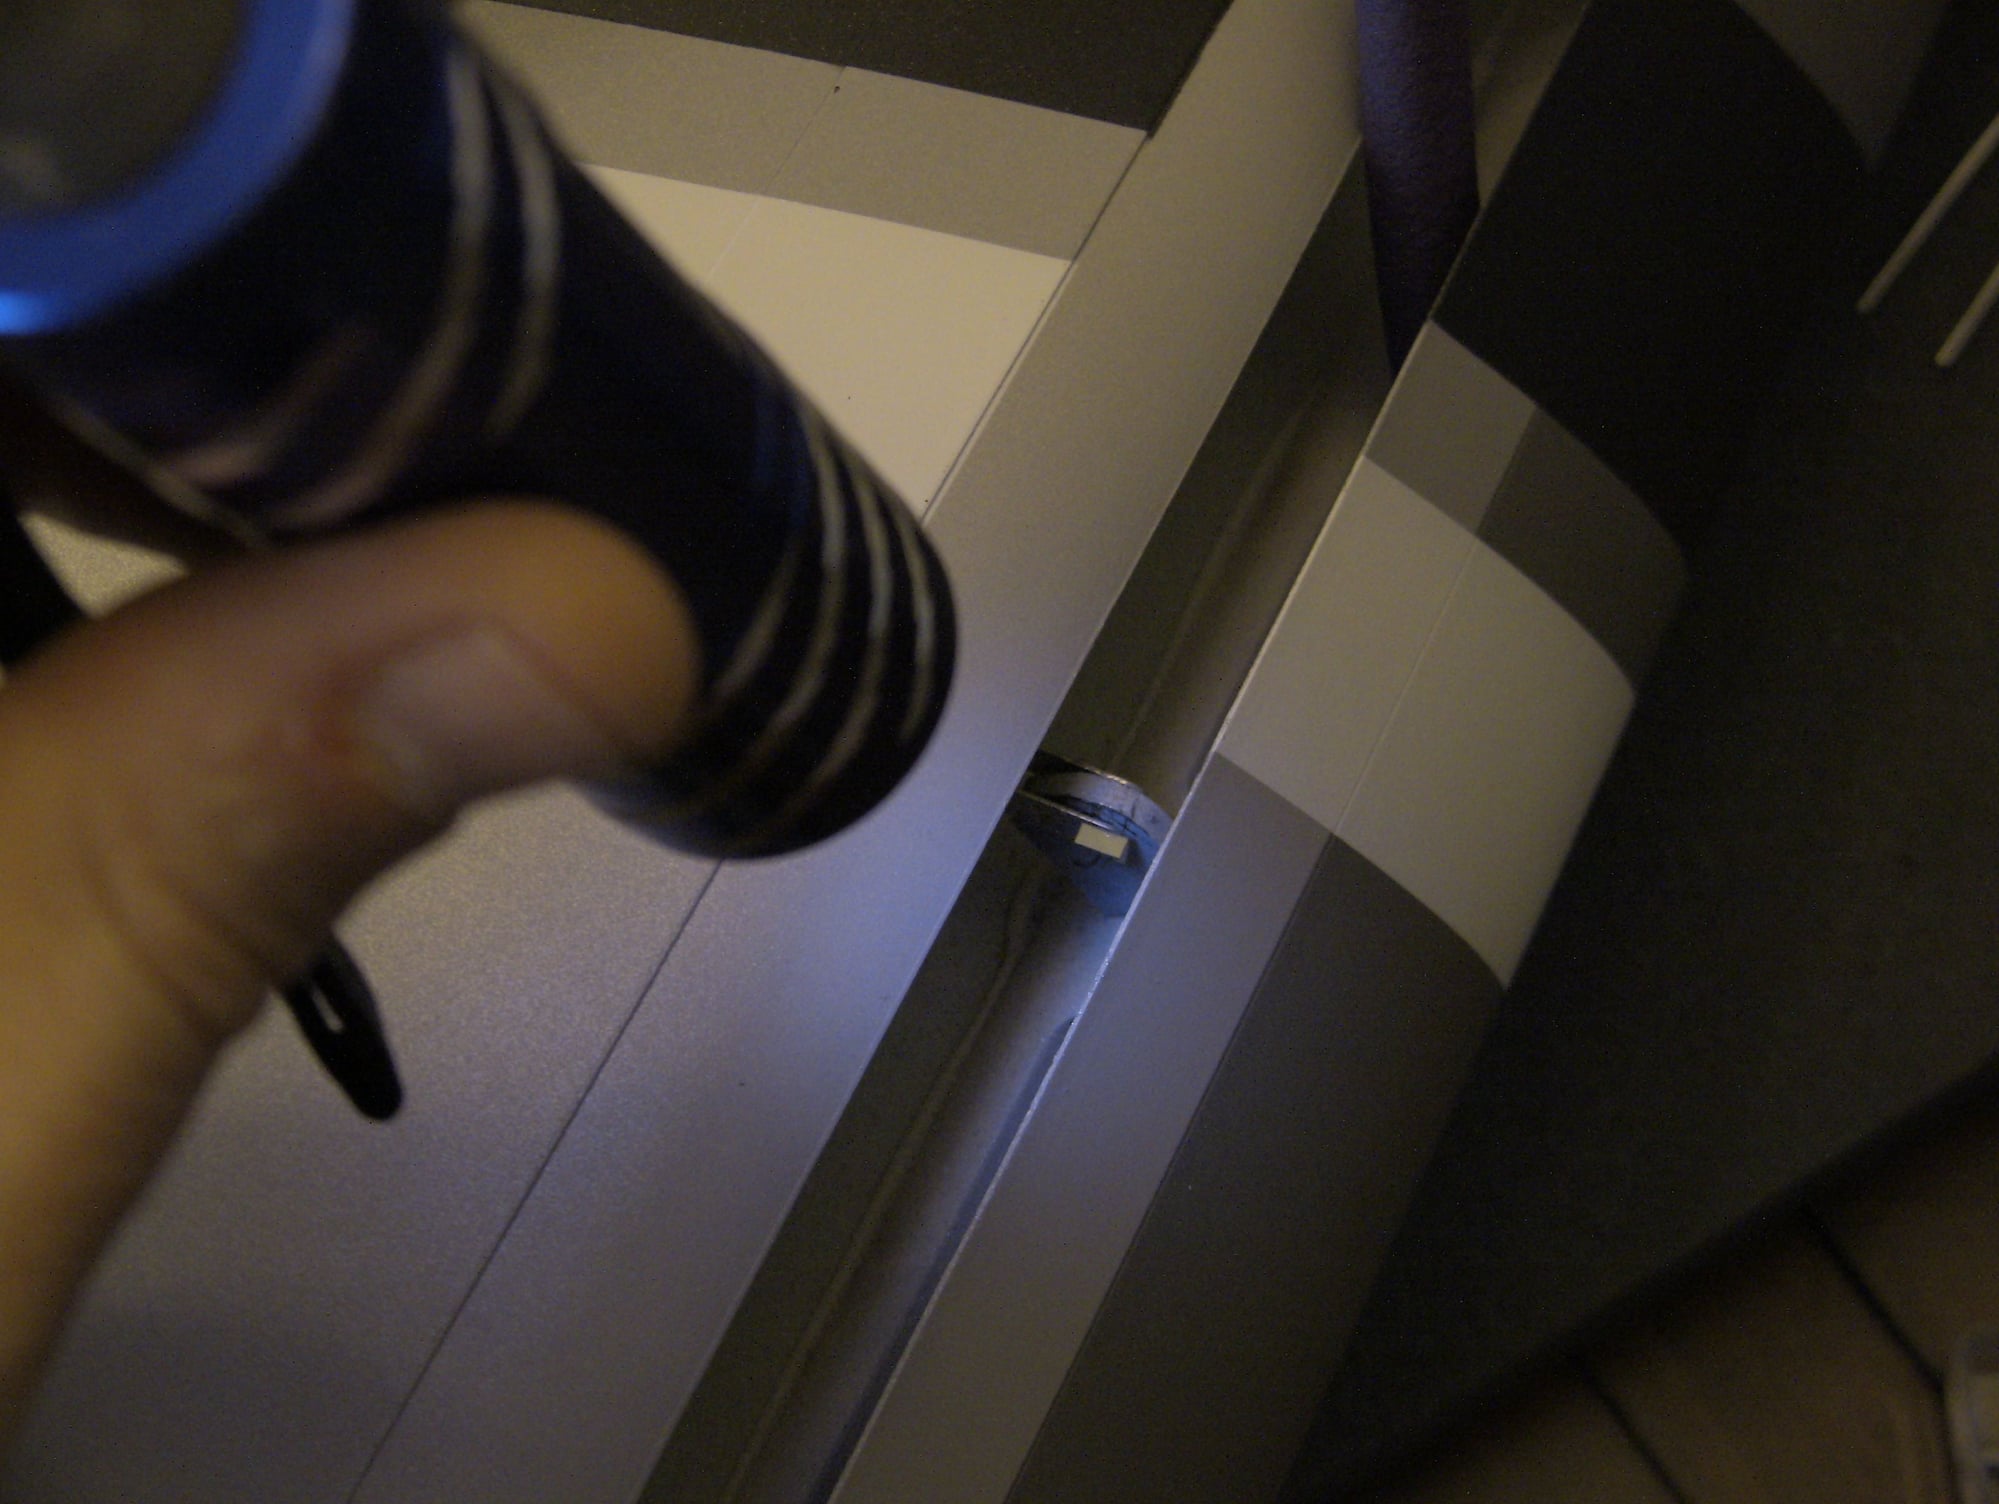
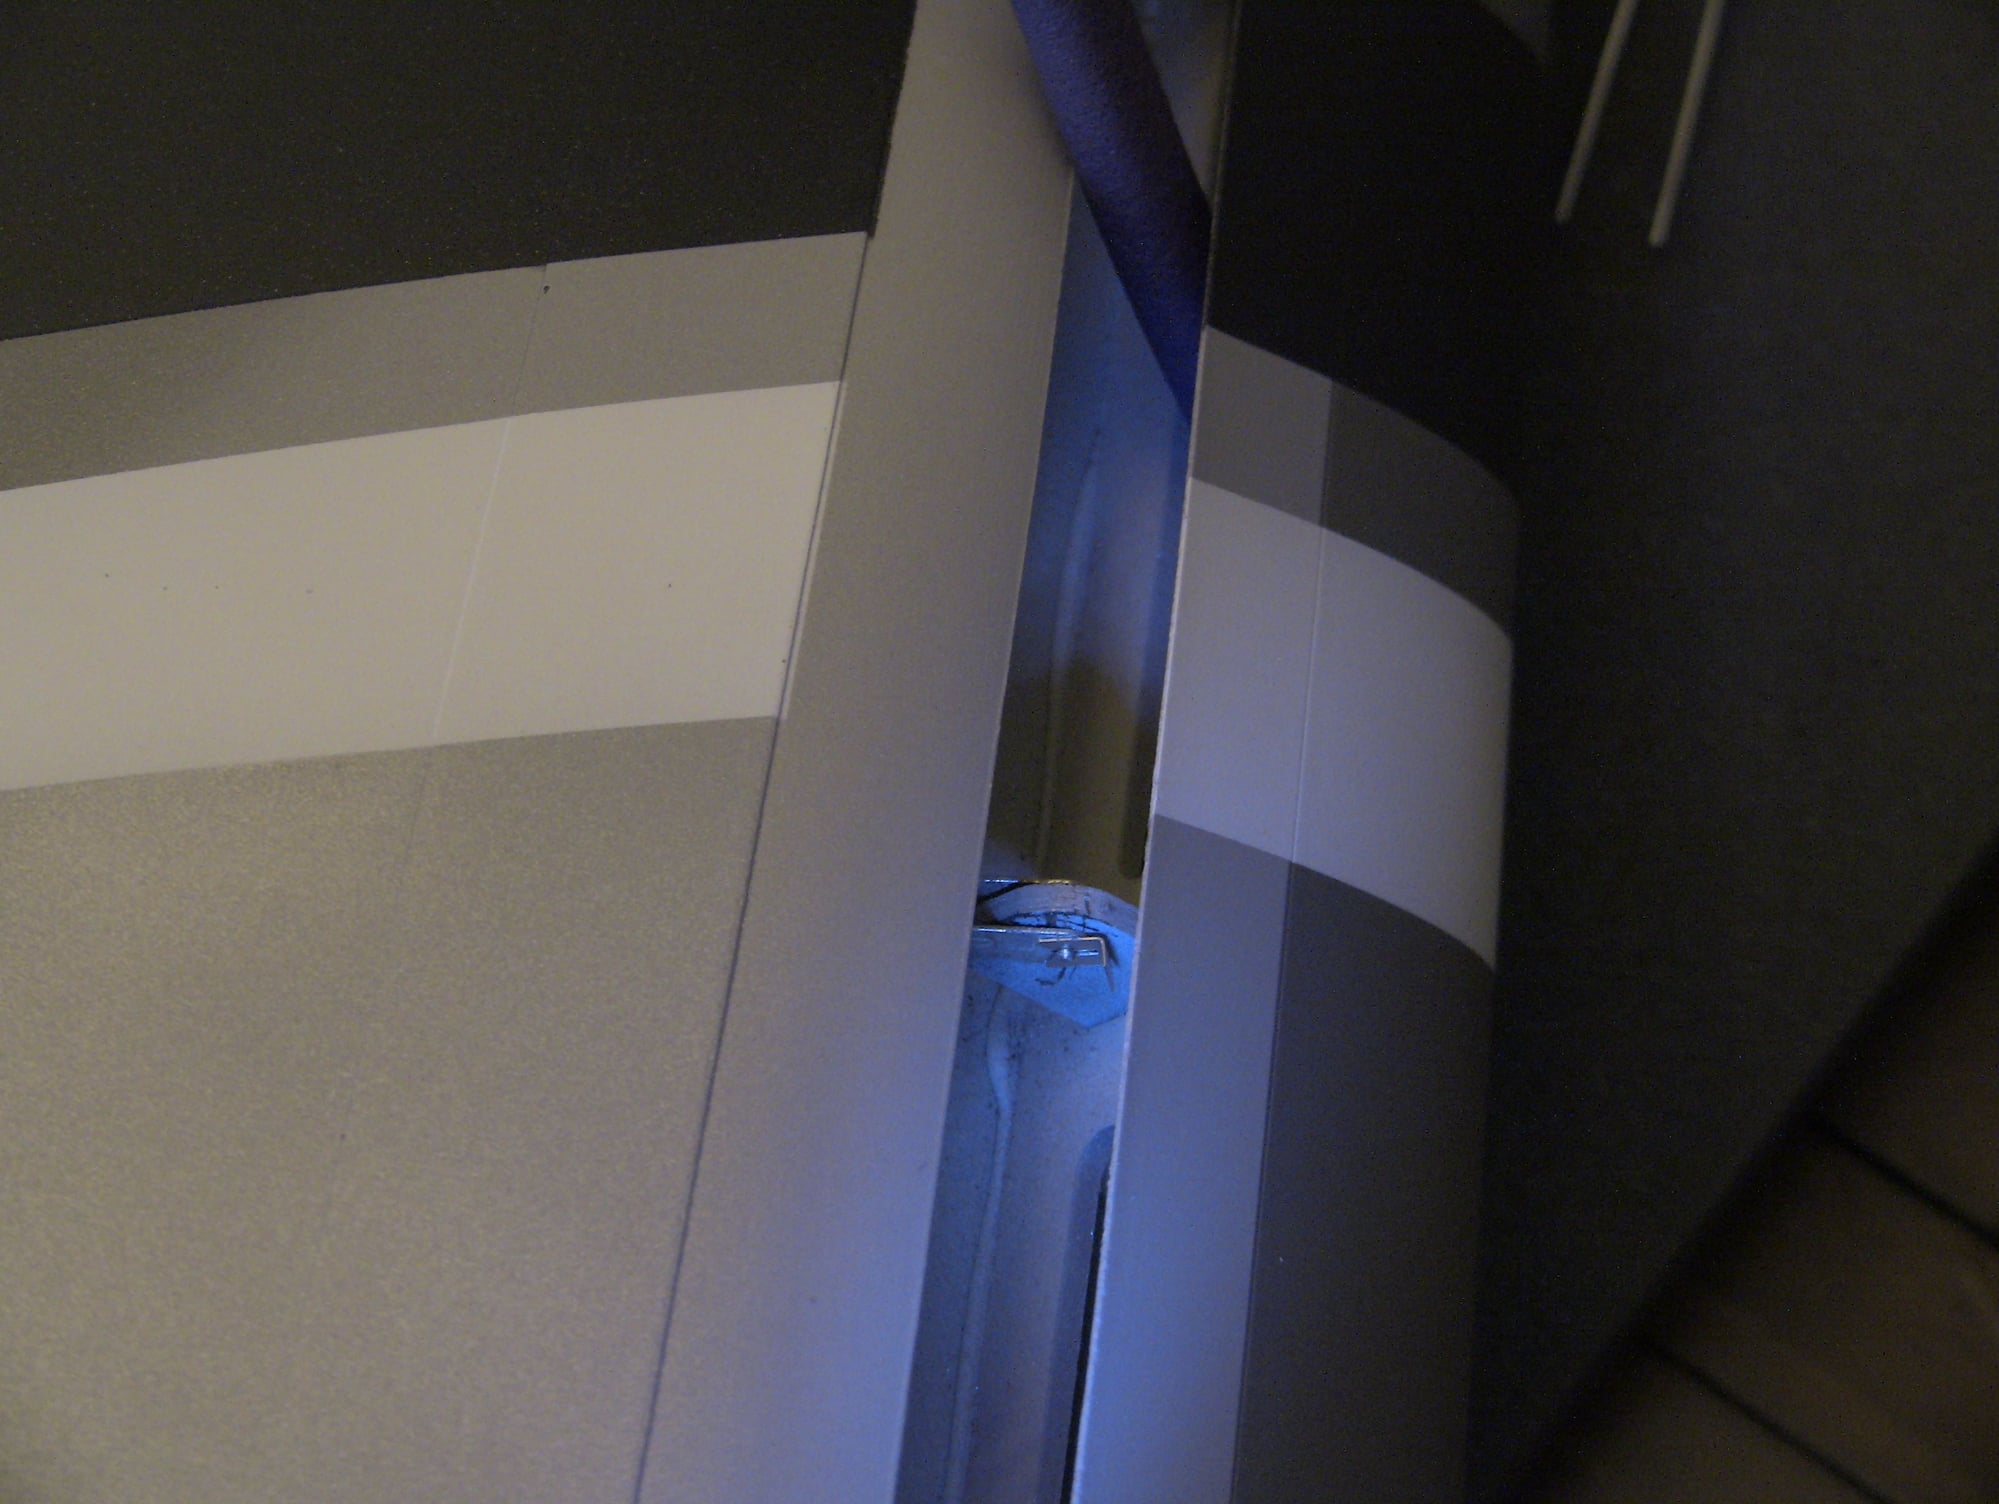
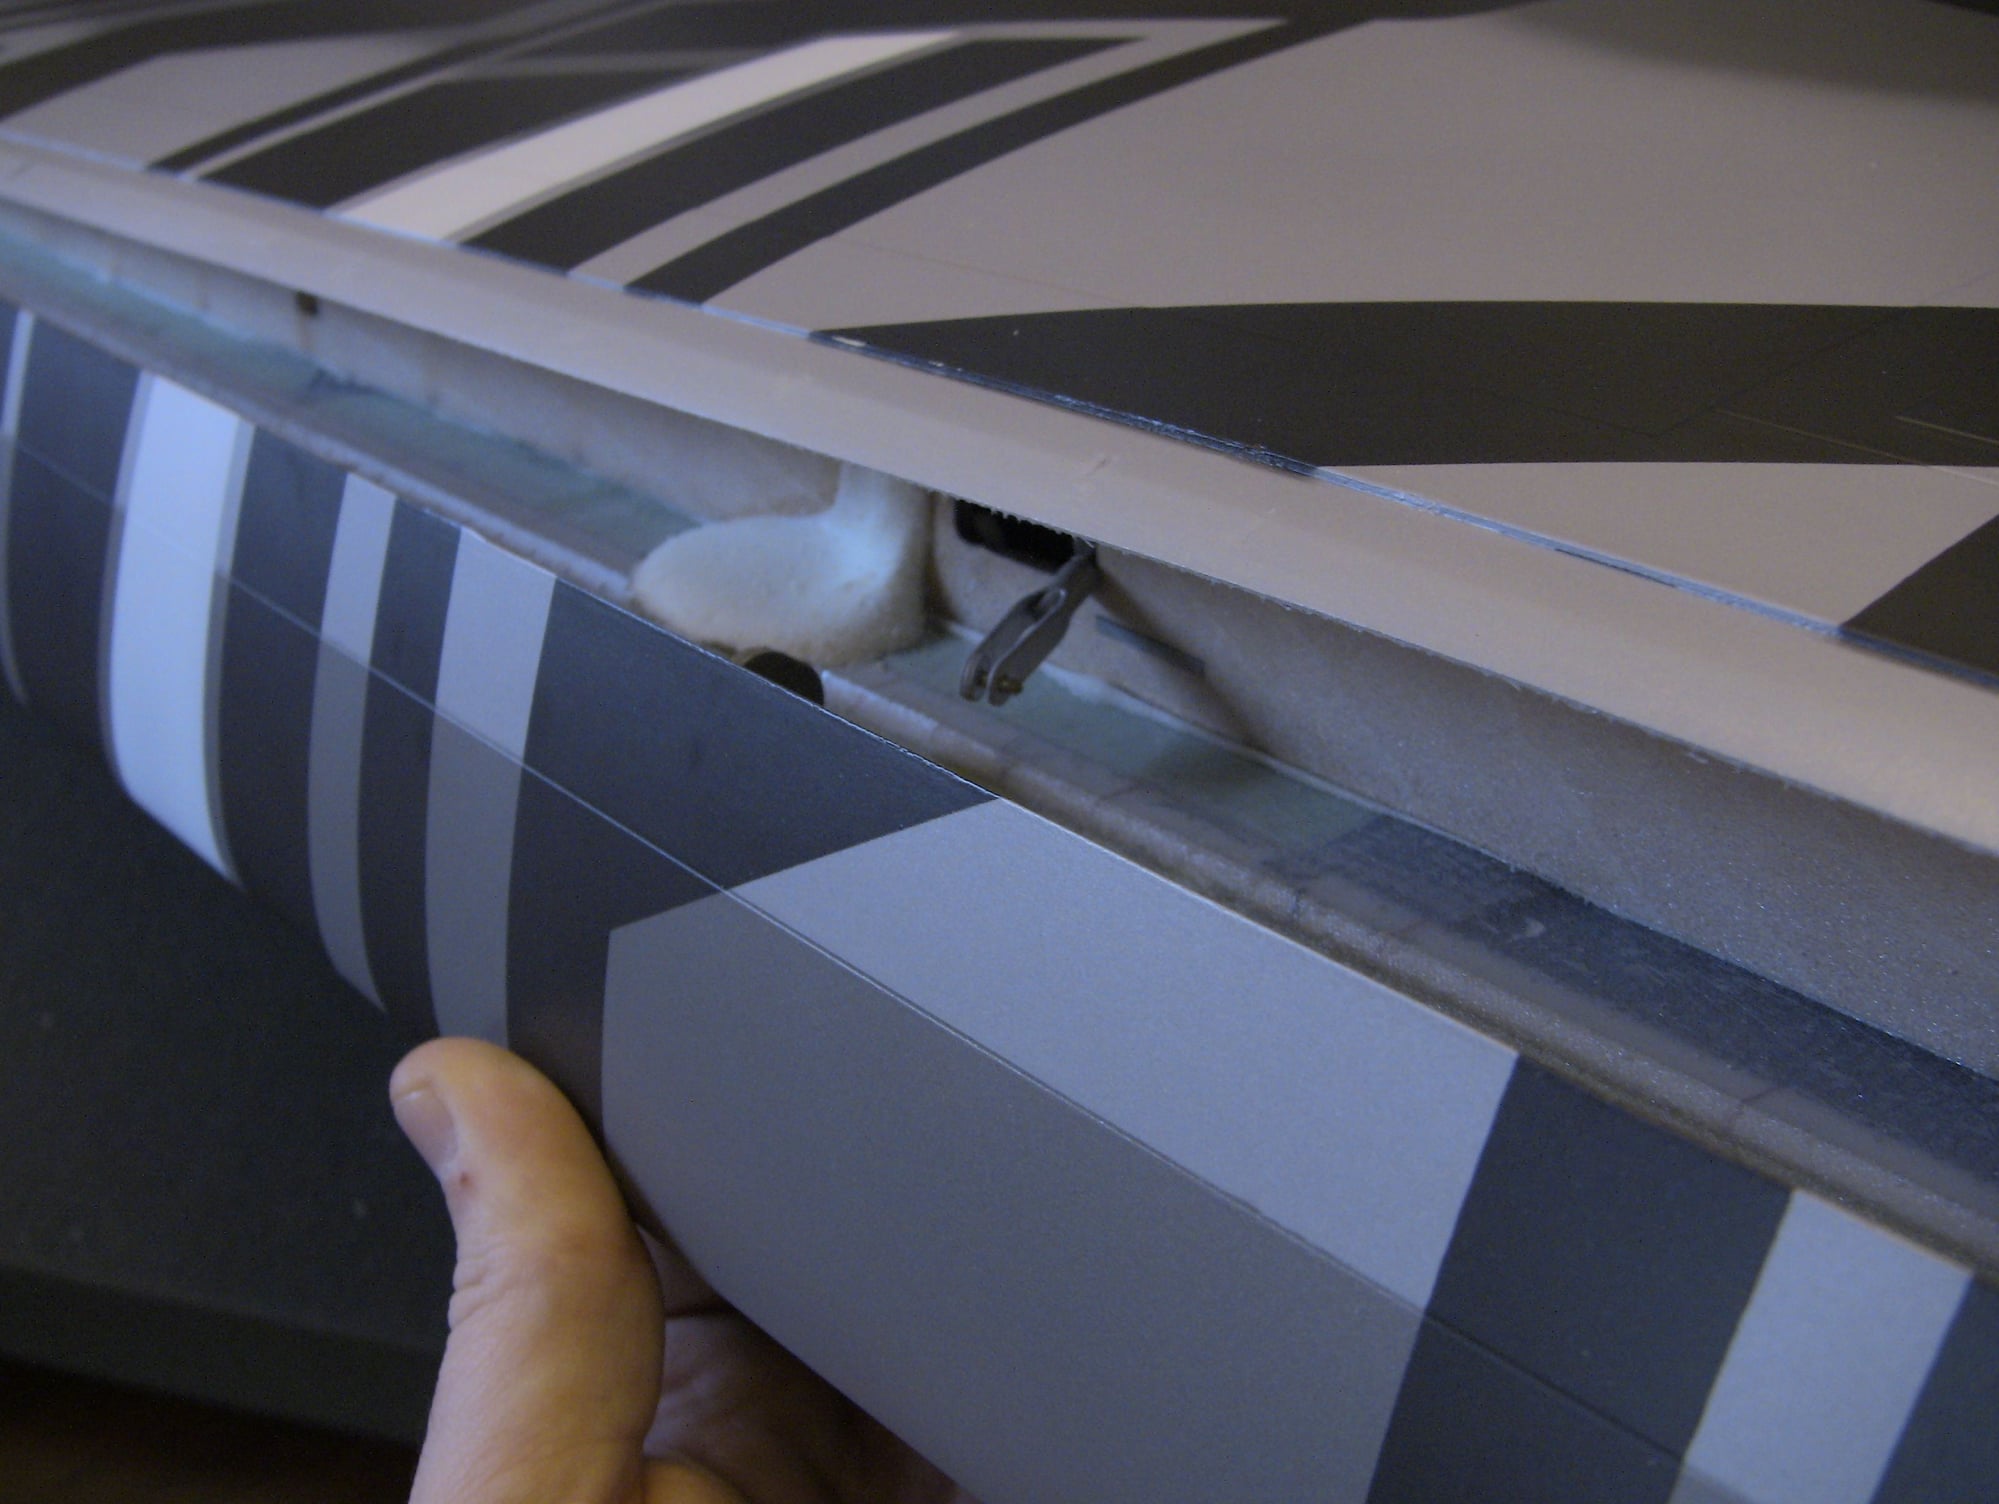
You will notice the rudder attachment is just glued to the wood bulkhead, I added a screw just in case. The brackets have two holes drilled for what Im assuming is this very thing.
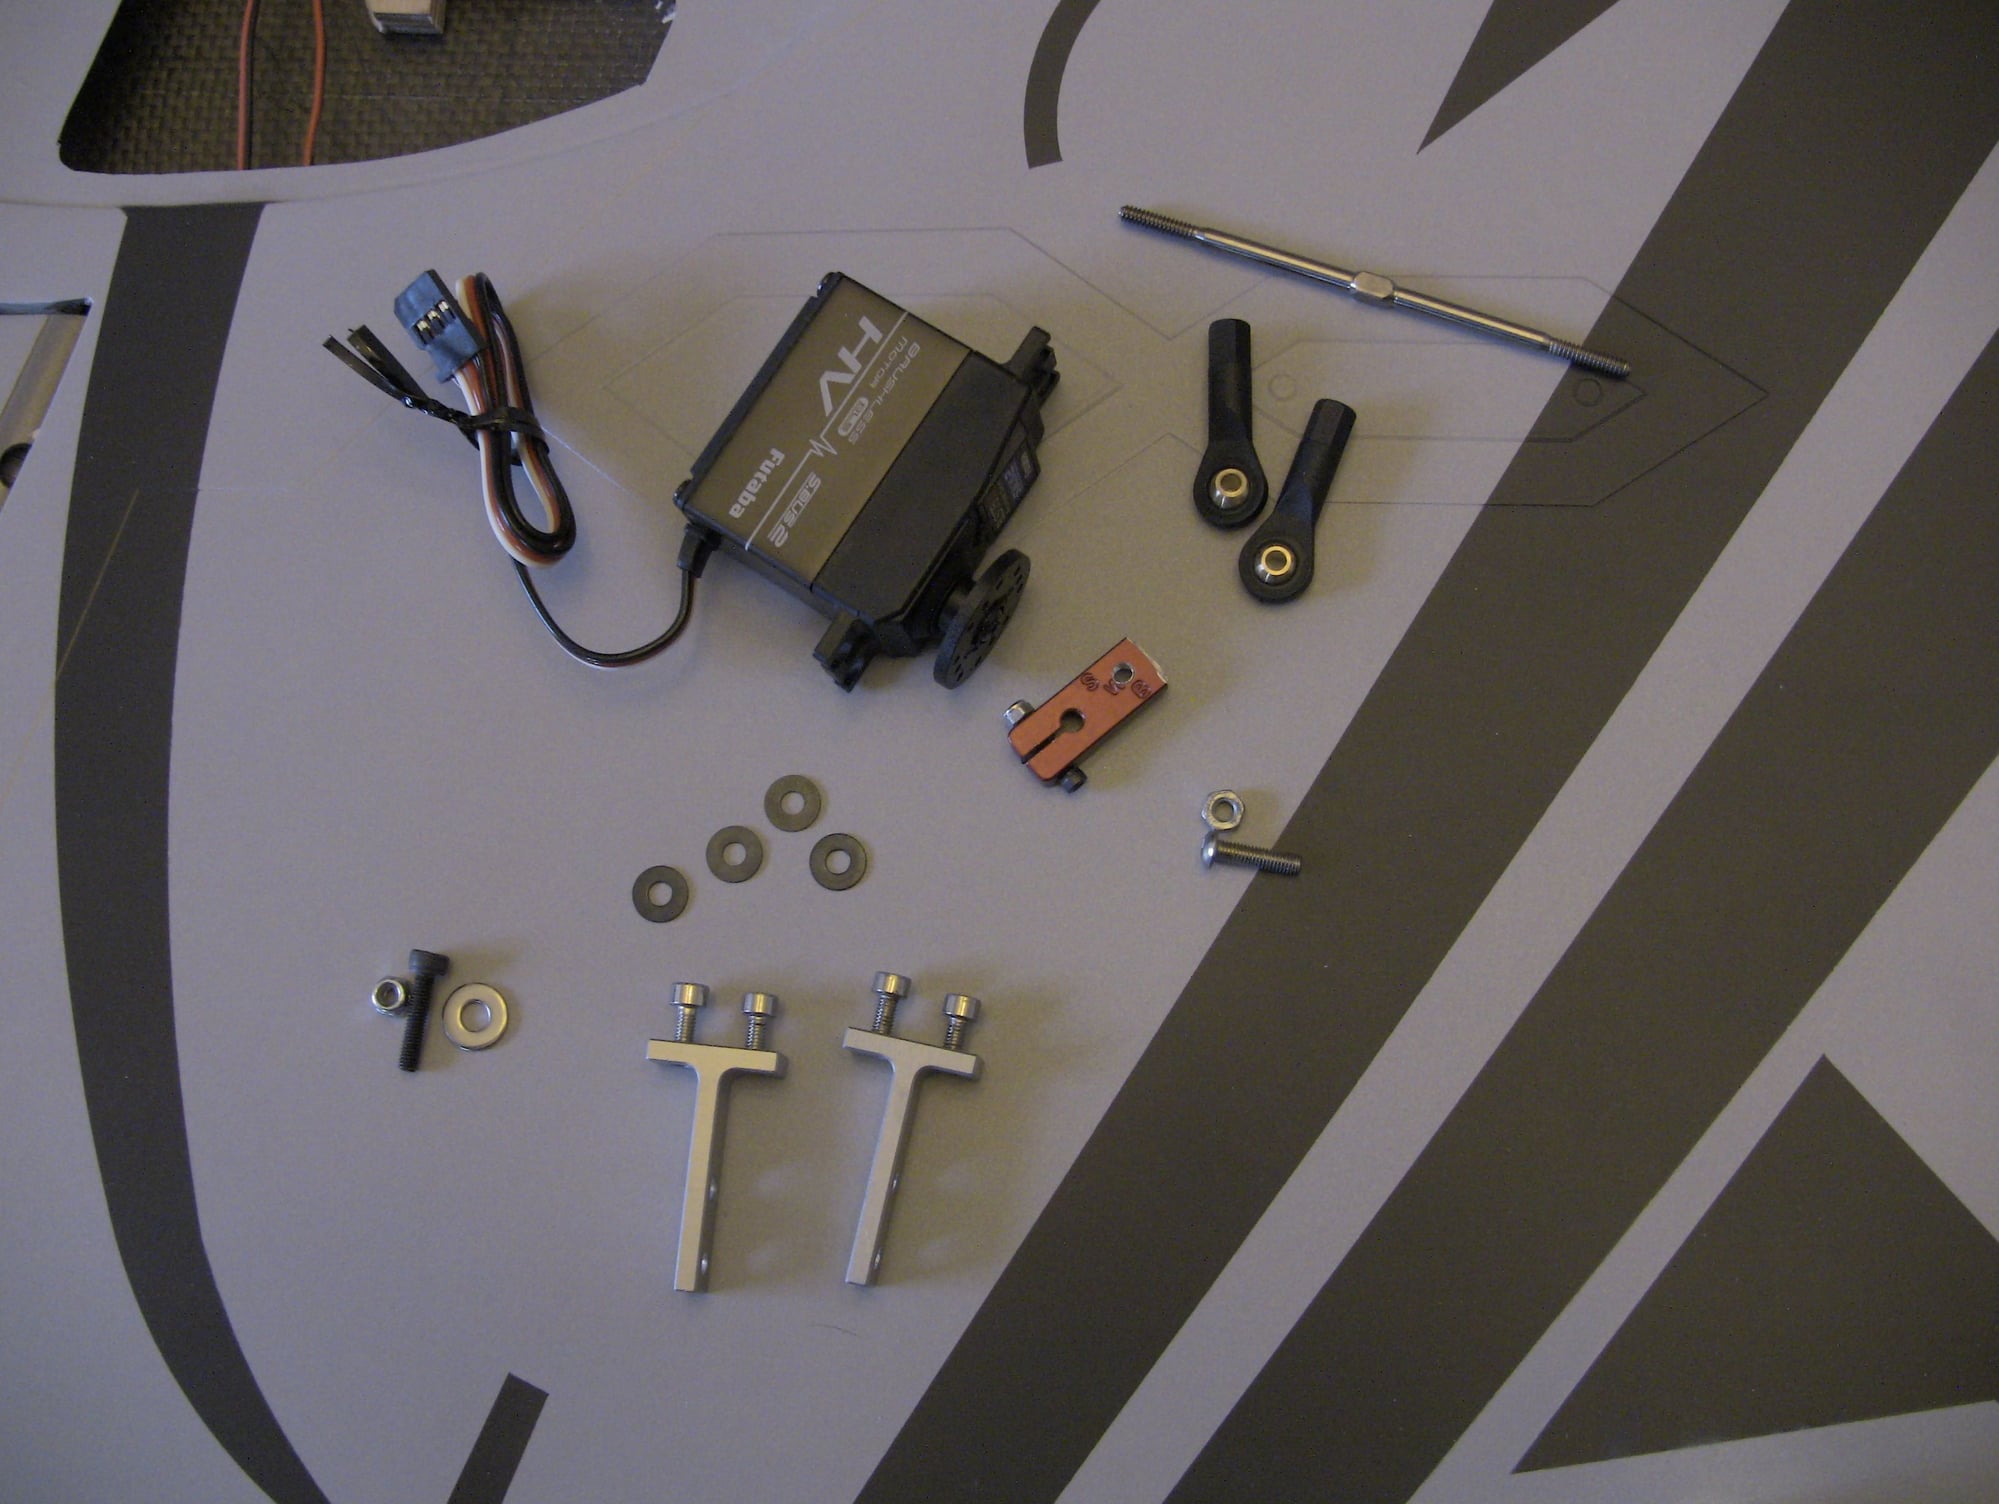
Rudder Servos are big problem on my kit, it appear the blocks were an after thought and I need to raise the servo almost half an inch before the drive system engages and then add a about a 3 -5 degree lift on the outboard side to make the shafts align properly. I stopped at that point today since I need to brain storm a bit. I took two quick videos showing stab and thrust vectoring operations, I will do another build video covering the entire tail once its done. Cheers!
Slight trimming for the 3mm screw head
Slight trimming for the back of the servo arm


All the hardware for the thrust vectoring
Rudder attachment bracket has two holes and no screws
I added one for security

You will notice the rudder attachment is just glued to the wood bulkhead, I added a screw just in case. The brackets have two holes drilled for what Im assuming is this very thing.
Rudder Servos are big problem on my kit, it appear the blocks were an after thought and I need to raise the servo almost half an inch before the drive system engages and then add a about a 3 -5 degree lift on the outboard side to make the shafts align properly. I stopped at that point today since I need to brain storm a bit. I took two quick videos showing stab and thrust vectoring operations, I will do another build video covering the entire tail once its done. Cheers!
Slight trimming for the 3mm screw head
Slight trimming for the back of the servo arm
All the hardware for the thrust vectoring
Rudder attachment bracket has two holes and no screws
I added one for security